GT550 Cafe project

General discussion about Street two-stroke Suzuki motorcycles.

Moderators: oldjapanesebikes, H2RICK, diamondj, Suzsmokeyallan

Post Reply
imquattro
To the on ramp
Posts: 239
Joined: Tue Jul 19, 2011 9:26 pm
Country: USA
Suzuki 2-Strokes: 72/74 GT550
Location: Muncy PA

Carb work....

Post by imquattro »

Since I last posted I've been working with a student on refurbishing the carbs.
I ordered the Keyster kit off ebay. Like this set: Click for ebay link from seller: Rusty Riders LCC
This was for a kit to do three carburetors.
It's just as pictured, but the jets that are included in the kit don't match factory jetting of the carbs. SO,after earlier discussion on the forum regarding Keyster carb jets, I resolved to clean, inspect, and reuse the OE jets & needle.
Here's a before shot of the '74 carbs:
Image
You can see they're a bit cRusty and sporting the wrong fuel supply hose and some ho-made (PO) "dust flaps" above the slides. Not sure if they did anything but ride up & down w/ the slides. They looked to be circles cut out of an inner tube. :wth:
Image
Image
So, with my oversight, my student disassembled the carbs from the upper framework and set about dissecting one at a time.
We removed every little bit and all the metal bits went into the carb cleaner bucket overnight. The rubber bits were kept out for later comparison.
The next day we pulled them out, rinsed them off, washed them down with carb cleaner and then brakekleen.
We then reused the OE jets as there was a visual difference in size and opening of the jets.
We pulled the new o-ring off the new pilot air screw and put it on the old pilot air screw. We used the new washers from the new jets, but only the washers. The OE needle jets were in fine shape. We did use the new valve seat and new needle valve.
After all were cleaned and installed, the float height was adjusted to 1.010" (or 25.75mm), and they did need adjustment, they were nearly 1.080".
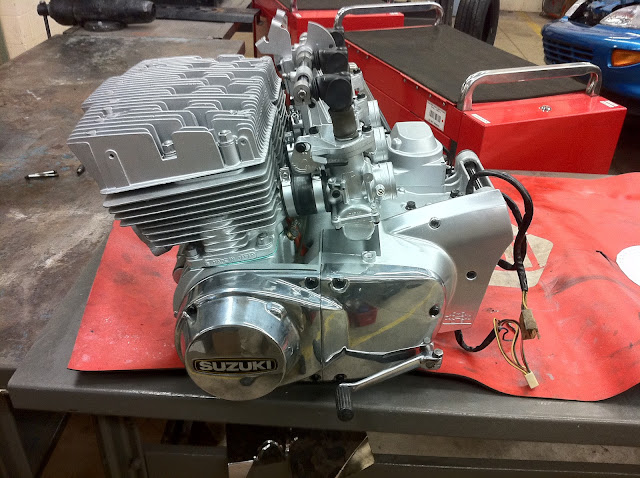
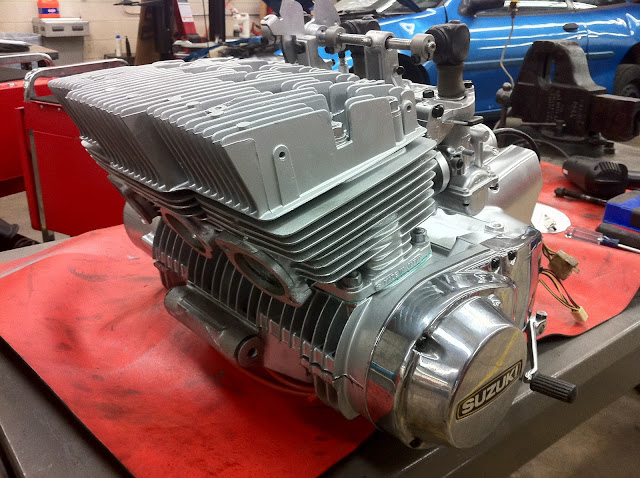
Then the ports were plugged and the carb sprayed with the same high temp, solvent/fuel resistant aluminium paint the case was.
All the fasteners were blasted and sealed with gloss black engine enamel.
You may be able to see the assembled carb in the upper right of his "workstation."
Image
We then disassembled the upper frame, the pivot rod was quite rusted and was difficult to remove. One of the throttle valve arms cracked as it was "massaged" through :(, but it cracked right at the notch for the key, so when assembled it still functions perfectly. :up:
I blasted the assembly, and it received paint as well.
Here it is on the right:
Image
The pivot rod dust boots were in nice shape, just dirty. So after a gentle cleaning:
Left is after; Right is before:
Image
Image

So during reassembly, I was going to replace the rubber dust boots the factory calls for on each throttle valve rod, but at $20 each :shock: um...nope. What to do.....?

Lets see, I need a flexible and solvent resistant boot that allows the rod to move through it, but not allow dust underneath....
like the factory boot.


Well, I have an old set of glass bead cabinet gloves that were only being used for stripping paint...


Image

...and the fingers look about the right size and when turned inside out...
Image


....and when installed and stainless safety wired in place....
Image
They work PERFECT! :P
click for short video
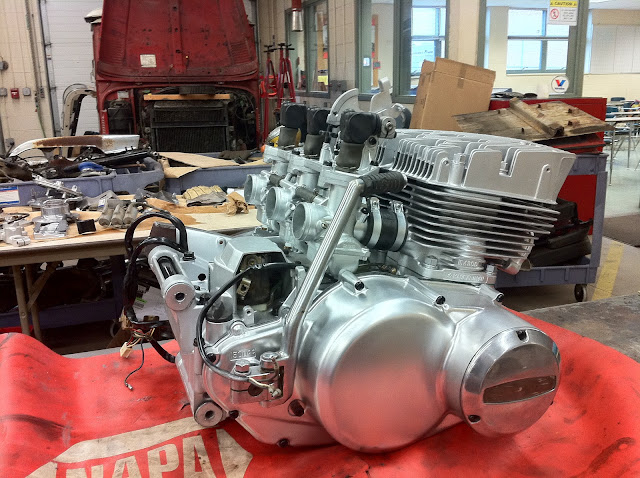
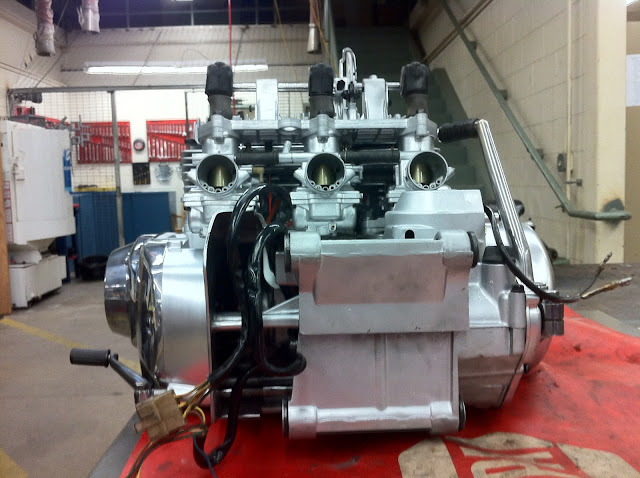
The throttle valve arm's boots are not down yet because the slides need their resting height set after all the carbs are rebuilt and bolted back onto the upper frame, but you get the idea....

So, one down, two to go...
Image
User avatar
Coyote
Moto GP
Posts: 3404
Joined: Tue Oct 21, 2008 2:41 pm
Country: USA
Suzuki 2-Strokes: GT550x2, GT750, GS1000
Location: Tulsa, Oklahoma

Re: GT550 Cafe project

Post by Coyote »

Absolutely ingenious idea on those econo dust boots. We have all wondered what we could use 'instead' of those insanely priced oem boots. Brilliant!
I was born with nothing and still have most of it left.

.
1978 GS1000C
1976 GT550 ongoing money pit.
User avatar
Allan k
On the main road
Posts: 191
Joined: Tue Dec 20, 2011 7:12 am
Country: Denmark
Suzuki 2-Strokes: GT125 SV650 GT550
Location: Denmark
Contact:

Re: GT550 Cafe project

Post by Allan k »

I Really like this project and every detail in it! I am hoping to find a gt 550 myself soon and make it a classic racer like this one,

Did you cut the extenden tank to make those "knee holes" and did you use a soft hammer to shape the tank?

I really look forward to see more of this project!
2-strokes are full of speed,
4-strokes are full of parts!
imquattro
To the on ramp
Posts: 239
Joined: Tue Jul 19, 2011 9:26 pm
Country: USA
Suzuki 2-Strokes: 72/74 GT550
Location: Muncy PA

Re: GT550 Cafe project

Post by imquattro »

Thanks, as you could see earlier in the post, I used a spare tank to extend "visually, not functionally" the tank, then used a soft hammer to form the knee dents.
The tank's with a friend who's a body guy as smoothing the tank isn't my specialty (I'm not a body guy).
The project is moving along, albeit slowly...
Carbs are done. Still need synchronized, but that requires a working engine (not ready yet)
Image


Remember what they looked like before?:
Image
Case covers should be on the engine soon & I have a set of rearsets from an R6 that I'll be using to make the ride more comfortable.
lasse
On the main road
Posts: 116
Joined: Sun Sep 25, 2011 7:53 am

Re: GT550 Cafe project

Post by lasse »

Don't they need to be 100% airtight?
imquattro
To the on ramp
Posts: 239
Joined: Tue Jul 19, 2011 9:26 pm
Country: USA
Suzuki 2-Strokes: 72/74 GT550
Location: Muncy PA

It been a while... and things HAVE slowed down but...

Post by imquattro »

I was able to get the motor assembled.
Image

Image

Image

Image

Image

Image

After working a bit at truing the wheels I re-laced, I found a local guy who could do them both for $40. :shock: $40?! Um, let me think about that..... DONE!

Just picked them up tonight. Look nice.
Picts tomorrow.
:up:
User avatar
Suzukidave
Moto GP
Posts: 3980
Joined: Fri Oct 24, 2008 5:55 pm
Country: US
Suzuki 2-Strokes: GT750 x2 97 -1200 Bandit 86 GSXR1100
Location: Lancaster Pa.

Re: GT550 Cafe project

Post by Suzukidave »

Well isnt that a great looking assembled engine :up:
the older i get the faster i was
CJF
To the on ramp
Posts: 306
Joined: Mon Dec 15, 2008 8:57 pm

Re: GT550 Cafe project

Post by CJF »

Engine looks awesome. Where did you get the wheels done?
Chris

'76 TR500 Style Cafe
'75 T500 - Cafe Build Underway
'78 Honda CB 750 Super Sport
imquattro
To the on ramp
Posts: 239
Joined: Tue Jul 19, 2011 9:26 pm
Country: USA
Suzuki 2-Strokes: 72/74 GT550
Location: Muncy PA

Re: GT550 Cafe project

Post by imquattro »

CJF wrote: Where did you get the wheels done?
"Dave's Bicycle Shop" in McEwensville Pa. $8 a wheel for bicycles, $20 a wheel for motorcycles. (laced and trued).
cyclebuster
On the main road
Posts: 199
Joined: Tue Oct 14, 2008 9:03 pm
Location: Central Michigan
Contact:

Re: GT550 Cafe project

Post by cyclebuster »

your telling me he is lacing and truing bicycle wheels for $8
Vintage High Performance Motorcycles of all types
User avatar
Coyote
Moto GP
Posts: 3404
Joined: Tue Oct 21, 2008 2:41 pm
Country: USA
Suzuki 2-Strokes: GT550x2, GT750, GS1000
Location: Tulsa, Oklahoma

Re: GT550 Cafe project

Post by Coyote »

I'm really surprised you didn't do the truing work yourself. It's just not that hard to do and I know you have the indicator, although I always use two when available. It's a little late for this, but think about it. A wheel can run true and round, but can be up to 1/4" off center line. To prevent this, I always checked the distance from the hub to the rim using a long straight edge and noted it. So when re-lacing, there were 3 dimensions to hold. Hub to rim edge, side run out and radial run out. The Clymer manual allows .080 side run out and about the same for radial run out. I always got my wheels within .010 side run out and .005 radial run out. Of the 4 wheels I have done, none took more than an hour or so.
I was born with nothing and still have most of it left.

.
1978 GS1000C
1976 GT550 ongoing money pit.
cyclebuster
On the main road
Posts: 199
Joined: Tue Oct 14, 2008 9:03 pm
Location: Central Michigan
Contact:

Re: GT550 Cafe project

Post by cyclebuster »

yeah well thats my point, from hub to useable wheel takes about an hour, unless its a plain 26 inch bicycle wheel with standard spokes, you can do it in maybe 35-40 minutes. and your fingers are sore for 2 hours. So this guys is working in a bike shop for $8 an hour. You cannot pay the light bill at that rate, I know i run a bicycle shop. I charge $50 to build and true a cycle wheel with customer supplied parts. $20 for a bicycle wheel.
Vintage High Performance Motorcycles of all types
imquattro
To the on ramp
Posts: 239
Joined: Tue Jul 19, 2011 9:26 pm
Country: USA
Suzuki 2-Strokes: 72/74 GT550
Location: Muncy PA

Re: GT550 Cafe project

Post by imquattro »

cyclebuster wrote:your telling me he is lacing and truing bicycle wheels for $8
yup.
Old timer, one man shop. 'Sbeen doing it for years.
imquattro
To the on ramp
Posts: 239
Joined: Tue Jul 19, 2011 9:26 pm
Country: USA
Suzuki 2-Strokes: 72/74 GT550
Location: Muncy PA

Re: GT550 Cafe project

Post by imquattro »

Coyote wrote:I'm really surprised you didn't do the truing work yourself.
I did, and worked with a student who wanted to try too.
We built a trueing stand and everything. Dial indicators etc...
Just took too long (first time ever lacing/truing). My time is semi-limited here at the school and working after hours (for more than an hr) is frowned upon as is working during instructional time (whoda thunk?).
So, if I can pay $42.40 for a set of wheels to be done... I'm doing it w/o thinking.
cyclebuster
On the main road
Posts: 199
Joined: Tue Oct 14, 2008 9:03 pm
Location: Central Michigan
Contact:

Re: GT550 Cafe project

Post by cyclebuster »

yeah the poor old dude is getting raped. sad to hear that. working for the pharoahs leavings.
For one thing tin wheels are seldom within .010 new. the best you can do is get the inner well straight inside the rim. the chrome outside of that rolled tubing will hardly ever equal the inside, the inner well is where your tire sets, and its the only measured thing.
easiest method i know of is to lace it up, oil the rim contact area, and then turn all the nipples until the thread ends are flush with the nipple end and dissapear. then start at the valve stem and go around it turning every single spoke 1/4 turn . If you get halfway and they seem tight keep going. you will shortly get it quite straight with no up and down, and then go round again 1/4 turn.

If you insist on using a dial indicator on those rough inner surfaces your gonna be a long time, as the needle will bounce on the surface irrregularities. just stick a steel pointer in there and do your best. the inner side wall, and the first flat of the bead ring is what matters.
Vintage High Performance Motorcycles of all types
Post Reply