Sounds great.
Just like my 550 as mine too is missing the baffles.
GT550 budget build
Moderators: oldjapanesebikes, H2RICK, diamondj, Suzsmokeyallan
-
SW550
- On the street
- Posts: 48
- Joined: Wed Oct 16, 2013 11:01 pm
- Country: USA
- Suzuki 2-Strokes: Past-72/75GT550,73GT750,77,78GS750/79 GS850.
- Location: Rio Rancho, NM
Re: GT550 budget build
1974 GT550
-
Cragdog
- To the on ramp
- Posts: 267
- Joined: Mon Oct 14, 2013 2:25 pm
- Country: USA
- Suzuki 2-Strokes: GT550L, PE250B, RM250N
- Location: Southern California
Re: GT550 budget build
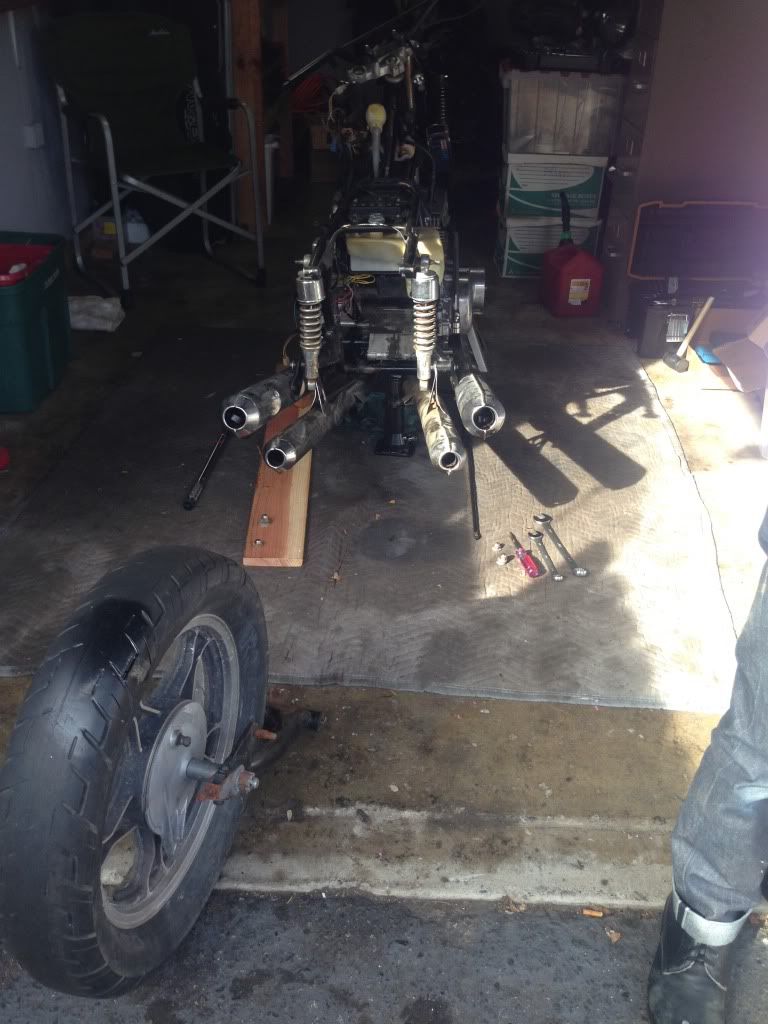
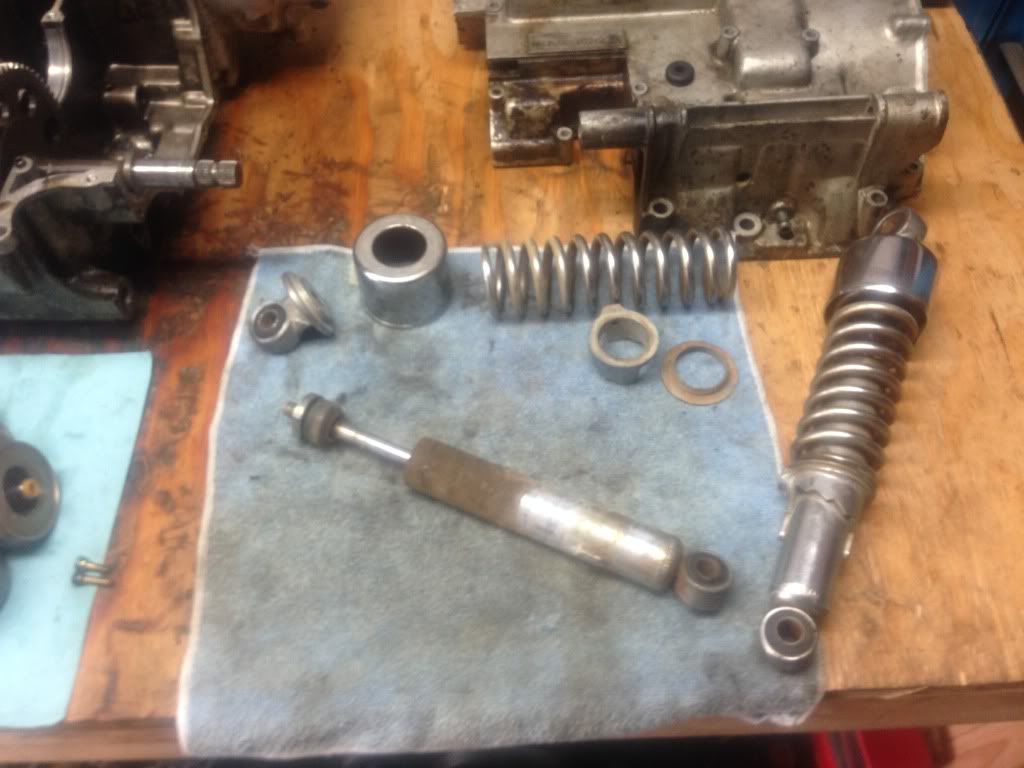
Not too much to report from this weekend, just took the rear shocks off to clean them up a bit, going to work on the swing arm next, then forks, then wheels..
-
Suzukidave

- Moto GP
- Posts: 3980
- Joined: Fri Oct 24, 2008 5:55 pm
- Country: US
- Suzuki 2-Strokes: GT750 x2 97 -1200 Bandit 86 GSXR1100
- Location: Lancaster Pa.
Re: GT550 budget build
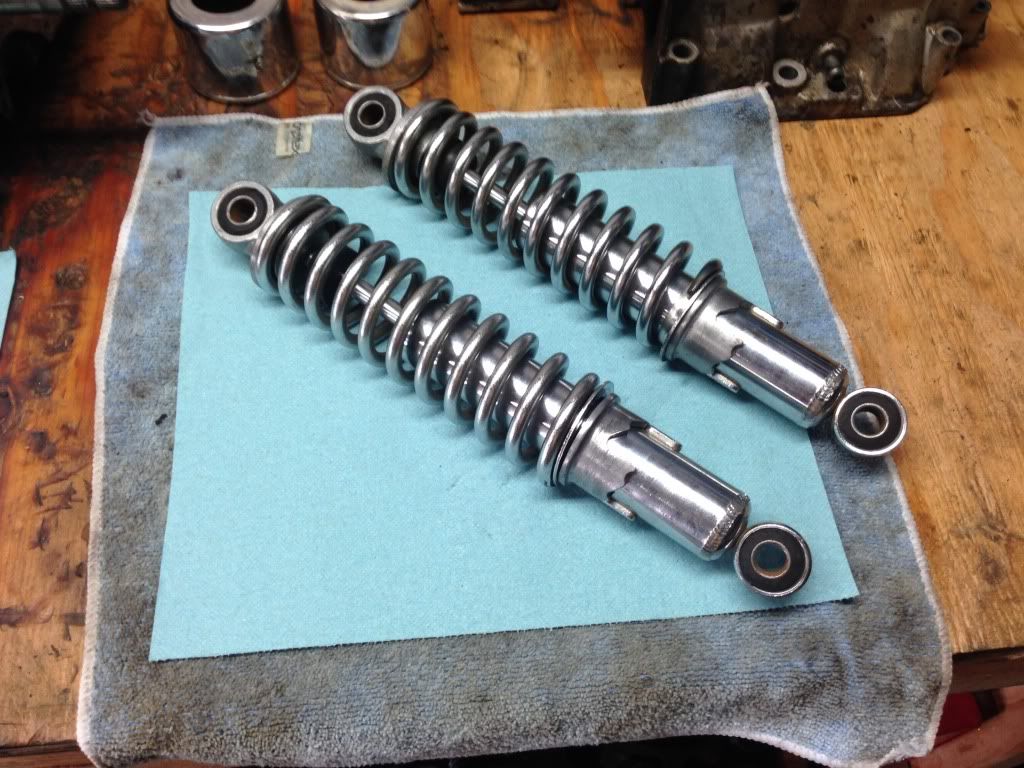
Wow !!! great job cleaning up the shocks  unless you are one sturdy guy you must live somewhere its a lot warmer than us in the north to be working on your bike outside
the older i get the faster i was
-
pearljam724
- AMA Superbike
- Posts: 1681
- Joined: Tue Jul 24, 2012 11:45 pm
- Country: U.S.
- Suzuki 2-Strokes: 75- GT 550 / 76- GT 750
- Location: SW PA
Re: GT550 budget build
Buy yourself a polish kit. You're gonna need it, lol ! This one is a great deal. I bought it and couldn't manage to restore or keep these bikes looking good without it. These bikes are extremely difficult to keep clean if you ride them time to time. Not to mention all of the oxidation of chrome and aluminum even if sits. Buy a lot of lighter sand paper grits too. Takes a lot of time and dedication. But, definitely worth it in the end. http://www.harborfreight.com/14-piece-a ... 98707.html" onclick="window.open(this.href);return false;


-
Cragdog
- To the on ramp
- Posts: 267
- Joined: Mon Oct 14, 2013 2:25 pm
- Country: USA
- Suzuki 2-Strokes: GT550L, PE250B, RM250N
- Location: Southern California
Re: GT550 budget build
Gotta love my Southern California weather that's for sure! Sure would be a welcomed change if at least Christmas was a cold day though...Suzukidave wrote:Wow !!! great job cleaning up the shocks
Wow! That's a great value and sure would've made my 2-hour hand polish much less physically involved and time consuming! Eh, it's okay though, I need to bulk up anyhow. Couple hours a day polishing aluminum might do the trick lol. But seriously, I will most likely invest in one of those, good call.pearljam724 wrote:Buy yourself a polish kit. You're gonna need it, lol ! This one is a great deal. I bought it and couldn't manage to restore or keep these bikes looking good without it. These bikes are extremely difficult to keep clean if you ride them time to time. Not to mention all of the oxidation of chrome and aluminum even if sits. Buy a lot of lighter sand paper grits too. Takes a lot of time and dedication. But, definitely worth it in the end. http://www.harborfreight.com/14-piece-a ... 98707.html" onclick="window.open(this.href);return false;" onclick="window.open(this.href);return false;
-
Cragdog
- To the on ramp
- Posts: 267
- Joined: Mon Oct 14, 2013 2:25 pm
- Country: USA
- Suzuki 2-Strokes: GT550L, PE250B, RM250N
- Location: Southern California
Re: GT550 budget build
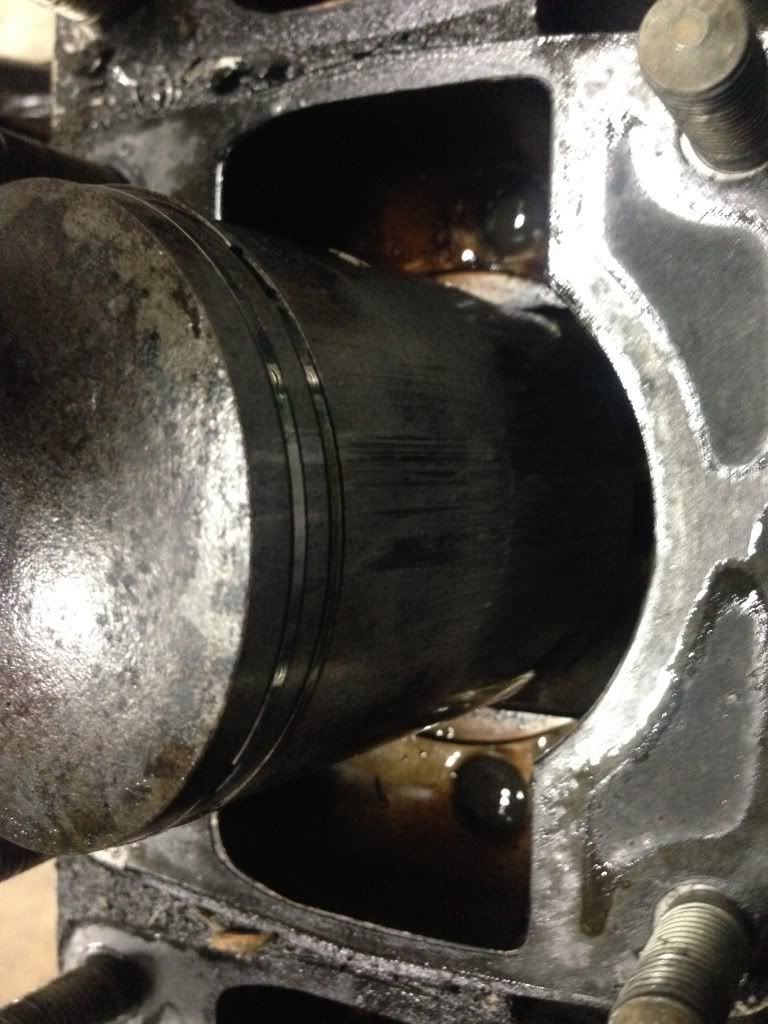
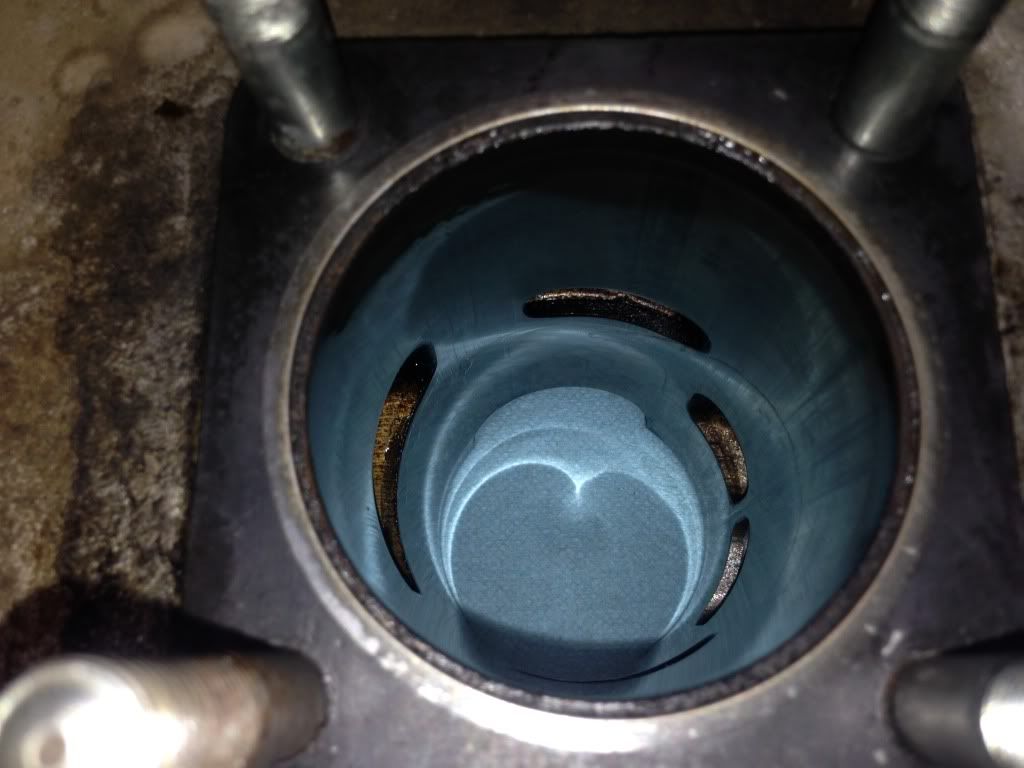
I noticed I was getting some really dark junk coming from the exhaust manifolds, I checked my plugs and they were dark and slightly fouled, they cleaned up easily, but I decided to take the head off to get a better look.
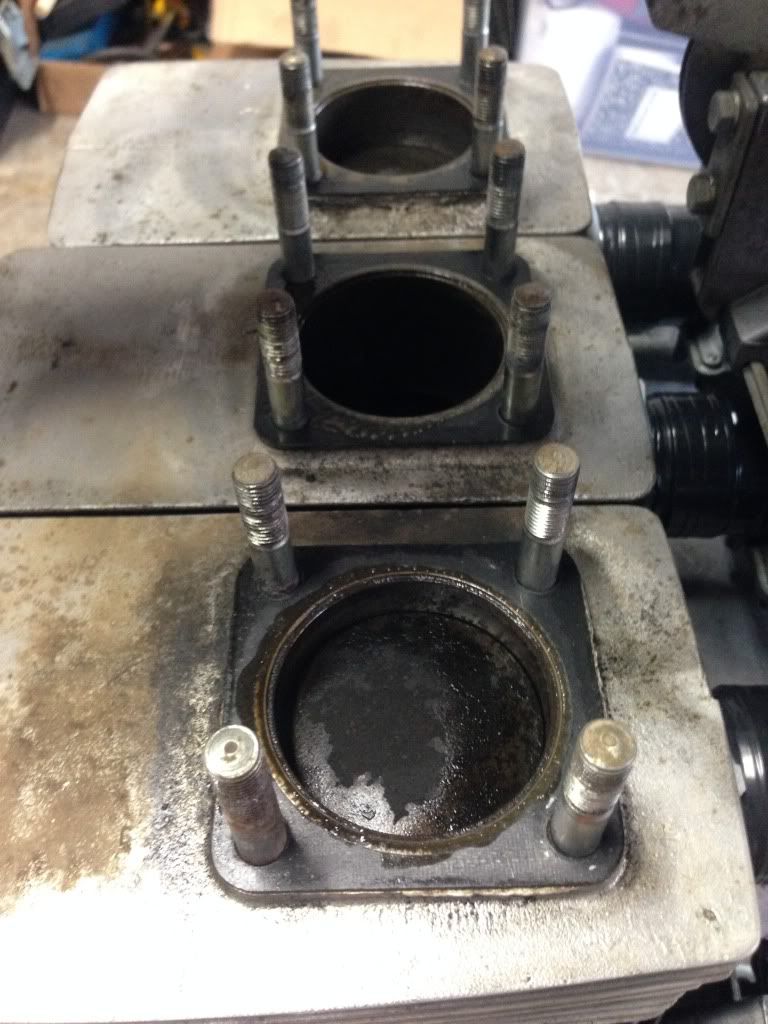
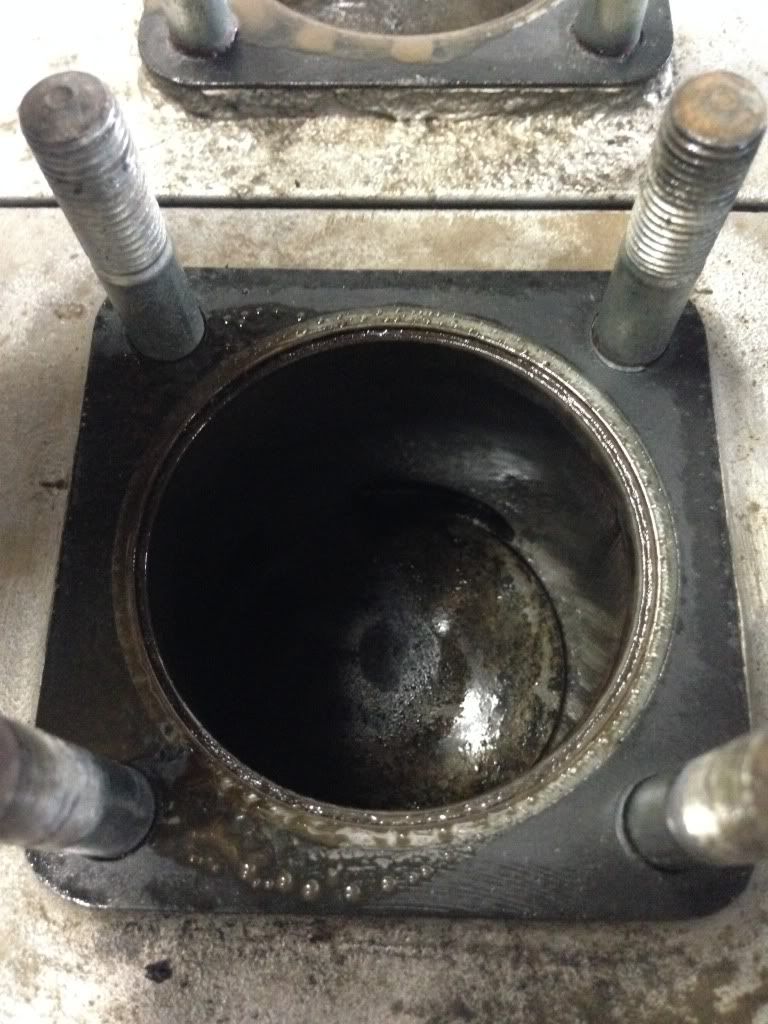

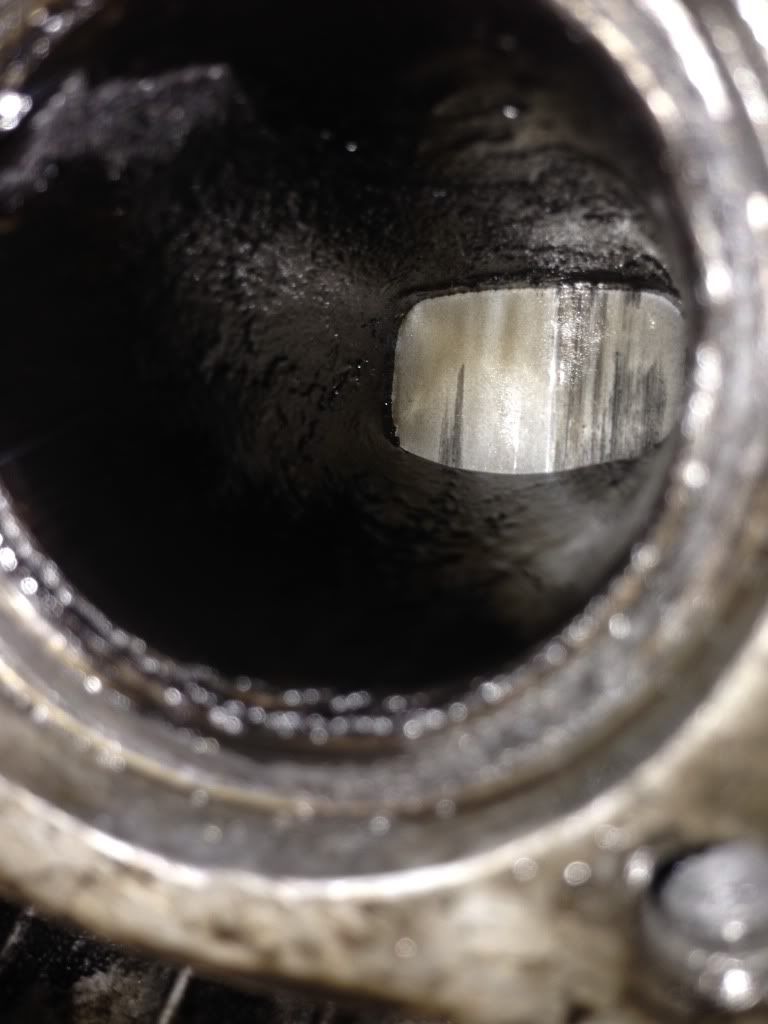

Inside it looked more like a brownish liquid. The ports in the cylinders had a good amount of carbon build-up, but the barrels themselves looked to be in good shape, the piston skirts had some marks on them though. I can't recall if I did a compression test on this motor yet, so I'll do that once I get it back together. I took out my SRIS crankcase plugs and let a bit of the dark stuff drain out, not sure what to make of it really, I'm hoping it's still purging itself of whatever old oil and stuff had been in the crankcase while it sat for years outside. Anybody see anything if concern here? I'm slightly tempted to take the barrels off so I could get a look into the crankshaft area.
Inside it looked more like a brownish liquid. The ports in the cylinders had a good amount of carbon build-up, but the barrels themselves looked to be in good shape, the piston skirts had some marks on them though. I can't recall if I did a compression test on this motor yet, so I'll do that once I get it back together. I took out my SRIS crankcase plugs and let a bit of the dark stuff drain out, not sure what to make of it really, I'm hoping it's still purging itself of whatever old oil and stuff had been in the crankcase while it sat for years outside. Anybody see anything if concern here? I'm slightly tempted to take the barrels off so I could get a look into the crankshaft area.
-
Suzukidave
- Moto GP
- Posts: 3980
- Joined: Fri Oct 24, 2008 5:55 pm
- Country: US
- Suzuki 2-Strokes: GT750 x2 97 -1200 Bandit 86 GSXR1100
- Location: Lancaster Pa.
Re: GT550 budget build
Pulling the cylinders would make it easier to clean up the ports and check the pistons and rings better , you could even remove the SRIS valves and flush out the bottom end with some gas .
the older i get the faster i was
-
Vintageman
- Expert racer
- Posts: 1485
- Joined: Tue May 18, 2010 5:38 pm
- Country: USA
- Suzuki 2-Strokes: Suz, Yam, Honda, Kaw.
- Location: New Hampshire
Re: GT550 budget build
Since you are this far I would remove the jugs. If you don't want to change piston I would smooth out those scuff marks minimum. The engine will be more quiet. Also remove carbon of tops. I think I would pull the engine out of the frame to wash out the crank area of debris. Unless that engine has drain plugs below the crank flywheels.
I would also very lightly ball hone the cylinders for example to smooth and high spots. If the cylinder looks good you call Check ring gap and look at edge of rings for smoothness. May be worth changing to new ones.
Nice job
I would also very lightly ball hone the cylinders for example to smooth and high spots. If the cylinder looks good you call Check ring gap and look at edge of rings for smoothness. May be worth changing to new ones.
Nice job
Current registered, inspected, and running well 2 stroke motorcycles
74 GT250 (T350 upgrade),
76 GT250 (T350 upgrade),
71 T350,
70 T350,
74 GT380,
75 T500,
73 GT550,
75 GT750,
72 Yamaha DS7 (R5 upgrade),
77 Yamaha RD400 (Daytona Cyls),
73 Kawasaki H1 500
74 GT250 (T350 upgrade),
76 GT250 (T350 upgrade),
71 T350,
70 T350,
74 GT380,
75 T500,
73 GT550,
75 GT750,
72 Yamaha DS7 (R5 upgrade),
77 Yamaha RD400 (Daytona Cyls),
73 Kawasaki H1 500
-
pearljam724
- AMA Superbike
- Posts: 1681
- Joined: Tue Jul 24, 2012 11:45 pm
- Country: U.S.
- Suzuki 2-Strokes: 75- GT 550 / 76- GT 750
- Location: SW PA
Re: GT550 budget build
I think the pistons look amazingly well. Sure the ports could use a little cleaning. But, they look good too. Looks like a rebore would do the cylinders some good. Most shops charge about $75 per cylinder. Concerning carbon fouled plugs. I would have looked into the carbs first.
-
Cragdog
- To the on ramp
- Posts: 267
- Joined: Mon Oct 14, 2013 2:25 pm
- Country: USA
- Suzuki 2-Strokes: GT550L, PE250B, RM250N
- Location: Southern California
Re: GT550 budget build
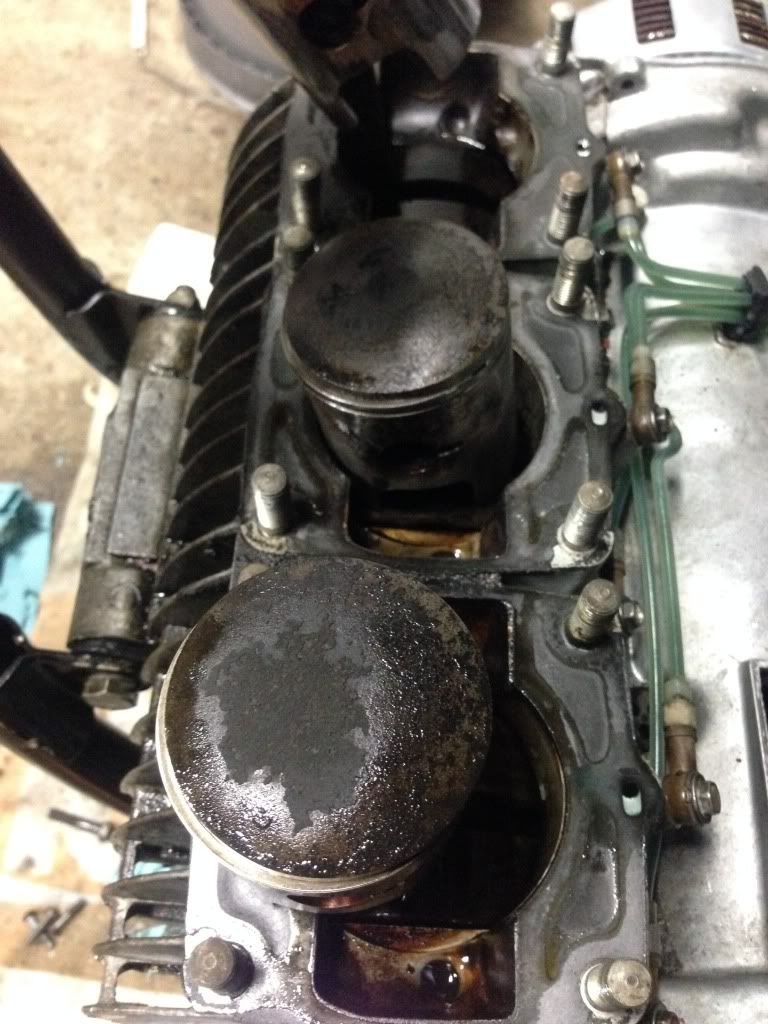
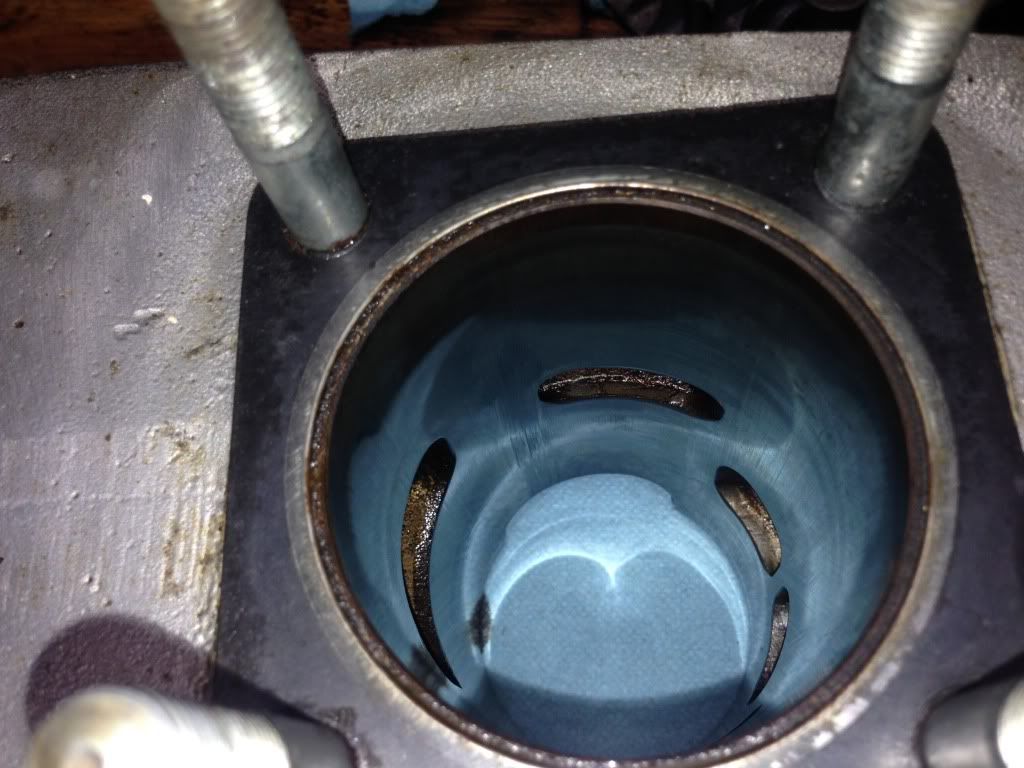
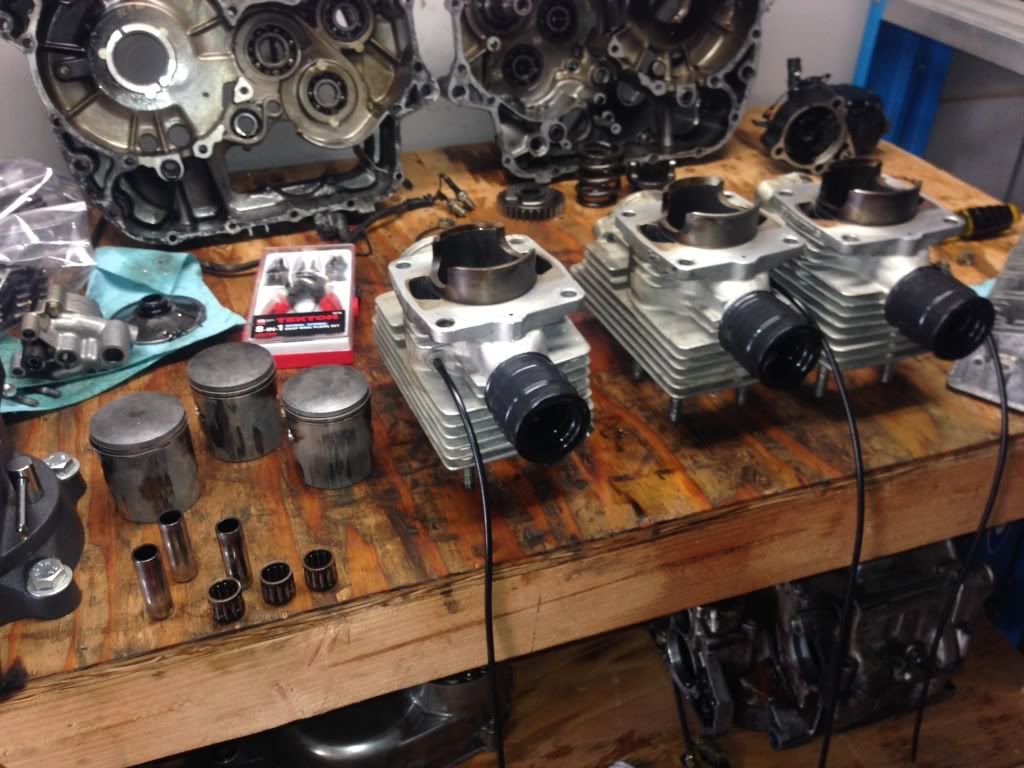
Well I did end up taking the jugs off. It's really nice on these bikes that you can take the whole top end off still in the frame.
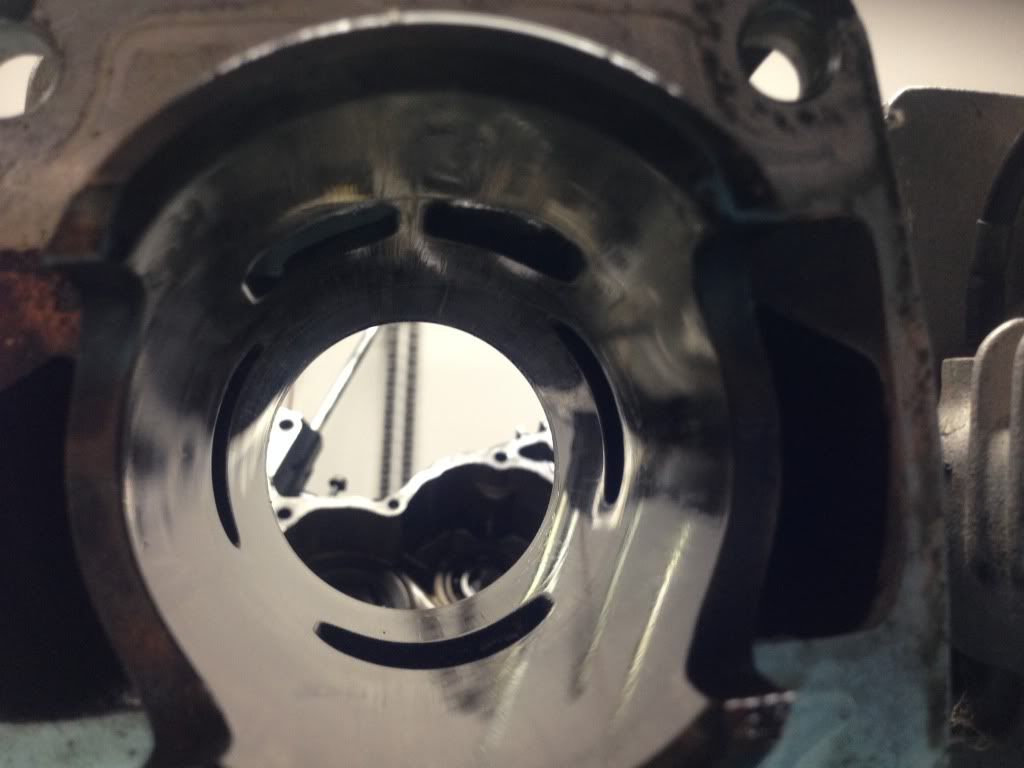
I'm a little concerned about rust, before this I didn't have any evidence of rust in the cases, but when I removed the jugs the crank looked a bit nasty.. Wondering what you guys think, I would hate to do more engine disassembly than this, as you'll see in one of the pictures I already have one of my Hondas split for a new crank.
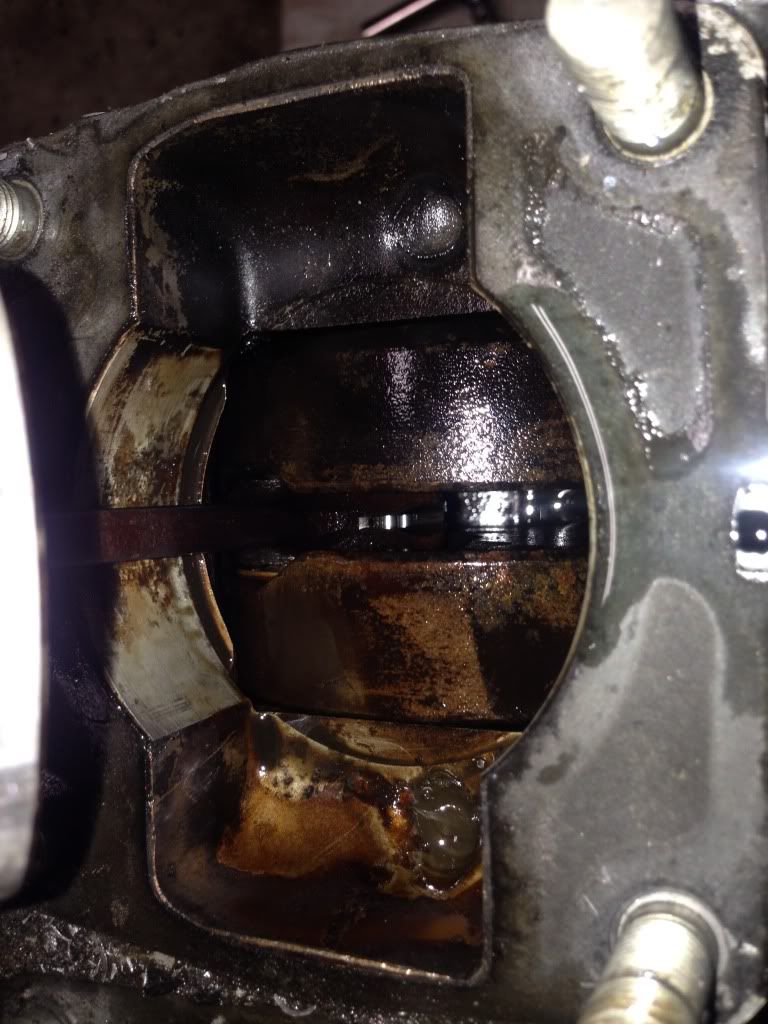


Sorry I thought I got a better picture of the crank, I'll try to get another one tomorrow, I'm done with it for tonight though, I tried for 30 minutes to get the con rod pin out of the piston, but it wouldn't budge, gonna let them soak in some wd40 overnight.
What's your guys take on the condition as you see it? I'm a little torn on how to proceed. On one hand, I'm glad I got in there to see the shape of the crank, but another part of me is thinking that if I clean up what I can, I could put it all back together and it would sort itself out after I get a few good rides on it. However I want to make sure that I will not have any problems with the crank down the road so I will do whatever is necessary, but like I said, another split motor is not what I want right now..
I'm a little concerned about rust, before this I didn't have any evidence of rust in the cases, but when I removed the jugs the crank looked a bit nasty..
Sorry I thought I got a better picture of the crank, I'll try to get another one tomorrow, I'm done with it for tonight though, I tried for 30 minutes to get the con rod pin out of the piston, but it wouldn't budge, gonna let them soak in some wd40 overnight.
What's your guys take on the condition as you see it? I'm a little torn on how to proceed. On one hand, I'm glad I got in there to see the shape of the crank, but another part of me is thinking that if I clean up what I can, I could put it all back together and it would sort itself out after I get a few good rides on it. However I want to make sure that I will not have any problems with the crank down the road so I will do whatever is necessary, but like I said, another split motor is not what I want right now..
-
Suzukidave
- Moto GP
- Posts: 3980
- Joined: Fri Oct 24, 2008 5:55 pm
- Country: US
- Suzuki 2-Strokes: GT750 x2 97 -1200 Bandit 86 GSXR1100
- Location: Lancaster Pa.
Re: GT550 budget build
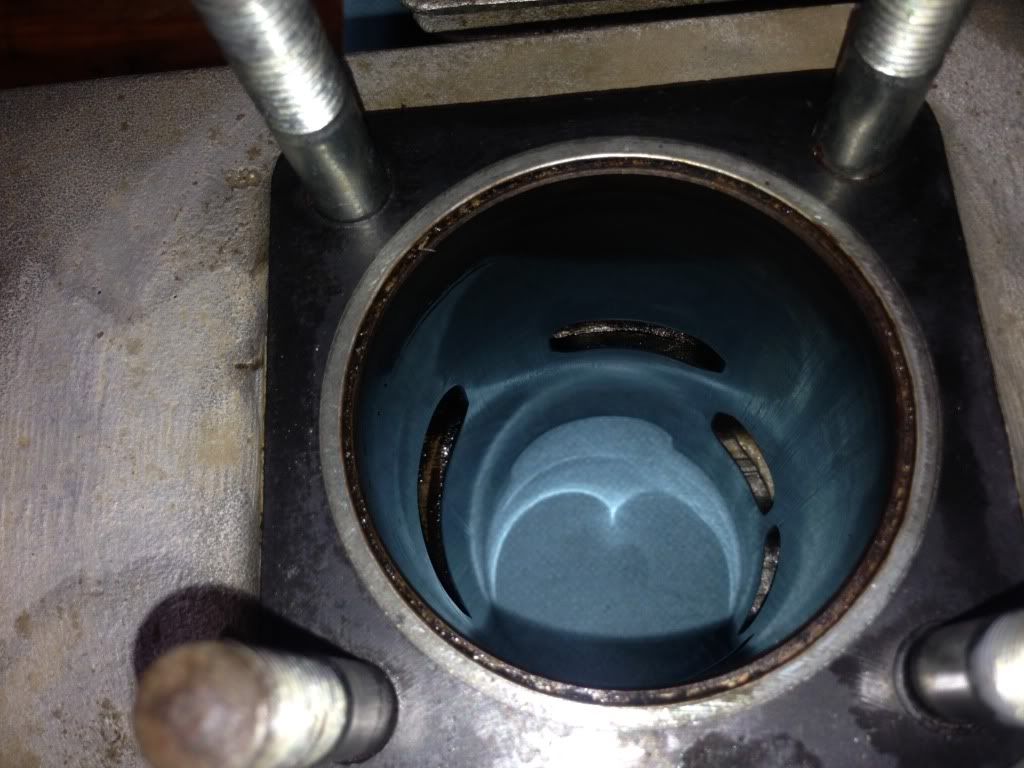
Pretty gummy in there all right  looks like a high mileage engine as from the pictures i dont see any hone marks left in the bore . It would be a good idea to check ring end gap . The crank sure could use a cleaning up and i dont know how much can be done without opening up the cases , but the bigest possible problem besides the seals would be rust on the pins in the bottom end bearings . The wrist pins can get pretty stuck in there piston some times and a good way to get them out without damageing anything is with a DIY pin puller , a length of threaded rod long enough to fit through the piston pin and also a deep well socket , a washer and nut on both ends and then tighten the nut on the socket end and it will pull the wrist pin out into the deep well socket . Instead of a socket a piece of PVC large enough will also work ..
the older i get the faster i was
-
Cragdog
- To the on ramp
- Posts: 267
- Joined: Mon Oct 14, 2013 2:25 pm
- Country: USA
- Suzuki 2-Strokes: GT550L, PE250B, RM250N
- Location: Southern California
Re: GT550 budget build
Hey guys, I decided to do a quick clean up of the pistons, rings, ports, and most importantly the crank case. I soaked the crank in gas and oil mix, scrubbed what I could, spun it around quite a bit to agitate everything and then drained it all out. Piston wrist pins were the most difficult thing to deal with, but thanks to Dave I used the deep socket trick.
I buttoned everything back up last night and it was running really good. Very little to no smoke coming from the pipes unless I revved it up.
Little video for those interested in its current state: http://youtu.be/d-jhtvIz_lQ
Now it's time to get working on the swing arm, wheels, forks, and brakes. More to come.
-
Suzukidave
- Moto GP
- Posts: 3980
- Joined: Fri Oct 24, 2008 5:55 pm
- Country: US
- Suzuki 2-Strokes: GT750 x2 97 -1200 Bandit 86 GSXR1100
- Location: Lancaster Pa.
Re: GT550 budget build
Sounds and looks real good , engine cleaned up real nice
the older i get the faster i was
-
pearljam724
- AMA Superbike
- Posts: 1681
- Joined: Tue Jul 24, 2012 11:45 pm
- Country: U.S.
- Suzuki 2-Strokes: 75- GT 550 / 76- GT 750
- Location: SW PA
Re: GT550 budget build
I would have done the same thing. But, for a hundred bucks you could have replaced all pistons and rings. I would have had the cylinders rebored also. But, hey as long as it runs fine. Why spend that much more money ? Something to think about doing in the future though. Diesel fuel works fantastic as a motor detergent. It's less corrosive than gasoline. My grandfather introduced it to me many years ago concerning flushing any motor. We use it in the natural gas industry to flush very large motorized water pumps too. Since I was very young, I've flushed my personal vehicle motor with it. About every 10k miles. I mix 4 quarts of diesel fuel with a 1 cheap quart of oil. Start it up, let idle up to operating temperature. Then drain. You wouldn't believe the amount of crud that comes out following a good engine flush. What did you use to clean the pistons ? They look nice.
-
Cragdog
- To the on ramp
- Posts: 267
- Joined: Mon Oct 14, 2013 2:25 pm
- Country: USA
- Suzuki 2-Strokes: GT550L, PE250B, RM250N
- Location: Southern California
Re: GT550 budget build
That was my thought as well. I figured also that once I get this bike on the road I will put a little more wear on it, then replace the pistons, rings, and possibly rebore. Why spend that money now when I haven't got it on the road yet? Trying to save every penny I can lately. Definitely will be done in the future though.pearljam724 wrote:I would have done the same thing. But, for a hundred bucks you could have replaced all pistons and rings. I would have had the cylinders rebored also. But, hey as long as it runs fine. Why spend that much more money ? Something to think about doing in the future though. Diesel fuel works fantastic as a motor detergent. It's less corrosive than gasoline. My grandfather introduced it to me many years ago concerning flushing any motor. We use it in the natural gas industry to flush very large motorized water pumps too. Since I was very young, I've flushed my personal vehicle motor with it. About every 10k miles. I mix 4 quarts of diesel fuel with a 1 cheap quart of oil. Start it up, let idle up to operating temperature. Then drain. You wouldn't believe the amount of crud that comes out following a good engine flush. What did you use to clean the pistons ? They look nice.
Good tip with the diesel fuel mix, I will have to try out that method next time.
