I use several software apps and as mentioned by Jeff, some ask for degrees and some in mm, but they are not exactly symmetrical because of piston pin offset. The difference is small but opening time is not exactly the same as closing time. Close but not the same. I can convert degrees to mm or vice versa with either MOTA or a spreadsheet.jeff g wrote:Ports have to be open for an even number of degrees...If the exhaust opens at 97 atdc then it closes at 97 btdc, for a port duration of 166 degrees.imquattro wrote:Prior to calling these 100% accurate, let me toss in this disclaimer:
It may not be: It's a paper wheel, a homemade pointer, but hopefully close to within a degree or two.
IF someone would PLEASE check these out, I'd really like to get these right.
I found NOTHING web in all the searching I've done & while someone here thought they had some somewhere, they have yet to show up.
So here goes:
I then rotated the crankshaft until the exhaust port opened @97°. I then zeroed the wheel and rotated the crankshaft counting the number of degrees the exhaust port was open until it closed (open for 163°)
I then followed this procedure for the intake port, and transfer port, jotting things down:
Didn't have colored pencils, but if you look real close you can see the semi-circular sweeps inside the hash marks indicating the port openings.
Bottom line:
GT550 Port Timings::drum roll::
One crankshaft revolution = 360° (duh)
Exhaust Port Timing: Opens @ 97° ->to-> 260° (open for 163°)
Intake Port Timing: Opens @ 285° ->to-> 72°AfterTDC (open for 147°)
Transfer Port Timing: Opens @ 120° ->to-> 240° (open for 120°)
If there are any corrections needed, please let me know.
I'm hoping the help out the next guy...
I've worked up a set of pipe specs that should make for a streetable pipe, though it might be a bit tough to fit (bellies are BIG)
TZ...depending on the software that you use, depends on how they want the inputs measured. Of the 2 programs that I have, one asks for port opening in degrees and the other asks for port duration in degrees.
Jeff
GT550 Cafe project
Moderators: oldjapanesebikes, H2RICK, diamondj, Suzsmokeyallan
-
tz375

- Moto GP
- Posts: 6212
- Joined: Mon Nov 03, 2008 10:47 am
- Location: Illinois
Re: GT550 Port Timings AT LAST!
-
uzidzit
- On the street
- Posts: 29
- Joined: Fri Jul 30, 2010 2:36 pm
Re: GT550 Cafe project
Is it too late to split the head?
-
imquattro
- To the on ramp
- Posts: 239
- Joined: Tue Jul 19, 2011 9:26 pm
- Country: USA
- Suzuki 2-Strokes: 72/74 GT550
- Location: Muncy PA
Re: GT550 Cafe project
Me? I have the head torqued down already. I suppose I could, but then I'd have to replace the gaskets.
Why?
Why?
-
imquattro
- To the on ramp
- Posts: 239
- Joined: Tue Jul 19, 2011 9:26 pm
- Country: USA
- Suzuki 2-Strokes: 72/74 GT550
- Location: Muncy PA
Re: GT550 Cafe project
'Sbeen a while, and I had typed up w/ pictures a post a while back and must've gotten distracted and closed the tab because it never posted...
So here goes on catching yall up on where the project's at.
I was working on the gauge pods.
I've flip-flopped on which set to use and I think I'll stick with the '74's set w/ a set of '72 face decals on them.
The gear selector is a neat feature I was going to graft into the 72's pod where the "S" logo but I've changed my mind.
So, I taped off the two displays in the middle (after polishing them) and bead blasted the oxidation, dirt, and dust off it.


I then prepped and sprayed it with Satin Black Plastidip
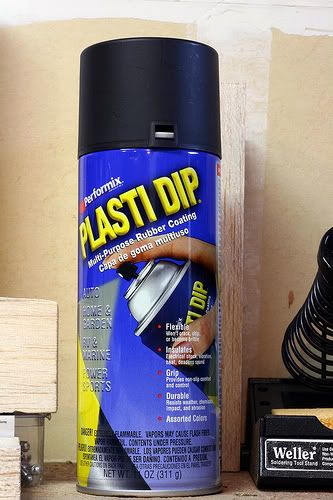
Leaves a rubbery touch weather resistant finish on it.
'72 above -untouched '74 below -refinished


I have yet to finish the reassembly of the gauges, so that's all for them for now.
After test fitting the motor in the frame ('74 motor in '72 frame -didn't think there was a difference, but wanted to test fit to be sure), we started removing the unnecessary bits...
Old foot peg studs: GONE

Students aren't super accurate with the grinder... but 'sok, I welded in the low spot and smoothed it flush.

Anyone else see what's missing?


I borrowed a sand blaster from a student and set up outside to blast.
It was full of "Black Beauty" which turned out to be a bit coarse & consistantly clogged the blaster -so much so that we gave up blasting.
The next day, we tried "play sand" -after filtering it through a screen- and ran out, worked much better, but we were done enough.

We then prepped the frame for paint, wiping it down with a oil/wax remover pre-paint solvent.

I went with paint over powdercoating simply due to the ability to touch up later (chips or added mounts/studs etc...).
I looked into what would offer rust/corrosion protection and be chip resistant + a tad flexable and kept coming to epoxy paint.
Not having the ability/facility/equipment to spray, I went with epoxy spraypaint by VHT. The company that makes some very nice caliper paints. Temperature resistant, solvent resistant, hard as nails, and easy to apply... win win win win.
Heres the frame after two coats.

Here's the paint:

I also blasted & painted the upper and lower triple tree and the headlight bucket. The headlight chrome will stand out nicely against the gloss black (imo).
The swing arm's next, just need more paint (2 cans down already)
All will be clear coated too.
So here goes on catching yall up on where the project's at.
I was working on the gauge pods.
I've flip-flopped on which set to use and I think I'll stick with the '74's set w/ a set of '72 face decals on them.
The gear selector is a neat feature I was going to graft into the 72's pod where the "S" logo but I've changed my mind.
So, I taped off the two displays in the middle (after polishing them) and bead blasted the oxidation, dirt, and dust off it.
I then prepped and sprayed it with Satin Black Plastidip
Leaves a rubbery touch weather resistant finish on it.
'72 above -untouched '74 below -refinished
I have yet to finish the reassembly of the gauges, so that's all for them for now.
After test fitting the motor in the frame ('74 motor in '72 frame -didn't think there was a difference, but wanted to test fit to be sure), we started removing the unnecessary bits...
Old foot peg studs: GONE
Students aren't super accurate with the grinder... but 'sok, I welded in the low spot and smoothed it flush.
Anyone else see what's missing?
I borrowed a sand blaster from a student and set up outside to blast.
It was full of "Black Beauty" which turned out to be a bit coarse & consistantly clogged the blaster -so much so that we gave up blasting.
The next day, we tried "play sand" -after filtering it through a screen- and ran out, worked much better, but we were done enough.
We then prepped the frame for paint, wiping it down with a oil/wax remover pre-paint solvent.
I went with paint over powdercoating simply due to the ability to touch up later (chips or added mounts/studs etc...).
I looked into what would offer rust/corrosion protection and be chip resistant + a tad flexable and kept coming to epoxy paint.
Not having the ability/facility/equipment to spray, I went with epoxy spraypaint by VHT. The company that makes some very nice caliper paints. Temperature resistant, solvent resistant, hard as nails, and easy to apply... win win win win.
Heres the frame after two coats.
Here's the paint:
I also blasted & painted the upper and lower triple tree and the headlight bucket. The headlight chrome will stand out nicely against the gloss black (imo).
The swing arm's next, just need more paint (2 cans down already)
All will be clear coated too.
-
oldjapanesebikes

- Moto GP
- Posts: 3229
- Joined: Sat Feb 07, 2009 12:43 am
- Country: Canada
- Suzuki 2-Strokes: GT750(Jx3,L,M,A,B),T500
- Location: Ontario
- Contact:
Re: GT550 Cafe project
You know - I'm looking at the photo of the student doing the sand blasting and just for info, up here Occupational Health and Safety would be all over you like a wet blanket unless that helmet he's wearing had a separate forced fresh air supply. I can't tell if it has an air supply from the photo, but I'm thinking not. The silica from the sand is the risk and prolonged exposure has been shown to lead to silicosis of the lungs. I think the use of blast media having more than 1% silica has been banned in the UK since the 1950's and in the EU since the mid 1960's. Play sand is mainly silica. Just mentioning it.
Ian
If at first you don't succeed, just get a bigger hammer !
If at first you don't succeed, just get a bigger hammer !
-
imquattro
- To the on ramp
- Posts: 239
- Joined: Tue Jul 19, 2011 9:26 pm
- Country: USA
- Suzuki 2-Strokes: 72/74 GT550
- Location: Muncy PA
Re: GT550 Cafe project
Thanks for the concern.
I read into that prior to using sand (researching sand blasting & sizing mentioned the concerns of silicosis).
We blasted outside (fresh air) and only for 1/2 an hour total, and in 5 minute sessions with 5+ minute breaks to fix the plugging blaster).
Plus it was a breezy day.
I read into that prior to using sand (researching sand blasting & sizing mentioned the concerns of silicosis).
We blasted outside (fresh air) and only for 1/2 an hour total, and in 5 minute sessions with 5+ minute breaks to fix the plugging blaster).
Plus it was a breezy day.
-
r3tro74
- On the main road
- Posts: 131
- Joined: Wed Feb 08, 2012 10:25 am
- Country: USA
- Suzuki 2-Strokes: 74 GT550
- Location: Michigan
Re: GT550 Cafe project
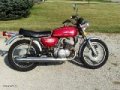
This thread has been an interesting read. Thanks for taking the time to post all the pictures. I am going to start another topic soon when I do my 74 gt550. I noticed on the bike pictured in your "inspiration" photo that the front brake calipers are mounted to the rear of the forks. Do you think these are stock forks swapped left to right and turned backwards? I think it looks better that way instead of the caliper at the 12 O-clock position.
1974 Suzuki GT550
1983 Honda XL250
2002 Yamaha Bear Tracker
1959 Lone Star Malibu
1983 Honda XL250
2002 Yamaha Bear Tracker
1959 Lone Star Malibu
-
imquattro
- To the on ramp
- Posts: 239
- Joined: Tue Jul 19, 2011 9:26 pm
- Country: USA
- Suzuki 2-Strokes: 72/74 GT550
- Location: Muncy PA
Burnt Chocolate!
I'm going with the dual leading shoe (drum) setup for the front. I'm not much of a rider, and I don't put a bike through it's paces so a decent set of working drum brakes will suit me just fine.
Plus all polished up, it'll look sweet.
Recently, I've painted the frame, swing arm, upper/lower head stock, headlight bucket, center stand and some other components.
I initially went with gloss black epoxy paint but after 3 coats, I wasn't happy with the results.
Due to the large grit of the the "black diamond" blast media we used prior to the sand, the surface of the frame was semi-stippled which isn't condusive to a smooth finish w/ standard gloss paint. Also, the rest of the components were small enough to glass bead blast and still had a smooth finish. Only the frame was had the rough finish....
So... instead of sanding the entire frame smooth... I did some research and went with Rustoleum Hammered spray paint.
Black
I did some test pieces and was quite happy with the results. Very hard, glossy, and pocked/stippled.
But it wasn't black....
Has a dark chocolate charcoal color, but not really black.
So I've named the bike "Burnt Chocolate".
2 strokes smoke a tad and it's painted dark brown. I kinda like it.
I did the above listed parts. Took 2 cans for 3 coats each. 2 light coats 12" away w/ 10 mins between coats, then one wet coat
Here's the bucket for reference. It's a tad "browner" in person.

Here's the upper head stock:

Here's the lower head stock:

We then worked on the forks.
The front forks were quite pitted under the boots. The pitting portion never reaches the seals or passes through them. I had a student fine wire wheel the rust off:

Then we polished the shaft (not pictured).
I removed the shaft from the housing, cleaned the old contaminated oil out (was black and stank TERRIBLE!!)
We then stripped the faded/crazed clear coat off the housing and polished the housing.
Here's a side-by-side comparision:

We then inspected the seal (both were in great shape, soft, no cracks, and tight to shaft & housing), added 1 cup of of 10W30 motor oil (approx 235cc, which is midway between the called for 230cc and 240cc's of oil) and reassembled.
So nice.
Getting ready for the wheels to return from getting tires mounted & balanced....
Then some assembly!!
Plus all polished up, it'll look sweet.
Recently, I've painted the frame, swing arm, upper/lower head stock, headlight bucket, center stand and some other components.
I initially went with gloss black epoxy paint but after 3 coats, I wasn't happy with the results.
Due to the large grit of the the "black diamond" blast media we used prior to the sand, the surface of the frame was semi-stippled which isn't condusive to a smooth finish w/ standard gloss paint. Also, the rest of the components were small enough to glass bead blast and still had a smooth finish. Only the frame was had the rough finish....
So... instead of sanding the entire frame smooth... I did some research and went with Rustoleum Hammered spray paint.
Black
I did some test pieces and was quite happy with the results. Very hard, glossy, and pocked/stippled.
But it wasn't black....
Has a dark chocolate charcoal color, but not really black.
So I've named the bike "Burnt Chocolate".
2 strokes smoke a tad and it's painted dark brown. I kinda like it.
I did the above listed parts. Took 2 cans for 3 coats each. 2 light coats 12" away w/ 10 mins between coats, then one wet coat
Here's the bucket for reference. It's a tad "browner" in person.
Here's the upper head stock:
Here's the lower head stock:
We then worked on the forks.
The front forks were quite pitted under the boots. The pitting portion never reaches the seals or passes through them. I had a student fine wire wheel the rust off:
Then we polished the shaft (not pictured).
I removed the shaft from the housing, cleaned the old contaminated oil out (was black and stank TERRIBLE!!)
We then stripped the faded/crazed clear coat off the housing and polished the housing.
Here's a side-by-side comparision:
We then inspected the seal (both were in great shape, soft, no cracks, and tight to shaft & housing), added 1 cup of of 10W30 motor oil (approx 235cc, which is midway between the called for 230cc and 240cc's of oil) and reassembled.
So nice.
Getting ready for the wheels to return from getting tires mounted & balanced....
Then some assembly!!
-
Allan k

- On the main road
- Posts: 191
- Joined: Tue Dec 20, 2011 7:12 am
- Country: Denmark
- Suzuki 2-Strokes: GT125 SV650 GT550
- Location: Denmark
- Contact:
Re: GT550 Cafe project
Looking really good!
2-strokes are full of speed,
4-strokes are full of parts!
4-strokes are full of parts!
-
r3tro74
- On the main road
- Posts: 131
- Joined: Wed Feb 08, 2012 10:25 am
- Country: USA
- Suzuki 2-Strokes: 74 GT550
- Location: Michigan
Re: Burnt Chocolate!
[quote="imquattro"]I'm going with the dual leading shoe (drum) setup for the front. I'm not much of a rider, and I don't put a bike through it's paces so a decent set of working drum brakes will suit me just fine.
Plus all polished up, it'll look sweet.
quote]
The drum brake does look nice. I recently looked at a gt750 for sale on EBay and the seller had right in the item description "No, I will not sell you just the front brake" so apparently the drum brake is a sought after item.
Plus all polished up, it'll look sweet.
quote]
The drum brake does look nice. I recently looked at a gt750 for sale on EBay and the seller had right in the item description "No, I will not sell you just the front brake" so apparently the drum brake is a sought after item.
1974 Suzuki GT550
1983 Honda XL250
2002 Yamaha Bear Tracker
1959 Lone Star Malibu
1983 Honda XL250
2002 Yamaha Bear Tracker
1959 Lone Star Malibu
-
imquattro
- To the on ramp
- Posts: 239
- Joined: Tue Jul 19, 2011 9:26 pm
- Country: USA
- Suzuki 2-Strokes: 72/74 GT550
- Location: Muncy PA
Re: Burnt Chocolate!
quote] the drum brake is a sought after item.[/quote]
They are
They are
-
imquattro
- To the on ramp
- Posts: 239
- Joined: Tue Jul 19, 2011 9:26 pm
- Country: USA
- Suzuki 2-Strokes: 72/74 GT550
- Location: Muncy PA
Re: GT550 Cafe project
Front shocks, done:

The gaiter boots look absolutely new after cleaning them up.
The gaiter boots look absolutely new after cleaning them up.
-
wvc
- To the on ramp
- Posts: 236
- Joined: Mon Oct 11, 2010 1:15 pm
- Location: Ohio, USA
Re: GT550 Cafe project
the vintage road racer guys like to buy up all the 4 leading shoe front brakes for their race bikes, which makes them a bit hard to come by if you actually need one for the bike they originally came on. 
I say keep 'em on the Suzuki's where they belong.
I say keep 'em on the Suzuki's where they belong.
76 GT500 - restoration project in work
4 other 76 GT500's
1.5 GT550's
4 GT380's
5 T500's (72-75 models)
4 GT750's
Suzuki GT hoarder...and a bad case of OBD.....(old bike disease)
4 other 76 GT500's
1.5 GT550's
4 GT380's
5 T500's (72-75 models)
4 GT750's
Suzuki GT hoarder...and a bad case of OBD.....(old bike disease)
-
greasemonkey

- On the street
- Posts: 49
- Joined: Fri Oct 14, 2011 10:46 am
- Country: Belgium
- Suzuki 2-Strokes: Gt500
- Location: Belgium
Re: GT550 Cafe project
the truthwvc wrote:the vintage road racer guys like to buy up all the 4 leading shoe front brakes for their race bikes, which makes them a bit hard to come by if you actually need one for the bike they originally came on.
I say keep 'em on the Suzuki's where they belong.
-
tz375
- Moto GP
- Posts: 6212
- Joined: Mon Nov 03, 2008 10:47 am
- Location: Illinois
Re: GT550 Cafe project
But they are so heavy. I had one and spent a fortune getting it machined and drilled to lighten it and it still weighed a ton. Not a bad brake but the effect on handling isn't all good. Spent a day at Broadford with a buddy's A7R getting jetting etc dialed in and as I started riding harder, so the front end chatter got worse.
Some years later I managed to buy a TZ250 Yamaha 10" drum and it was almost as heavy, but it sure did look nice.
I'll stick to modern disks that work all the time every time and don't weigh much - and you can get them quite cheaply.
Some years later I managed to buy a TZ250 Yamaha 10" drum and it was almost as heavy, but it sure did look nice.
I'll stick to modern disks that work all the time every time and don't weigh much - and you can get them quite cheaply.
