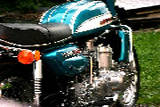
I've started to restore the switches on my '75 Buffalo and I can't figure out how to get the horn and starter push buttons out. I can see the switch assembly slides into the groove in the housing, but it won't slide out with the button in place. What's the secret to getting these out? I fooled with them a bit but don't want to break them - any help would be greatly appreciated.
Thanks.
Chris
GT750 horn /Starter button removal
Moderators: oldjapanesebikes, H2RICK, diamondj, Suzsmokeyallan
-
speedblock
- Around the block
- Posts: 75
- Joined: Sun Sep 26, 2010 7:50 pm
GT750 horn /Starter button removal
______________________________
- Chris
1975 GT750 - Done!
1984 Honda VF750 Interceptor
1985 Honda VF1100S Sabre
1987 Honda XL600R
1975 Yamaha RD200
1977 Yamaha YZ125
1978 Yamaha YZ250
2009 HD FXDF
- Chris
1975 GT750 - Done!
1984 Honda VF750 Interceptor
1985 Honda VF1100S Sabre
1987 Honda XL600R
1975 Yamaha RD200
1977 Yamaha YZ125
1978 Yamaha YZ250
2009 HD FXDF
-
kettle kid
- On the main road
- Posts: 195
- Joined: Sun Jan 30, 2011 2:30 pm
- Country: UK
- Suzuki 2-Strokes: GT380A GT750L GT750J Z900
- Location: SUNNY HERTFORDSHIRE UK ENGLAND
- Contact:
Re: GT750 horn /Starter button removal
Hello, Yes i have been there,  but now i do 4 a day, Takes me no time to get out.
Right, you will need,
1 small very tiny screw driver (something a watch maker would use)
1 long nose pliers, http://www.google.co.uk/products/catalo ... CHEQ8gIwAQ#" onclick="window.open(this.href);return false;" onclick="window.open(this.href);return false;" onclick="window.open(this.href);return false;" onclick="window.open(this.href);return false;" onclick="window.open(this.href);return false;" onclick="window.open(this.href);return false;
There's 3 types of horn button. small push, longer/ long.
1, you can get, some out with just the screw driver. Get the screw driver, right in by the brass, down on the back of the spring, and move, the spring (compress) it towords the face, and pull out the wire.
2, move the brass piece out of it's cutaway,( at the top,) and the pull the back piece up with the pliers.
Use a take out plastic base container (black ) so you can see the small parts)
3 I use a small jar, with, some paint thiners in, put all the bit's you can inside, put the lid on,( tight) and shake, to clean all the parts.
Don't forget to put the button back in, the right way up, (see the TR, right way up, the flat part of the button at the top)

On the horn button, Take off the cable clamp, then remove the indicator button, (a screw at the back) then lift out the indicator switch, and angle out the button, with it's wires.


Right, you will need,
1 small very tiny screw driver (something a watch maker would use)
1 long nose pliers, http://www.google.co.uk/products/catalo ... CHEQ8gIwAQ#" onclick="window.open(this.href);return false;" onclick="window.open(this.href);return false;" onclick="window.open(this.href);return false;" onclick="window.open(this.href);return false;" onclick="window.open(this.href);return false;" onclick="window.open(this.href);return false;
There's 3 types of horn button. small push, longer/ long.
1, you can get, some out with just the screw driver. Get the screw driver, right in by the brass, down on the back of the spring, and move, the spring (compress) it towords the face, and pull out the wire.
2, move the brass piece out of it's cutaway,( at the top,) and the pull the back piece up with the pliers.
Use a take out plastic base container (black ) so you can see the small parts)
3 I use a small jar, with, some paint thiners in, put all the bit's you can inside, put the lid on,( tight) and shake, to clean all the parts.
Don't forget to put the button back in, the right way up, (see the TR, right way up, the flat part of the button at the top)
On the horn button, Take off the cable clamp, then remove the indicator button, (a screw at the back) then lift out the indicator switch, and angle out the button, with it's wires.
-
speedblock
- Around the block
- Posts: 75
- Joined: Sun Sep 26, 2010 7:50 pm
Re: GT750 horn /Starter button removal
Thanks for the super detailed reply!
I actually got the horn apart yesterday - it was much easier than the starter button.
The starter button gave me fits until I saw your post. I was pushing the spring the wrong way, thinking that the "post" was part of the switch and not the button. Once I saw what I needed to do it came apart in no time.
That's also a great tip on cleaning the small parts - I'll try that as well.
Thanks again !
Chris
______________________________
- Chris
1975 GT750 - Done!
1984 Honda VF750 Interceptor
1985 Honda VF1100S Sabre
1987 Honda XL600R
1975 Yamaha RD200
1977 Yamaha YZ125
1978 Yamaha YZ250
2009 HD FXDF
- Chris
1975 GT750 - Done!
1984 Honda VF750 Interceptor
1985 Honda VF1100S Sabre
1987 Honda XL600R
1975 Yamaha RD200
1977 Yamaha YZ125
1978 Yamaha YZ250
2009 HD FXDF
-
MikeH1A
- Yeah Man, the Interstate
- Posts: 529
- Joined: Mon Oct 20, 2008 1:27 am
- Location: New Zealand
Re: GT750 horn /Starter button removal
This is such a timely thread, thank you. My problem is the reverse with the starter button. I got it all apart and painted the casings BUT I can't get it all back together - spent an hour getting increasingly grumpy today 
What am I doing wrong please? I put the button through it's hole (the correct way up - thanks for clarifying that small detail), have the spring over the "stem" out the back of the button but can't get the rest to sit in there. Please direct me here: there's a brass plate with a hole in the centre (presumably for the button's "stem" to fit through) and then a squarish plate - these two seem to fit together (correct?). But if I slide them both down into the cutaway I can't get them down past the "stem" which therefore can't fit into the hole of the brass plate.
What am I doing wrong and what is the trick here please??
Thanks, Mike
What am I doing wrong please? I put the button through it's hole (the correct way up
What am I doing wrong and what is the trick here please??
Thanks, Mike
Burt Munro + John Britten + Kim Newcombe + Ivan Mauger = Kiwi Street Cred
72 GT750J
71 TS250R
71 H1A
72 GT750J
71 TS250R
71 H1A
-
kettle kid
- On the main road
- Posts: 195
- Joined: Sun Jan 30, 2011 2:30 pm
- Country: UK
- Suzuki 2-Strokes: GT380A GT750L GT750J Z900
- Location: SUNNY HERTFORDSHIRE UK ENGLAND
- Contact:
Re: GT750 horn /Starter button removal

-
SClubSuzuki
- On the street
- Posts: 22
- Joined: Mon Jan 26, 2015 2:04 pm
- Country: USA
- Suzuki 2-Strokes: Suzuki A50, S32 Olympian
Re: GT750 horn /Starter button removal
Kettle Kid, hope it’s not too late to say THANK YOU for the invaluable instructions on how to re-assemble the starter button, you saved me perhaps hours of frustrationkettle kid wrote: ↑Sun Jan 08, 2012 2:22 pm
Chris
