Page 3 of 4
Re: New member intro, GT380 resto project.
Posted: Sun Apr 19, 2020 9:38 am
by jeffz
Did more cleaning and removed the oil pump and lines. Broke the end off the longest line. I knew they were a little crispy, thought I was being careful... I noticed someone
selling a set of lines broken exactly like mine. Is he nuts, or can you repair them? I'm gonna try to, by slipping a connector over the ends and epoxy-ing.


Re: New member intro, GT380 resto project.
Posted: Sat Apr 25, 2020 6:13 am
by sportston
It depends where it is broken. I have a repaired set on my bike and it works fine. One of the guys on here has a post about repairing his set of oil lines somewhere.
If it is broken where it goes into the plastic disc you might find it difficult or perhaps impossible to repair though.
Re: New member intro, GT380 resto project.
Posted: Sat May 02, 2020 10:26 pm
by jeffz
Thanks, Sportston.
I was able to repair the line with a piece of clear plastic that the vinyl line pressed into tightly, then epoxied over.
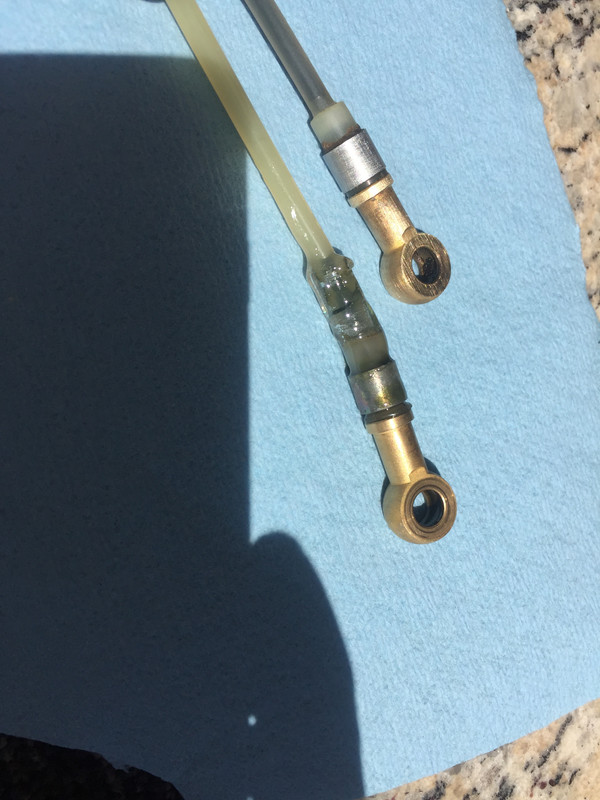
I confirmed none of the epoxy got into the line.

Re: New member intro, GT380 resto project.
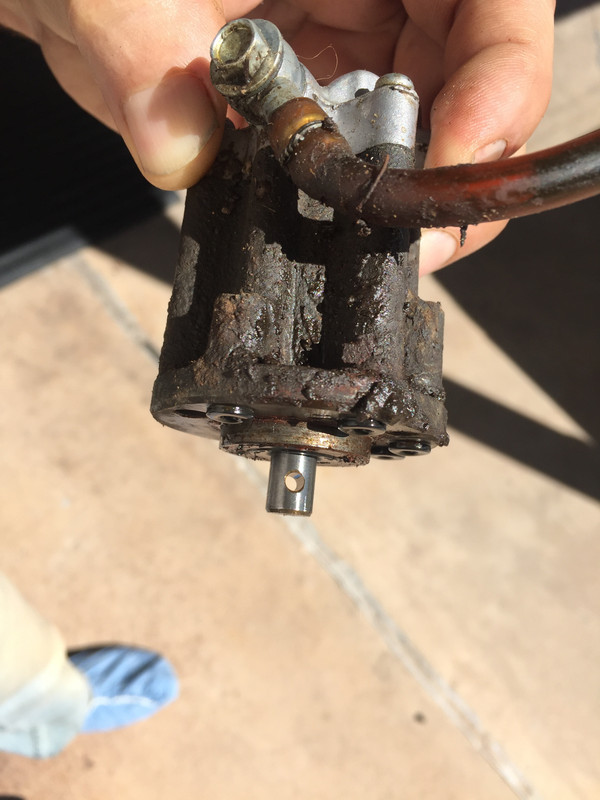
Posted: Sat May 02, 2020 10:33 pm
by jeffz
Oil pump pics.

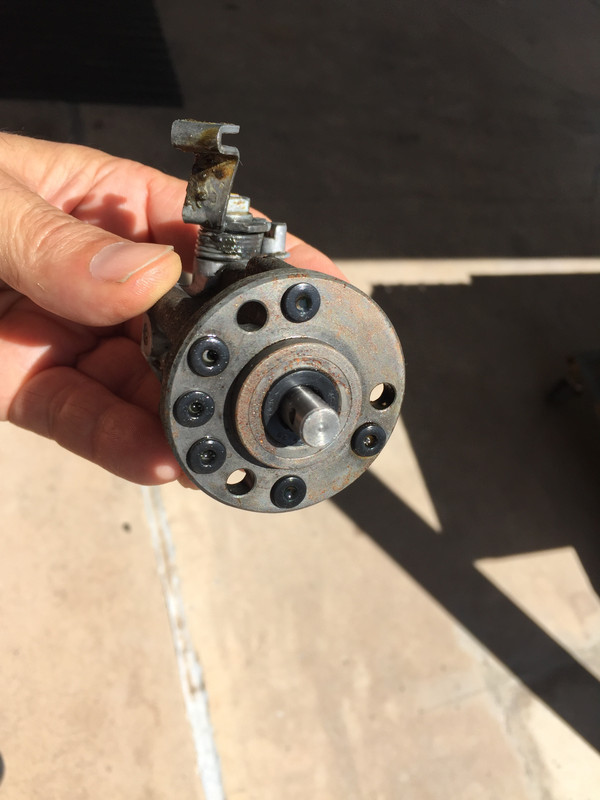
Fortunately, the o-rings held in place, making replacement easy. Replacing the lines is fiddly work.
Re: New member intro, GT380 resto project.
Posted: Sat May 02, 2020 10:53 pm
by jeffz
So nice to have all the gunk removed and the lines back in place.
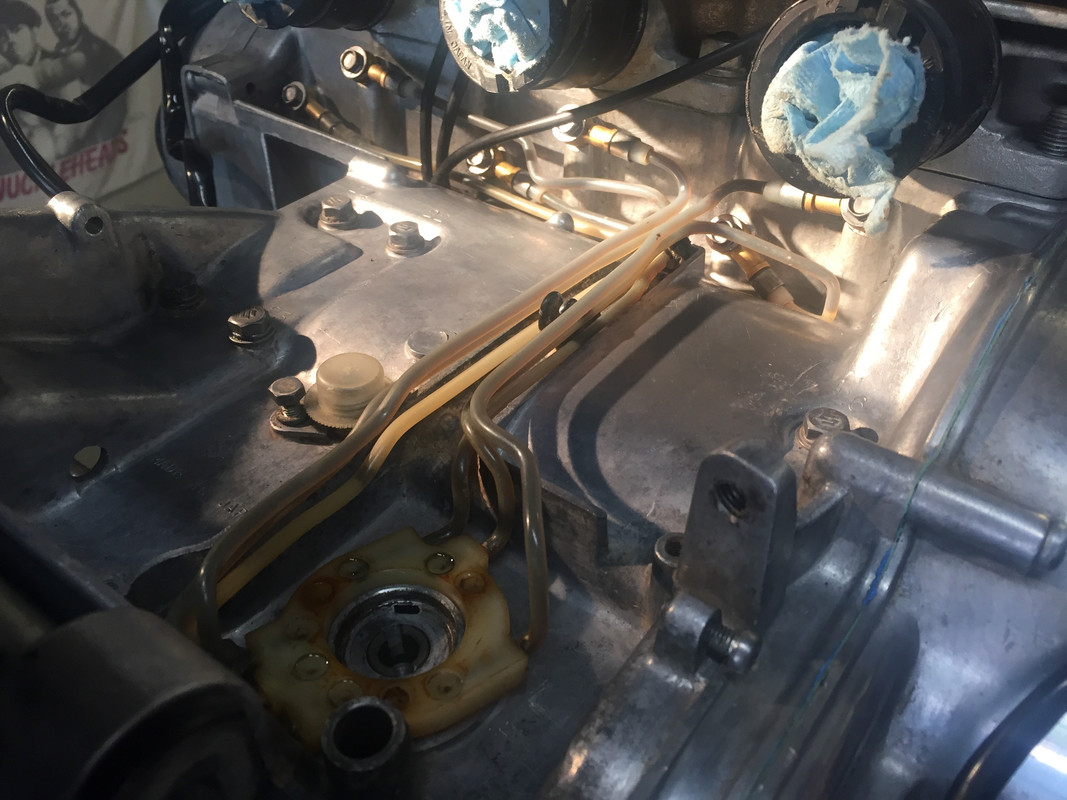
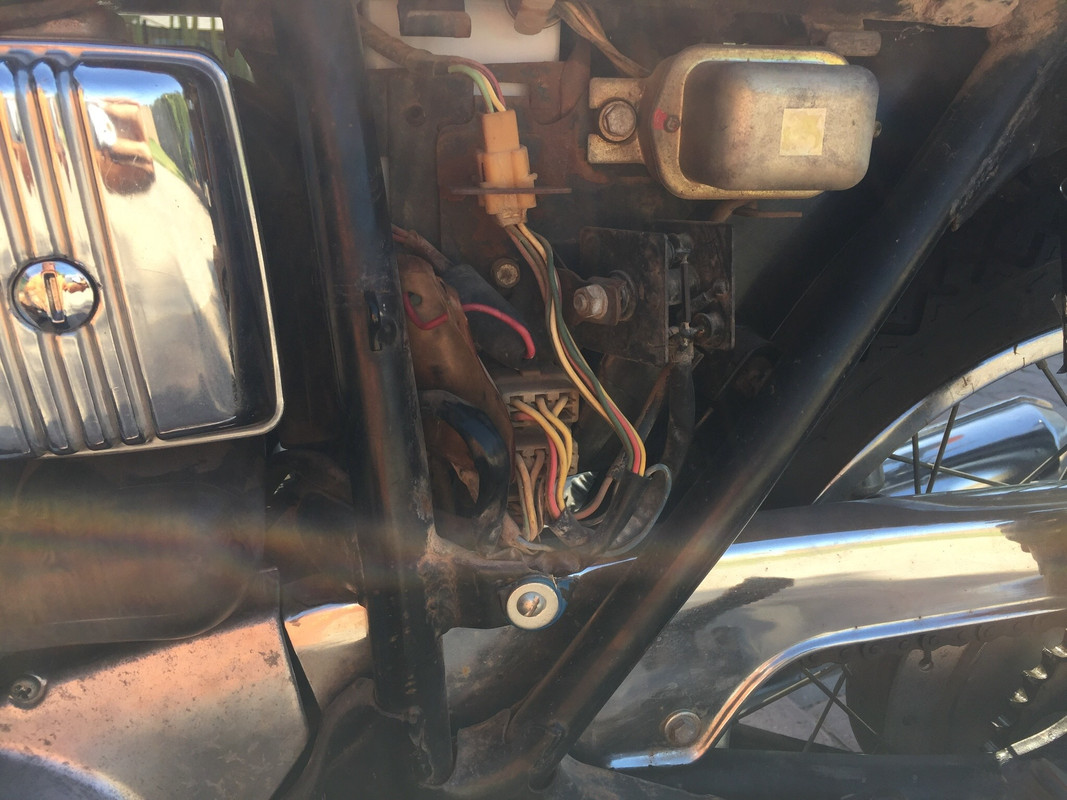
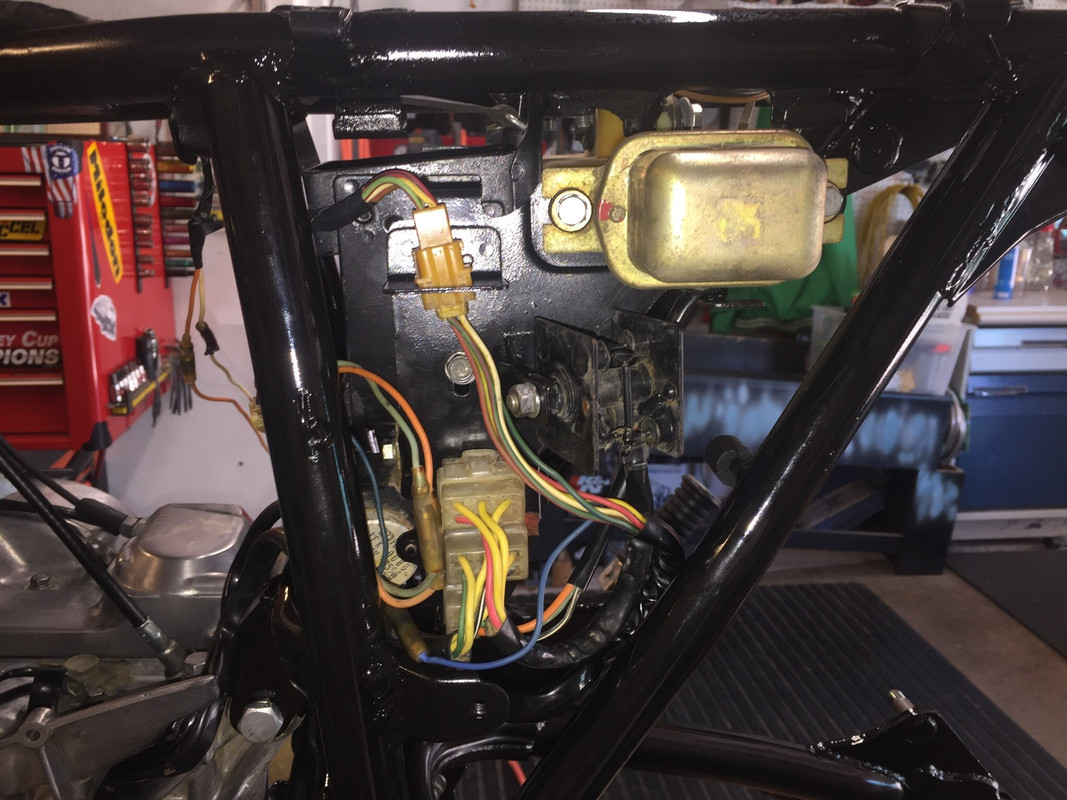
Later today I reinstalled the pump, cable, supply line, and cover. Also the battery box, oil tank, and electrical panel.
Re: New member intro, GT380 resto project.
Posted: Sun May 03, 2020 11:26 am
by sportston
Looking good so far! Don't do what I did and forget to fit the speedo cable before you fit the carbs.

Re: New member intro, GT380 resto project.
Posted: Mon Jun 08, 2020 1:40 pm
by jeffz
Recent progress:
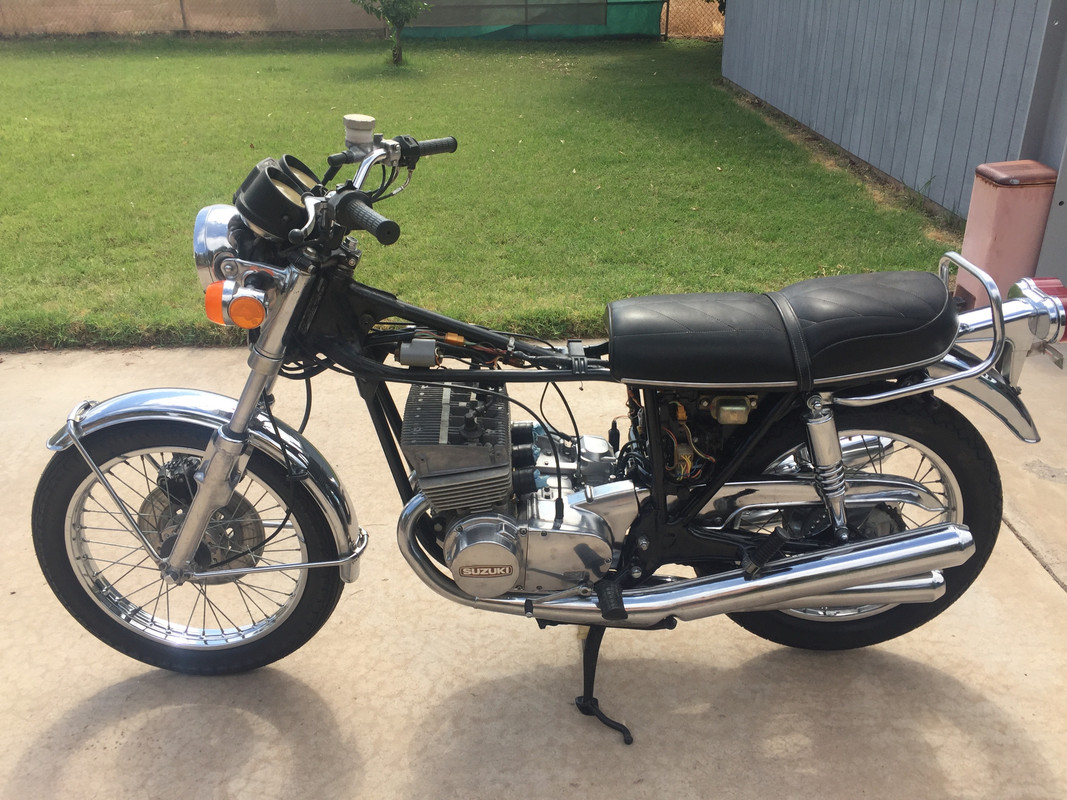
Painted frame, put painted/polished parts back on: swingarm, battery box, new shocks, rear fender, wheel, exhaust, grab bar, tail light, footpegs, brake pedal, shifter, seat. Rolled the bike into my shed for summer storage. I will work on painting the tank and side covers this summer.
I'm losing enthusiasm, though, and personal matters are demanding more of my time. I'd like to sell the bike for someone else to complete. Please PM
or email me if you are interested, I have many more pics to send. I'm not advertising it as yet.

Re: New member intro, GT380 resto project.
Posted: Mon Jun 08, 2020 1:46 pm
by jeffz
Re: New member intro, GT380 resto project.
Posted: Sat Jun 13, 2020 12:15 pm
by sportston
A pity to give up when you have come so far. If you can afford it, ship the tank and side panels out to a paint guy then spend another day or two assembling and you'd have a running bike!
Re: New member intro, GT380 resto project.
Posted: Fri Aug 14, 2020 2:33 pm
by jeffz
I have a few pics to share of painting the tank and side covers. Not a good time of year to paint, with temps of 110+ at midday. Had to spray at 7-9am when it's only 90, lol. I thought a spray can could cover all 3 pieces, and would be the cheapest way to do the job. Wrong. I chose a color from chips at
my local auto paint store that makes up spray cans. Its a base coat, and I don't intend to clear coat, since perfect, glossy bodywork wouldn't look right with the "driver quality" remainder of the bike. Well, thats what I got; not show quality, but much better than it was.
I didn't realize that the tank had been repainted, nor original to the bike. I like the Hawaii green much better, but figured a year-correct color would be
a better idea. Also saving myself the work and expense of replacing the stripe, which I find ugly.
Re: New member intro, GT380 resto project.
Posted: Fri Aug 14, 2020 2:40 pm
by jeffz
Re: New member intro, GT380 resto project.
Posted: Sat Aug 15, 2020 1:23 pm
by jeffz
I'm still learning how to use image hosting. Link to all my Suzuki photos:
https://postimg.cc/gallery/2BbMgTp" onclick="window.open(this.href);return false;
Re: New member intro, GT380 resto project.
Posted: Sat Aug 15, 2020 2:15 pm
by jeffz
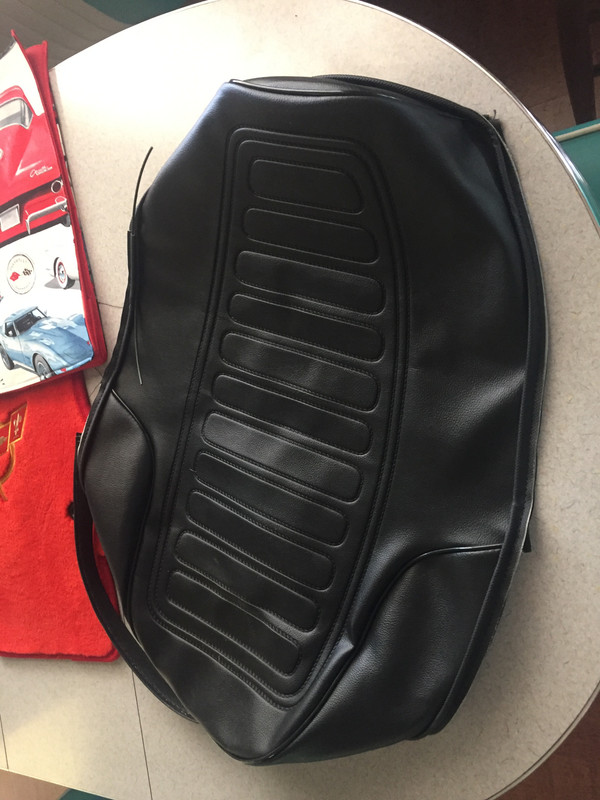
I wasn't going to recover the seat, since I'm cheap, and the existing cover, was intact. It had a pattern, no label, and the strap was redic. tight. It didn't
match the original, which, as seen on a friends' 550, had no pattern, but a tiny pebble-grain finish. I haven't seen any repros like it. I did find my new
cover for only $42, so I went for it. It is very lightweight and has a drawstring in the bottom hem, but otherwise a very accurate pattern.
My seat foam was fair for 46 yrs, but when fitting the new cover, showed voids where foam had fallen out. The old cover had an added gel-like pad that
I liked, and decided to re-use. I trimmed the bottom off and put the old cover under the new one. The new cover stretched over it with not much work,
and smoothed out the appearance of the finished product. It also had a drawstring in a sleeve in the hem that was very helpful getting a secure purchase for tucking under the shark teeth. The string was actually a stiff plastic about 2mm in dameter. Not very good for cinching and impossible to tie, but
excellent for avoiding ripping the hem during installation.
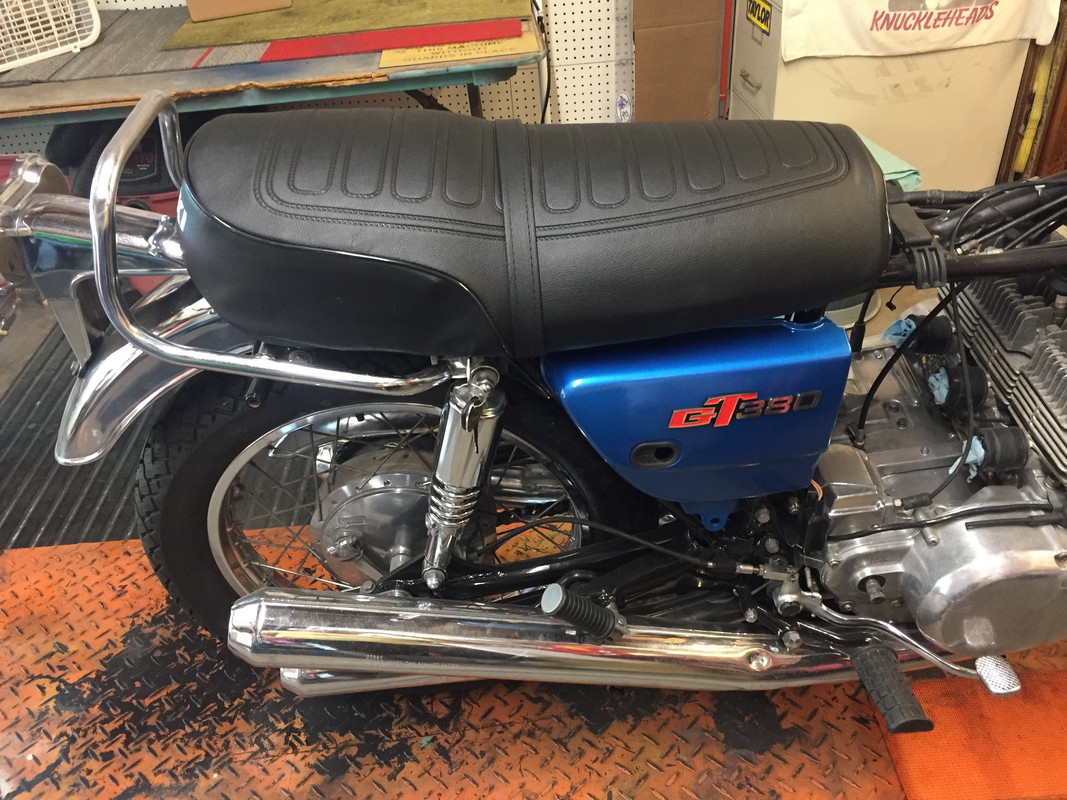
The pan had minor surface rust around the perimeter, which sandblasted off, leaving very light pitting here and there. Primed with etching primer and
painted gloss black. I tried to leave the "shark teeth" primed to make them easier to see poking thru the cover during install.
Here is a pic of the finished product.
Link to more pics in an earlier post in this thread.
Re: New member intro, GT380 resto project.
Posted: Fri Oct 30, 2020 3:41 pm
by jeffz
Just FYI, Japanese reproduction intake rubbers are now available for our GT380's. About $42 for 3, shipped. I like the quality and fit.
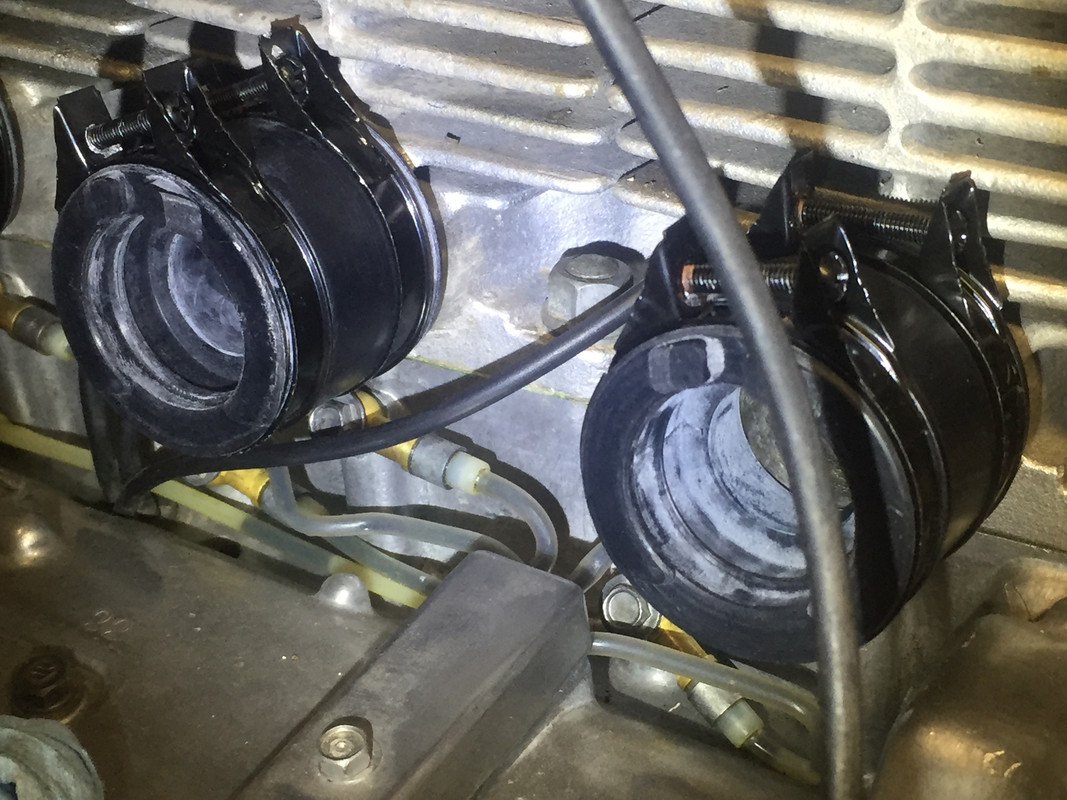
Re: New member intro, GT380 resto project.
Posted: Fri Oct 30, 2020 4:01 pm
by jeffz
Also coming along on the rebuild of the carbs and linkage. I replaced the bellows with NOS, 3 for $82, shipped. They are def. lighter and thinner than what I took off,but they seemed to seal snugly. When I went to replace the base clamps, they were still loose, able to rotate when fully tightened. With the lip on the plate holding the new rubber snugly, clamping may be overkill. But, anal as I am, lol, I put a thin strip of rubber inside the clamps so they
tightened properly. I don't plan on using the L-shaped rubbers on top, since they are similarly priced, and I don't plan on riding in sandstorms.


 [/url]
