GT550 Cafe project
Moderators: oldjapanesebikes, H2RICK, diamondj, Suzsmokeyallan
-
oldjapanesebikes

- Moto GP
- Posts: 3229
- Joined: Sat Feb 07, 2009 12:43 am
- Country: Canada
- Suzuki 2-Strokes: GT750(Jx3,L,M,A,B),T500
- Location: Ontario
- Contact:
Re: GT550 Cafe project
For the stand, you can try something like Mike Y did in the UK did with his to get some additional clearance on the centre pipe. 

Ian
If at first you don't succeed, just get a bigger hammer !
If at first you don't succeed, just get a bigger hammer !
-
imquattro
- To the on ramp
- Posts: 239
- Joined: Tue Jul 19, 2011 9:26 pm
- Country: USA
- Suzuki 2-Strokes: 72/74 GT550
- Location: Muncy PA
Re: GT550 Cafe project
ooOOOOooo I like that idea!
-
Coyote

- Moto GP
- Posts: 3404
- Joined: Tue Oct 21, 2008 2:41 pm
- Country: USA
- Suzuki 2-Strokes: GT550x2, GT750, GS1000
- Location: Tulsa, Oklahoma
Re: GT550 Cafe project
The pipes on my bike don't have room for the pivot bolts. The stand I made works off the pin(s) to the right of the holes. The problem is it's a 2 man job. One person needs to steady the bike in an upright position while the other positions the stand. I'll get a pic of the stand later today.

I was born with nothing and still have most of it left.
.
1978 GS1000C
1976 GT550 ongoing money pit.
.
1978 GS1000C
1976 GT550 ongoing money pit.
-
CumbriaSuzuki
- Around the block
- Posts: 96
- Joined: Thu Mar 31, 2011 2:23 pm
- Country: England
- Suzuki 2-Strokes: GT250, GT380, GT500
- Location: Cumbria, UK
Re: GT550 Cafe project
I began looking around through the extra parts I had from the project and saw the "S" Suzuki symbol on the mirror.
I thought, if I could just cut that out, it just might make a perfect fix!
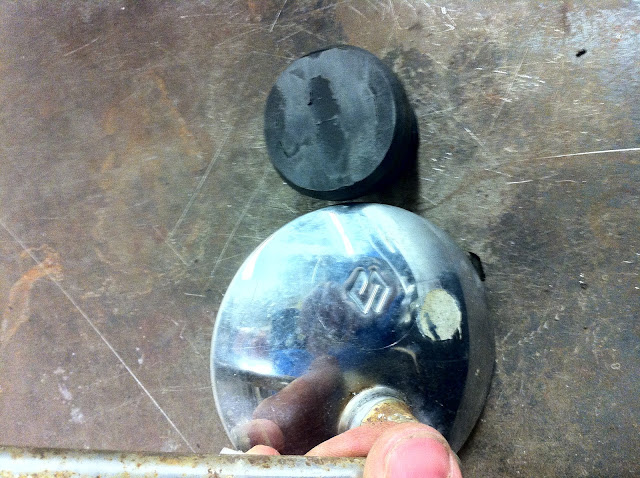
Oh no!
Those genuine Suzuki mirrors with the coveted S stamp on go for a small fortune on Ebay.
I thought, if I could just cut that out, it just might make a perfect fix!
Oh no!
Those genuine Suzuki mirrors with the coveted S stamp on go for a small fortune on Ebay.
Martin
GT500A 1976
GT500A 1976
-
imquattro
- To the on ramp
- Posts: 239
- Joined: Tue Jul 19, 2011 9:26 pm
- Country: USA
- Suzuki 2-Strokes: 72/74 GT550
- Location: Muncy PA
Re: GT550 Cafe project
So after getting the foam plug shaped, the students began aluminum taping off the base & plug.

Here it is, taped off & paper prepped for fiberglass.


Really hard to make it smooth & sharp w/ the aluminum tape over curves.
Then the tape has to be waxed GENEROUSLY so the fiberglass comes off after it cures.


After being waxed (WAX ON -no wax off) the wax is allowed to dry.
The fiberglass mat is sectioned out and the resin is mixed w/ the hardener.
Do this with plenty of ventilation! In our case, we're in a large 5+ bay garage with the doors open.


After the first layer of glass mat, the roving cloth is laid on w/ more resin.


We'll see how it turned out tomorrow!
Here it is, taped off & paper prepped for fiberglass.
Really hard to make it smooth & sharp w/ the aluminum tape over curves.
Then the tape has to be waxed GENEROUSLY so the fiberglass comes off after it cures.
After being waxed (WAX ON -no wax off) the wax is allowed to dry.
The fiberglass mat is sectioned out and the resin is mixed w/ the hardener.
Do this with plenty of ventilation! In our case, we're in a large 5+ bay garage with the doors open.
After the first layer of glass mat, the roving cloth is laid on w/ more resin.
We'll see how it turned out tomorrow!
-
imquattro
- To the on ramp
- Posts: 239
- Joined: Tue Jul 19, 2011 9:26 pm
- Country: USA
- Suzuki 2-Strokes: 72/74 GT550
- Location: Muncy PA
Re: GT550 Cafe project
Also finished welding up the sections of the chambers:
The belly:

After:
Here they are ready to be assembled after the down pipes are shortened to the proper length.

The belly:
After:
Here they are ready to be assembled after the down pipes are shortened to the proper length.
-
imquattro
- To the on ramp
- Posts: 239
- Joined: Tue Jul 19, 2011 9:26 pm
- Country: USA
- Suzuki 2-Strokes: 72/74 GT550
- Location: Muncy PA
Re: GT550 Cafe project
I still need someone with JEMco pipes on a GT550 to measure the length of the pipe from the head flange to the first transition.
That would be great!
Thanks!
That would be great!
Thanks!
-
imquattro
- To the on ramp
- Posts: 239
- Joined: Tue Jul 19, 2011 9:26 pm
- Country: USA
- Suzuki 2-Strokes: 72/74 GT550
- Location: Muncy PA
Re: GT550 Cafe project
Next day, I went in early and laid the rest of the roving cloth on the mold.
Cured before class and then we pulled the paper off.


I had a piece of laun (1/8" plywood) from a while back that I had trimmed to fit the frame. Well, I pulled that back out and we used it to trace out the first trimming.

We placed the marker on top of a 7/8" block of wood to simulate the thickness of the frame tube.
Here's the first line:

Then the student suited up and made the cut.


After the first trimming, the students had to go and so I took some of my own time to trim it up and shape out the lower edge.


Next batch of students (after theory) we set out to start sizing up the exhaust. The stock downpipes were about 4" too long (thanks for the measurement r3tro74!). The first transition reportedly starts 13" down (measured across the leading edge of the pipe) from the head flange. So some of the pipe was trimmed out.

The first flare was kept to make the transition as the measurements I used to make the cones suggest that JEMco downpipes are of larger diameter than stock so my first cone's first ID is larger than the stock dp.

After welding it back on:

First cone tack:

And the rest:

Disclaimer ! : I really don't think this will be the final position of the pipes as the kick starter hits them on the way down and the center stand hits them when up.
I did take notice that some of you are using a modified kickstarter that bends out of the way?????
Cured before class and then we pulled the paper off.
I had a piece of laun (1/8" plywood) from a while back that I had trimmed to fit the frame. Well, I pulled that back out and we used it to trace out the first trimming.
We placed the marker on top of a 7/8" block of wood to simulate the thickness of the frame tube.
Here's the first line:
Then the student suited up and made the cut.
After the first trimming, the students had to go and so I took some of my own time to trim it up and shape out the lower edge.
Next batch of students (after theory) we set out to start sizing up the exhaust. The stock downpipes were about 4" too long (thanks for the measurement r3tro74!). The first transition reportedly starts 13" down (measured across the leading edge of the pipe) from the head flange. So some of the pipe was trimmed out.
The first flare was kept to make the transition as the measurements I used to make the cones suggest that JEMco downpipes are of larger diameter than stock so my first cone's first ID is larger than the stock dp.
After welding it back on:
First cone tack:
And the rest:
Disclaimer ! : I really don't think this will be the final position of the pipes as the kick starter hits them on the way down and the center stand hits them when up.
I did take notice that some of you are using a modified kickstarter that bends out of the way?????
-
drøn
- On the main road
- Posts: 134
- Joined: Fri Jun 17, 2011 2:36 am
- Location: Copenhagen
- Contact:
Re: GT550 Cafe project
WOW! I really really like the layout of that pipe. The way it bends just aft the down pipe and then goes straight slightly upwards from there. Unusual and very very cool!imquattro wrote:
And the rest:
Disclaimer ! : I really don't think this will be the final position of the pipes as the kick starter hits them on the way down and the center stand hits them when up.
I did take notice that some of you are using a modified kickstarter that bends out of the way?????
-
imquattro
- To the on ramp
- Posts: 239
- Joined: Tue Jul 19, 2011 9:26 pm
- Country: USA
- Suzuki 2-Strokes: 72/74 GT550
- Location: Muncy PA
Re: GT550 Cafe project
-
Coyote
- Moto GP
- Posts: 3404
- Joined: Tue Oct 21, 2008 2:41 pm
- Country: USA
- Suzuki 2-Strokes: GT550x2, GT750, GS1000
- Location: Tulsa, Oklahoma
Re: GT550 Cafe project
Nate, you're probably gonna have the shuck that center stand to give some freedom for lots more exhaust routing options. You have the welder so you could always make one that kicks in under the rear swing arm. There are a billion of them on the internet you could copy from. Just Google "motorcycle stand".
I just remembered I was supposed to post a pic of the one I made. Here it is:


I just remembered I was supposed to post a pic of the one I made. Here it is:
I was born with nothing and still have most of it left.
.
1978 GS1000C
1976 GT550 ongoing money pit.
.
1978 GS1000C
1976 GT550 ongoing money pit.
-
imquattro
- To the on ramp
- Posts: 239
- Joined: Tue Jul 19, 2011 9:26 pm
- Country: USA
- Suzuki 2-Strokes: 72/74 GT550
- Location: Muncy PA
Re: GT550 Cafe project
I like it! but...... do you strap that to your back when you ride? How does your bike stand up? Did you keep the kick stand?
-
Coyote
- Moto GP
- Posts: 3404
- Joined: Tue Oct 21, 2008 2:41 pm
- Country: USA
- Suzuki 2-Strokes: GT550x2, GT750, GS1000
- Location: Tulsa, Oklahoma
Re: GT550 Cafe project
Si. Side stand. Had to weld a short doubler on the underside of the chamber to keep the kick stand from denting it.
I was born with nothing and still have most of it left.
.
1978 GS1000C
1976 GT550 ongoing money pit.
.
1978 GS1000C
1976 GT550 ongoing money pit.
-
imquattro
- To the on ramp
- Posts: 239
- Joined: Tue Jul 19, 2011 9:26 pm
- Country: USA
- Suzuki 2-Strokes: 72/74 GT550
- Location: Muncy PA
Like I need more things to do:
These were dropped off today by a student.
Said I could have at them...
Both are 1972's that have been sitting since 1976.... outdoors.... anything frozen...is.
A Suzuki RV90 and TS90

Maybe a project for next year... maybe scrap $....
Said I could have at them...
Both are 1972's that have been sitting since 1976.... outdoors.... anything frozen...is.
A Suzuki RV90 and TS90
Maybe a project for next year... maybe scrap $....
-
imquattro
- To the on ramp
- Posts: 239
- Joined: Tue Jul 19, 2011 9:26 pm
- Country: USA
- Suzuki 2-Strokes: 72/74 GT550
- Location: Muncy PA
Re: GT550 Cafe project
Got the other side pipe together and on today.


We're working on the routing underneath the bike:

After a couple measurements, adjustments, and tricky cuts&clocks:


Hope it's not too low! I just like the shotgun style on one side and matching upper pipe on the other.
We're working on the routing underneath the bike:
After a couple measurements, adjustments, and tricky cuts&clocks:
Hope it's not too low! I just like the shotgun style on one side and matching upper pipe on the other.
