As for the application of the new flat black, since its also water based, you can in fact drop a small blob of paint into the middle of the recessed sections, and then use a tooth pick to drag it to the edges where you 'line' it neatly to the letters edge.
You are doing this with the emblem flat on a surface, so work each section quickly but evenly and once thats done if its looking a bit thin apply another paint blob and work it into the section.
You have to do this in each section before it dries and you'll get NO brush marks...
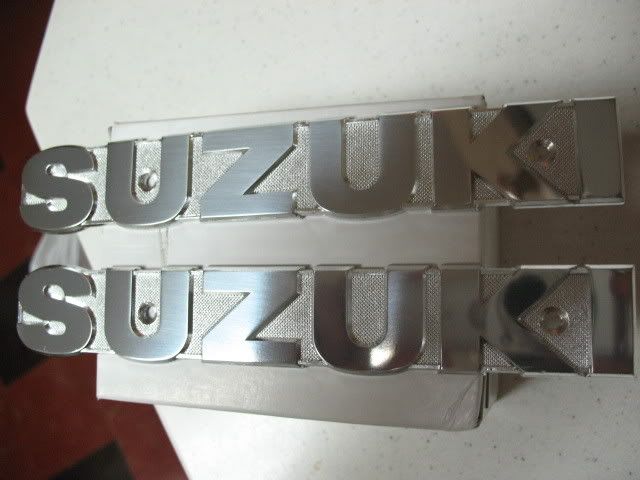
I tried to show this resto better in this pic, at least in this light you can see how the finish and shine on the letters faces came out. You can even see the reflection of the cameras lens housing too in the lower letter K,,,,,LOL