It all started in 2008 in a old barn, the definition of a barn find:


Not a whole lot later, it looked like this and was actually not that bad, it was worn, but oke.

The plan was to restore it and sell it on with a slight profit, just for the experience. Of course that didn’t happen…
It turned out to be very non-original (didn’t know a thing about GTs back then). It has a 73 frame, 74 air cleaner, 75 engine and then some. So wasn’t worth it to restore to original condition, so I thought I’d better keep it

First problem were the original exhausts, they were very rotten.


After a small test run in the middle of the night with only the stingers, I decided I needed mufflers. Did enjoy the sound though and made a small clip of it:
http://www.youtube.com/watch?v=AO_s3tDe-J0" onclick="window.open(this.href);return false;
Then I bought this and it all changed again

Thrown together

Then for a while it looked like this. It had several modifications including a rear disc brake conversion using a GS750 hub and GT750 rim with new spokes.

It all looked quite nice but it handled like a pig and everything was hurting whilst driving it. I had no fun in driving it so I parked it for a while to have a rethink.
Buying this:

And this:

All changed the course of the project drastically and the project enjoyed some renewed enthusiasm.
Here are some more pictures of the rebuild, it’s somewhat chronological, but I guess the pictures will do most of the talking


With the fairing

Friend of mine who wanted to try it out


This concludes the first rebuild, now I will show you my plans with the throttle bodies and GSXR donor bike.
I had a spare engine and frame (actually, there was a complete white GT750 with the fairings I bought..) so I could modify and fit the throttlebodies on the workbench instead of dismantling the running GT. This was done to limit the downtime.


Also, I’ve rebuild the 3 in 3 exhaust into a 3 into 1 exhaust. By this time I’ve realised the exhaust I made were terrible and had to go. They were too fat and ungainly and they also made placing the footrest impossible. So I chopped it up and made a 3 into 1. I know this isn’t good either, but it had to do for now. I’ll have to build myself a proper set some day


Then it was time to start fitting the GSXR front fork. I trial fitted it into my spare frame and it seemed to be a straight fit, only having to change the bearings (!). By using a selection of parts from either the GSXR, the GT and a head bearing set meant for a XS650 it went straight in! Luckily the GSXR front end already had a Lucas superbike conversion including a nice fat handle bar. With some generic lampholders it was looking quite good.


Just a shame the rear tyre is so skinny, better change that as well then! The GSXR swingarm was an almost direct fit in the GT frame, don’t you just love LEGO?;) I had to fit new swingarm bearings and some bushes to compensate for a swingarm axle diameter difference but that was quickly sorted. Of course I had to make some dual shock mounts as well, but I have a tame welder tucked away in a chopper shop nearby so that wasn’t a problem either.


The following photos show the progress during the conversion to fuel injection. This all happened in 1 week of vacation and I had a strict deadline to go camping with the bike some months later. It all started with a pile or parts

Wideband exhaust sensor, coolant sensor with modified thermostat housing, air intake temperature sensor and a couple of relays. Also a picture showing the idle control valve mounted on the throttlebodies. Since this was giving me all sorts of trouble later on I removed it.

Wiring harnass, plugs, sensors, all the electrical stuff.

Stripped down GT, ready for its shot (get it? Fuel injection? Shot? Never mind…)


Everytime I see this I notice how puny the frame is and how enormous the engine is, no wonder it’s such a “flexible” ride

Drilled a hole in the airfilter to place the intake air sensor.

Swapped thermostat housings.


Throttlebodies mounted, fuel pump and pressure regulator mounted on a small subframe.

Just a quick fit to see how the side covers would sit.


Removed the battery tray to make room for the new parts.

I wanted to create a new battery tray so I could create some more room. So I cut up a random tray laying around so I could save the powdercoated stock one.

So I could save this one.


Removed the mountings and rubbers from this very rusted GT tray.

Sorted!

Then it was time to play with hoses and adaptors.


Whilst I was at it, I also fixed the original loom and fitted a new starter relay.


Nieuw stangetje voor bediening van de oliepomp

Very ugly holder for the fuel pump, but it will have to do. This first fit is more of a trial run and proof of concept than a completed product…

Fitted a plate on the battery tray so I could mount the ECU there.


And then the wiring started!


The wideband lambda sensor with nut that had to be welded into the exhaust. This is actually a axle nut from a Peugeot van I believe. But it was the correct thread so it was perfect.

Fuel lines!

Started wiring the relays and new fuse holder. The old single, glass fuse was not going to cut it with all the added power drains.


Had to move the Newtronics ignition module to the rear mudguard.

Stole the signal and switched power from the ignition unit to feed the ECU.

Modified plugs

Had to slot this cover since it was fighting me all the way. Now I can just remove it without messing with the coolant hose.

This ugly lump is a 3 way split to feed the injectors. Since I absolutely did not want any moisture in here I used several coats of high quality isolation.

More wiring…

The connectors that came with the ECU were very small and terrible to use. The larger wires almost wouldn’t fit, but with some perseverance (and a power drill) they eventually went in. Wiring this plug took me almost all of the afternoon…


Last one!


LED are a good sign!

Intensive care
Large car battery to keep the electrics going, laptop for getting the ECU all set up.

It’s alive!

Well then, what’s left? Mounting the wideband sensor and getting it to run of course!
Problems thus far were unsuppressed sparkplugs and caps, making the ECU very unhappy and constantly resettting. I also had a large amount of noise and feedback from the ignition coil making triggering for the injection almost impossible. But using an inbuilt filter allowed me dial out all the noise.
At the beginning of this week the GT ran on injection, but eventhough it didn’t sound half bad, I still had lots to do.
I used the signal from 1 coil to give the ECU a RPM signal. This did work, but there was 1 mayor drawback, due to the wiring of the ECU (I had every injector on a separate injector channel) it was firing every injector alternately instead of all together. This meant that it was firing the injectors once every 3 rotations!
To solve this, I tried to combine all 3 coil signals into 1 wire, effectively tripling the frequency. I used 3 diodes to prevent crosstalk, but sadly, this didn’t work and I let the magic blue smoke out Luckily I only blew the diodes, but it was clear I had to find another way.
Learning from commercial RPM sensors, I tried winding a piece of wiring around each plug wire and feeding the ECU the combined signal from these “Coils”. I got a signal, but it was too small and the ECU just couldn’t make sense of it.


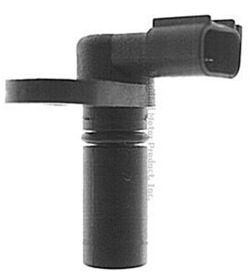
Instead of mucking about, I decided I was going to do this the proper way. By using a Ford VR sensor, this is a crank position sensor which triggers on moving pieces of metal. When a trigger wheel moves past this sensor, it generates an AC signal. The ECU can then calculate the RPM and trigger moments from this AC signal. Using the stock points wheel fitted behind the ignition plate I could get 3 trigger events per crank rotation with this sensor.


It should go somewhere here.

After measuring, measuring and measuring some more, I grew a pair and drilled a hole in the engine cover.

Which resulted in this

I had to move the ignition plate outwards a bit to make room for the VR sensor. It’s tight, but works like a treat!


Fitted including waterproof plug and ignition cover.

One of the last things now was fitting the wideband sensor

Drilled a 13mm hole and used a small grinder until the nut fitted. I welded a small piece of pipe on the nut to shield the sensor from the oil in the exhaust. I got this idea from a KOSO 2 stroke wideband bung adaptor, but I’ve got no idea if it would work.

Almost there.

Done

Quick blast of black paint, just wanted it to look right.

And mounted.


Then I had a USB issue to solve. The ECU has a internal USB B connector but no way of getting to this when the case is closed. Stupid design flaw which I had to find a way around.

Drilled a small hole, threaded the USB cable through and a bit of glue/caulk to make it “waterproof” again.
This meant I had to solder a USB cable though, which was quite a pain since the wires are so incredibly small, but I got there in the end.


By this time I constantly thought I was done, but small jobs kept coming up. Like modifying the rod from the carbs to the oil injection pump. This had to be bent and a tab made on the throttlebodies.

Not a very pretty solution, but it works
Small progress was made, I had to solder in a jumper wire inside the ECU to activate the onboard wideband controller, but after this it worked fine. I could go for a run, check everything on the handlebar mounted tablet whilst logging all parameters so I could look back afterwards and adjust the fuel tables.


I’ve had the chrome redone a while ago, but I still had to protect the inside from rust. So bolted it from the bike

And painted them black using POR15.


The front fender could also use some attention, since it was black and broken. So I removed it, and sanded it down.

“Fixed” it, just using a soldering iron to prevent it from tear any further.

Then, a quick white spray can job and it was good to go.


I wanted to combine the original seating/peg position but I also had fitted a rear disc so I had to find a way to mount and use the rear master cylinder.


By using this extra pivot point it works perfectly and with some black paint on it looks like it was meant to be (atleast to me
)
Also fitted the plastic radiator shroud after a quick blast of some silver paint.


Time to fit the new GSXR swingarm;


This goes to show that Suzukis are like LEGOs, the sprocket carrier, sprocketbolts and sprocket are a direct swap! In fact, I needed to fit the GT carrier in the GSXR wheel to align the chain.


The rear fender is now too narrow


Of course the Hagon rear shocks could stay, so I fitted some fancy Marzocchis.

To make sure that it al fitted and to check the stancy of the bike, I created/fitted this very ugly subframe to get the bike rolling. Don’t worry, I didn’t drive it like this


 [/URL]


