Page 4 of 5
Posted: Mon May 18, 2009 8:53 pm
by water cooled
Jason,
You made my day....

I knew you couldnt resist!
Your bike looks so sharp...you have to be very pleased with the way it is turning out. You have also worked hard and put in many hours. It has really paid off with something special. Very, very sharp!
Youve done a nice job. Next step, post a video of your startup and then another one of you driving down the street.

Posted: Tue May 26, 2009 3:27 pm
by jaybob
Progress.....
Soon.......
Posted: Tue May 26, 2009 7:16 pm
by CJF
You might want to try out a set of cafe bars and bar end mirrors. I had them on my GT500 and they looked great. They lowered the the overall look of the bike and I liked the riding position better than stock.
Posted: Wed May 27, 2009 4:37 am
by Barry S.
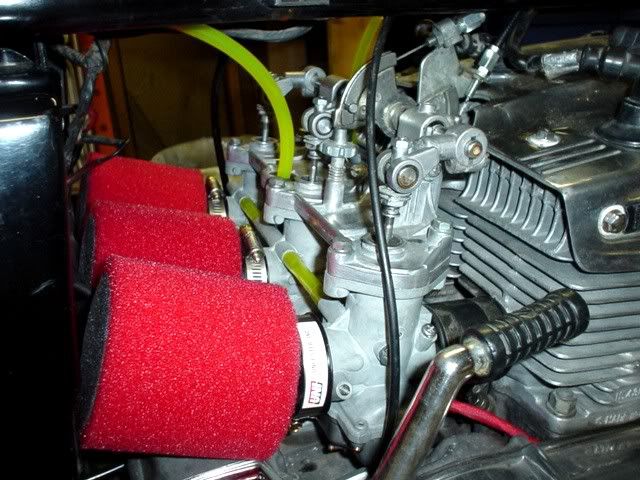
Don't they leak air around the carb rods without the rubber boots on them....
Posted: Wed May 27, 2009 9:05 am
by jaybob
Chris
Thanks for the suggestions. The bar end mirrors are in the plan, just waiting on the money. I am just trying to get it road ready for phase 1 of the project. the handlebars that are on it are some aftermarket replacement that are lower than the stock bars. I am going to ride it with them for awhile to see how I like them.
Barry,
I am sure some air leaks there and I have thought about it to some great extent. I can hardly believe that the rubber boots seal the air out completely although I am sure that they help alot. I am thinking that the biggest job they perform is to keep dirt out.
The bike came to me running without them in place. I have seen many running bikes with the boots deteriorated. At first Iwas going to replace them, however the plan now is to change to the old style of individual mikunis without the rack.
Even on the individual style of carbs without the rack I am sure it is possible for some air to get in where the cable goes through the cap.
So what I am saying is I really don't know for sure. I hope someone can add some info on the subject.
I have a plan to add some home made rubber skirts to keep out most of the large particles.
But I want to thank you for pointing out the concern. Comments like that will help to keep me from making any expensive mistakes.
Jason
Posted: Wed May 27, 2009 9:11 am
by Suzukidave
With the non air tight fit of the boots i also feel they were there to help keep out water and dirt .
Posted: Wed May 27, 2009 8:04 pm
by Coyote
I went ahead and put the boots on RedZone. When installed correctly they do a pretty good job if keeping out grit and water. The OEM clamps that went around the bottom of the lower boot at the carb top would not tighten up enough to hold the boot so I used some heavy zip ties instead.
I believe (IMO) the upper boot at least should be in place. If grit gets into that knee pivot it will eat it alive - causing unwanted play in the linkage.
These boots were pricey, but were actually cheaper from my dealer than from P Miller.
Jaybob, Save up and at least get the upper knee boots. Could save a lot of headaches later.


Posted: Thu May 28, 2009 8:12 am
by H2RICK
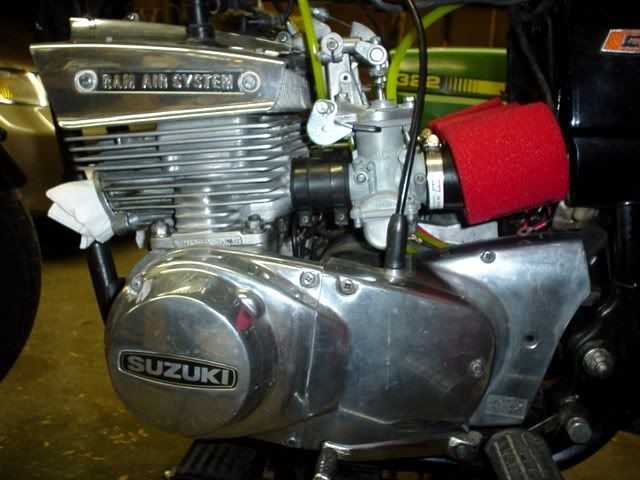
Well, gents, if I was running the later style carbs, I would FOR SURE get the lower bellows type boots, if not the uppers as well. You will be sucking lotsa air in there without the lower boots.
Jaybob, the J/K style carbs get very little air in around the cable. Firstly, you have that little rubber boot that fits around the cable and over that spigot on the top of the carb where the cable adjuster sits. As well, when you open the throttle the least little bit, the cable casing/thimble end seats into the adjuster bolt effectively sealing that area......plus it's DARN hard to suck any air down the INSIDE of the cable casing, too.
Where you WILL get air quite easily is under the top cap that's held in place by that threaded ring. There is supposed to be a flat rubber seal between the top cap and the top of the carb body to prevent any air getting through that area. Make sure your seals are in good shape.
Mikuni has some pretty clever engineers.....and that's why the good old VM round slides are STILL being made to this very day......and still doing a heck of a job of carburetting.
Posted: Thu May 28, 2009 2:38 pm
by jaybob
Well... Okay then.
Here is the situation. A few weeks ago I came into the posession of what appears to be a decent set of carbs off a J model. They need to be cleaned but they look like they will clean up well.
The reason I did not go with them already is that they need a little work and I kinda wanted to bore them. Also I am itchin to get some miles under me on 2 wheels.
So here is a chance for the audience to participate in a major decision on the build specs.
It is about $100 to replace both the knee joint and rod boots on the rack carbs. Then re-sync them up and install.
For the other set I need a new throttle cable, throttle tube, and clutch perch to hold the choke lever, and a new petcock. So figure 60-100 there. Figure another 50 or so if I get the carbs bored out.
So pretty much the same money there either way. The J carbs are lighter and it is much easier to change the needle position without un-syncronizing the whole assembly.
So share your opinions on the new option here? It will take more time and money to retrofit the J carbs. But I am leaning that way...
Anyone able to help with a petcock and throttle tube?
Thanks as always......jason
Posted: Tue Jun 16, 2009 2:46 pm
by jaybob
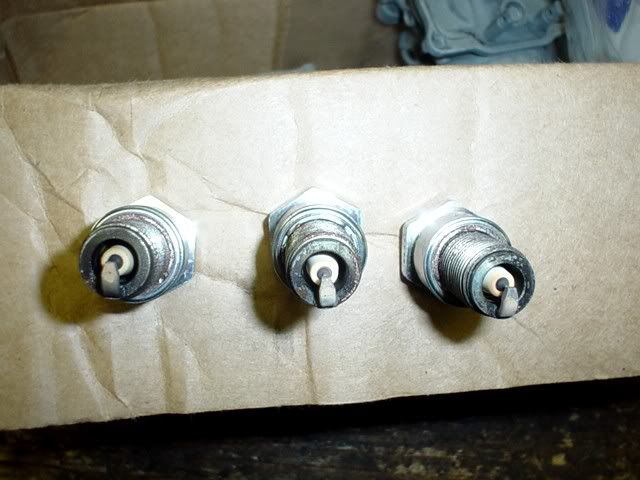
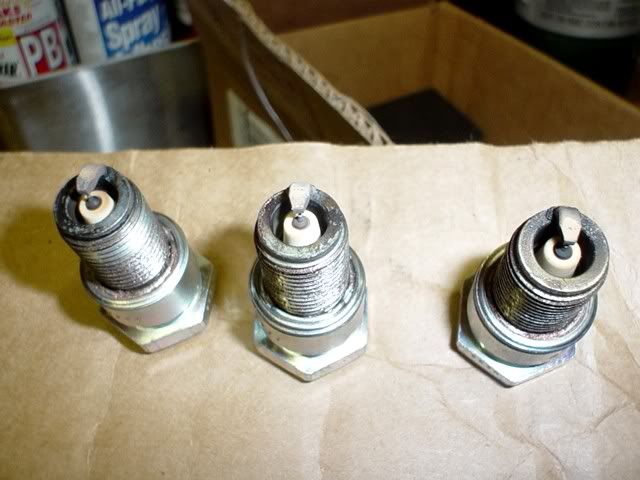
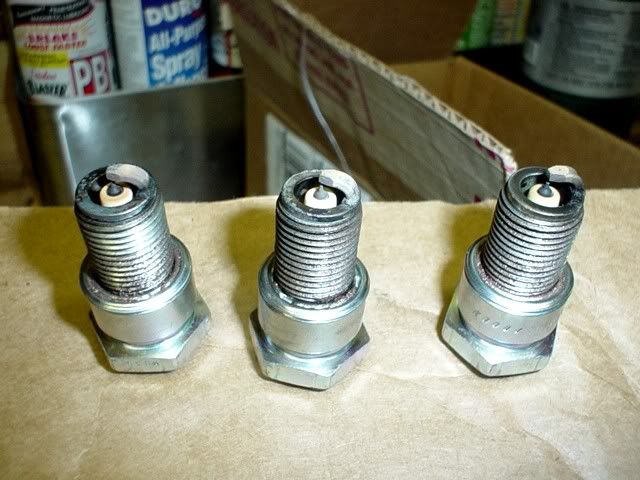
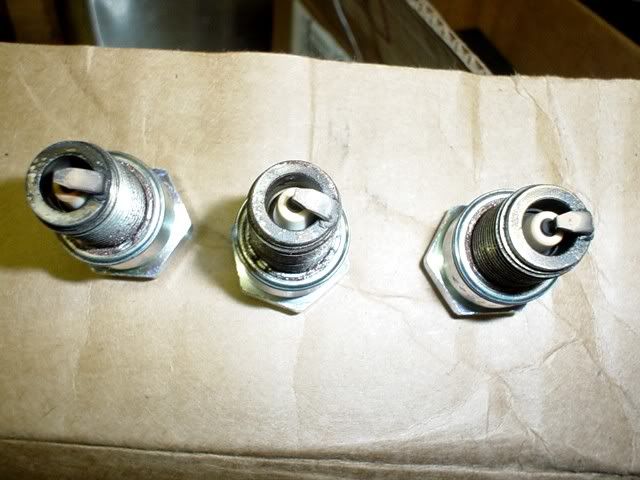
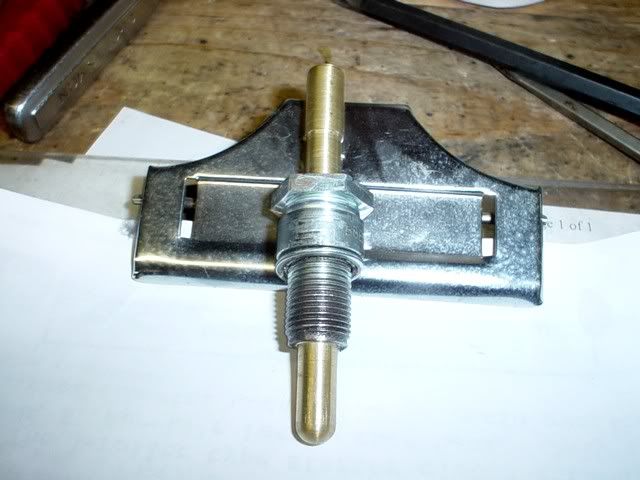
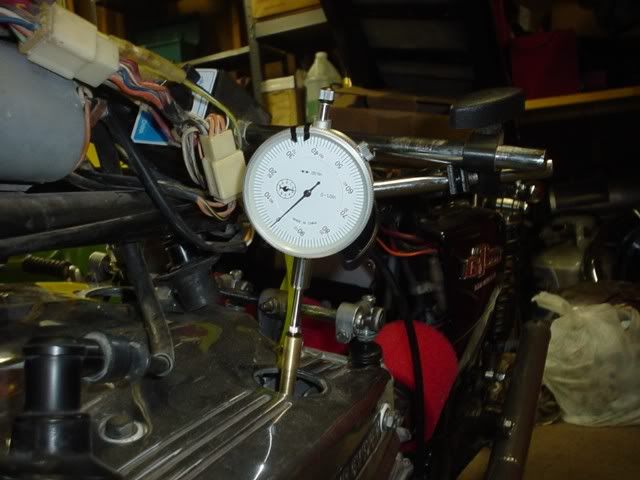
Here is the spark plug adaptor I made to measure the timing.
And a picture of the dial guage at TDC.
Posted: Tue Jun 16, 2009 2:47 pm
by jaybob
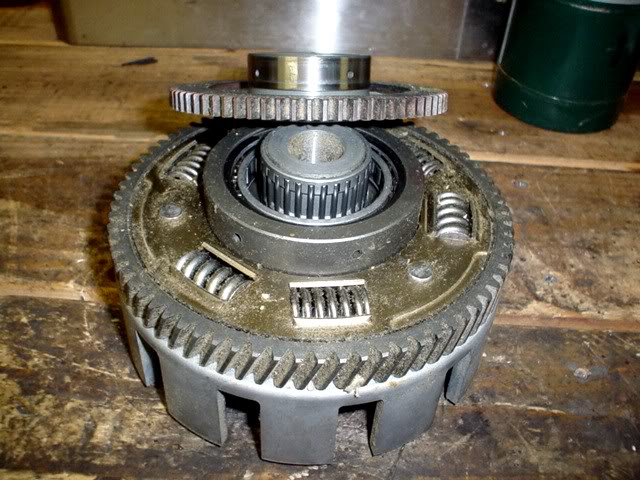
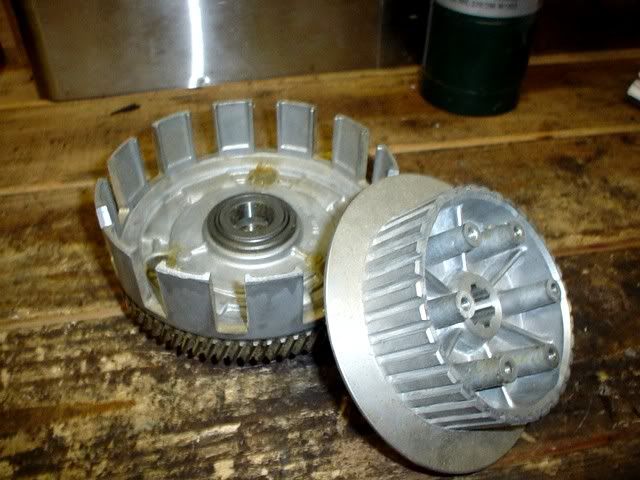
New starter clutch awaiting install
Posted: Tue Jun 16, 2009 2:49 pm
by jaybob
Posted: Tue Jun 16, 2009 3:20 pm
by tz375
Jason,
Ignore the tips, they don't tell you much about mixture. The tips tell you that they stayed very clean and there's no obvious signs of overheating on the elctrodes that i can see from those pictures.
The place you look for mixture is the narrow ring at the bottom (looking down into teh plug) where the insulator meets the steel case. That's where you want to see a light brown or gray color. No color down inside the plug= too lean.
Posted: Tue Jun 16, 2009 5:28 pm
by jaybob
I can't see much of anything on the insulator at the bottom. I think I am going to bump up one more size and see.
Posted: Tue Jun 16, 2009 8:05 pm
by CJF
[quote="jaybob"]Here is the spark plug adaptor I made to measure the timing.
And a picture of the dial guage at TDC.
[/quote
How did you make the brass piece on the timing tool? Did it require a lathe?