I was a little concerned initially about the possibility of the block warping under the heat but I feel fairly confident there is enough mass to act as a heat sink since the spigots where only milled enough to change the angle. D&D is performing the work and this is right up their alley and I have great confidence in them. We did discuss that the block might be pre-heated to minimize the risk but I dont know if that was necessary in this case.
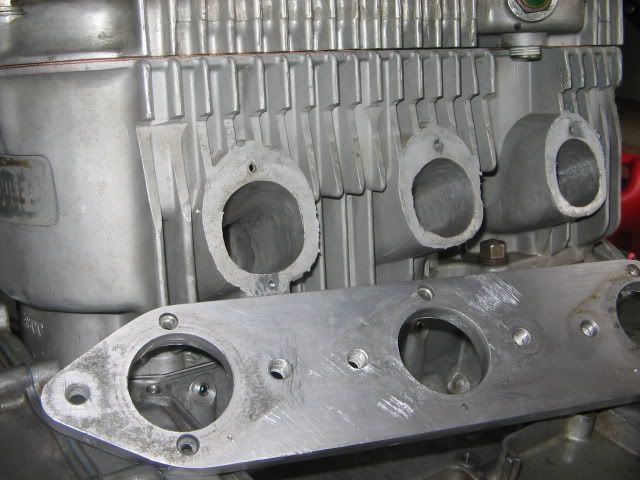
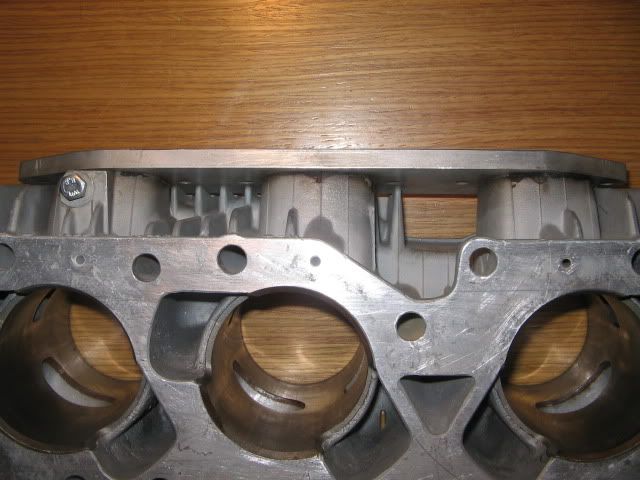
You can see that we identified several problems with the mounting configuration of the carb adapter plate. There were too few bolts, all undersized and poorly positioned to support the weight of the 38mm carbs. So the bolts stripped out of the block.
I studied the images of your reed-block and see that the reed were positioned deep into the back of the block...much closer to the sleeves then my adapter plate so I could understand your block moving a bit under the welding process. I think the reeds also required a great deal more welding too so there was a lot more heat that need to be disipated on the reed-block but, all that said, you bring up an excellent point and I will need to verify that the bore is still straight before I go charging ahead.
I dont have the block back yet...but when it comes, I have also geared up to perform some additional intake porting work to lower the floors about 4mm whcih will bring the intakes (dimensionally) to the TR750 porting specs. I have not trimmed the piston skirt...in place of removing the intake bridge picking up additonal intake volume, though I made the adjustment on the roof and floors to be very close to the same port "timing" (as if the skirts were trimmed). I will take several pics of the work and hope to clean up some of the rougher porting work originally done on the intake tracts.
The way i understand it is that the closer teh reeds, the more they are able to respond to pressure changes. In other words, they open and close faster for more power and a more responsive motor.
That's correct. The farther away the reeds are from the piston adds volume between the reeds and piston. There is more "give" the larger the area. (or volume) So the vacuum (and pressure) has to be at a higher point to open/close the reeds, which translates to a "lag" in the reed opening/closing.
Once you get into higher RPMS's milliseconds can make a big difference in power production.
On most of my kits, the tips of the reeds are curved to clear the pistion....
Just an update on some chassis upgrades...to help launch the bike a bit better.
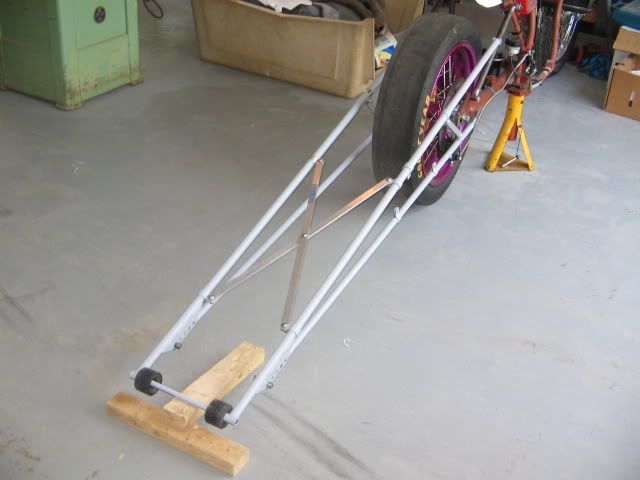
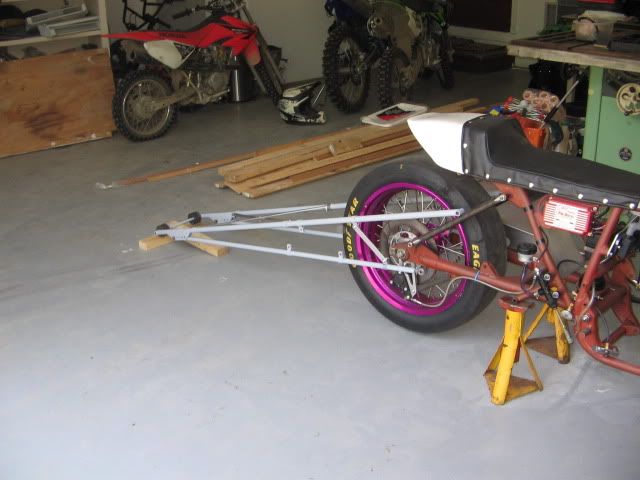
I won these bars on ebay for about $80. Stipped the paint with Aircraft Paint Stipper from a spray can and found some rust forming under the paint. With a lot of elbow grease, I cleaned up the rust and sprayed with a Self-Etching Primer. Replaced most of the hardware and bought new vertical braces from Pingel. I set the wheelie bars in place to determine where the mounts will be added to the swingarm and struts. It ended up being a nice set of bars for about $100 bucks.
I dont like the location of the upper bar in the middle of the strut but thats where it will go for now. Evidently, the bars will help launch much more aggessivley and improve the 60FT ET's. One more thing I can cross off the list.
Last edited by water cooled on Fri Jul 24, 2009 6:32 am, edited 1 time in total.
That's looking good. Next thing is you will be asking for more power and then a wider wheel and then a lighter chassis and then..... Where does it all end?
Two weeks to Indy. Will the barrels be back in time?
I've been quietly collecting parts for the lighter chassis and bigger wheel but I needed to finish off the stocker-chassis and iron out a few more things before I convert everything over.
I spoke with D&D this week and the intake welding is complete and should be on its way back to me next week. Dave at D&D has been terrific. The cylinder head should be done too. I'll take care of lowering the intake floors and get the engine back in the bike fairly quickly.
Between the work on the engine block, cylinder head, adding bars and antoher sprocket change, I'm hoping to see decent gains at Indy...
The welding turned out fantastic...D&D Chassis did a great job welding the plate through the inside of each port. The old bolt holes were filled in and the carb-plate was milled flat. They really produce high quality work. I have a little porting work I want to do also to lower the intake floors slightly and then I'll start reassembly this weekend. The head should be done later today.
That looks like a significant improvement and should make quite a difference to performance and reliability. It takes a while to iron out the bugs on a new bike, especially when there are not too many opportunities to run it.
I'll keep my fingers and toes crossed for you for the Indy race meeting next weekend
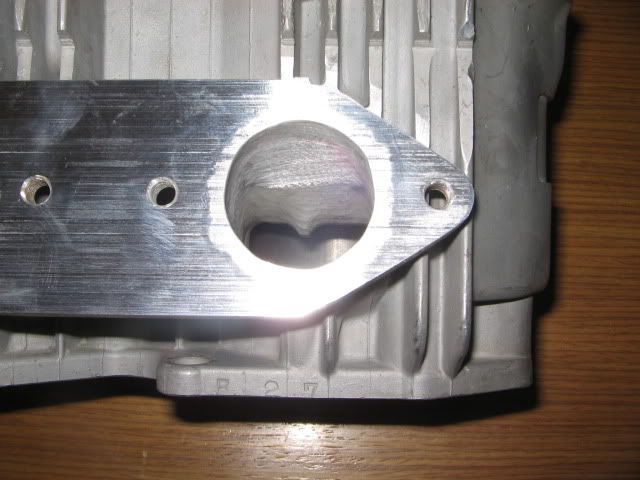
Just got the head back a few minutes ago. Spot faced all the 8 and 10mm bolt surfaces and removed an addtional .025inch (.040inch total) off the surface which eliminated the cylindrical lip leaving only the full diameter dome which will be in contact with the copper head gasket.
Sorry to ask this if its something you have already checked Kevin , but with the head surfaceing have you checked to make sure the head bolts dont bottom out in the step in the block before they tighten down ?
That's a great question since I only intended to remove .015 off the head. The head was warped and the shop ended up taking off .025 which just eliminated the lip. My piston clearance should be the thickness of the copper gasket at .034inch. My 10mm bolts are not stock GT750. I think Lane accurately identified them from either a 500 or 550...cant remember but should be even more reason to verify the dims.
I can solve the rod stretch issue by installing a slightly thicker lift plate under the block. For the bolt issue, I can either trim the 10mm ends or see if I can locate the equivalent of gr8 spacers to replace the stock flat and lock washers to gain back what was lost on the head. I should be able to measure tonight. Anyway...thank you for bringing that up. I will check and verify.
I set all the 10mm bolts in place with the copper gasket installed and all sat flat against the head with no wahsers...so I think we are going to be ok.
\