That's good info. Thanks. Was typing my response below as you posted yours... So, to continue learning new stuff, I shall post it anyway.
Figured it out... I think.
Those numbers, 97.5 and 95 are 97.5/1000 of an inch and same for 95.5.. so, .0975" and .095" diameters for these bikes... Also, if I am reading correctly, the clip position should be setting 4, correct?
It's a GT550L
'74 GT550 rebuild - Project Gaki
Moderators: oldjapanesebikes, H2RICK, Suzsmokeyallan
-
blurred
- On the street
- Posts: 35
- Joined: Sat Feb 28, 2015 1:47 pm
- Country: USA
- Suzuki 2-Strokes: YZF600
Re: '74 GT550 rebuild - Project Gaki
Last edited by blurred on Fri Mar 20, 2015 7:18 pm, edited 1 time in total.
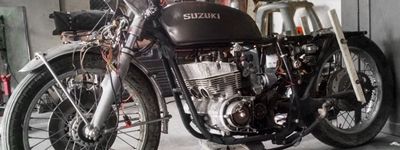
1974 Suzuki GT550 project
Hard-tail setup of engineering genius
Hard-tail setup of engineering genius
-
ConnerVT

- Novice racer
- Posts: 963
- Joined: Wed Jan 18, 2012 8:01 pm
- Country: USA
- Suzuki 2-Strokes: T500R (now), T500M (40 yrs ago)
- Location: North of Albany, NY
Re: '74 GT550 rebuild - Project Gaki
Dennis Kirk sell Mikuni jets in packs of 2. Cheap shipping (USPS) on small orders, too.
-
jeff g
- On the main road
- Posts: 118
- Joined: Tue Oct 14, 2008 3:13 pm
- Country: USA
- Suzuki 2-Strokes: GT550 -- 1 running, 4 not, '80 TS185
- Location: Stroudsburg, PA
Re: '74 GT550 rebuild - Project Gaki
It would be really nice if the jet sizes were that simple...but they aren't. I think it's a flow rate, but I'm not sure. Clip goes in position 4.blurred wrote:That's good info. Thanks. Was typing my response below as you posted yours... So, to continue learning new stuff, I shall post it anyway.
Figured it out... I think.
Those numbers, 97.5 and 95 are 97.5/1000 of an inch and same for 95.5.. so, .0975" and .095" diameters for these bikes... Also, if I am reading correctly, the clip position should be setting 4, correct?
It's a GT550L
You need this... http://www.mikuni.com/pdf/vmmanual.pdf The GT550L uses VM carbs...they are just mounted to a common rack.
-
tz375

- Moto GP
- Posts: 6204
- Joined: Mon Nov 03, 2008 10:47 am
- Location: Illinois
Re: '74 GT550 rebuild - Project Gaki
Jeff is correct. Most jets are rated in cc/min of flow at a certain pressure differential across the orifice. That applies to all Hex jets.
Large ROund Jets and small round jets are numbered in fractions of a mm, so 125=1.25mm, 80=0.80mm and so on. The cross sectional area and flow are proportional to DiameterxDiameterxPi/4 so double the size for 4 times the flow (more or less).
On my bike, I went from 110 to 122.5 (round) or the equivalent of 140 to 175 which is almost 25% increase in flow.
You gots to know what jets you are talking about... So to speak.
In the case of the 550, I think they are round jets.
-
blurred
- On the street
- Posts: 35
- Joined: Sat Feb 28, 2015 1:47 pm
- Country: USA
- Suzuki 2-Strokes: YZF600
Re: '74 GT550 rebuild - Project Gaki
Yes, they are round jets.
I'm going to have to pull the ones I installed and figure which is needed and which is not. If anything, I'll just find the jets and purchase them separately like someone mentioned on here.
However, everything with the bike is on hold. I was getting side-tracked with it and neglecting to finish a project that I have been working on for about 5 months now.
Once the truck is back together, then I will really be tearing into this.
Until then, I am ordering some odds and ends and getting a parts pile going. Right now, I have new spark plugs, new engine gaskets and a new petcock.
1974 Suzuki GT550 project
Hard-tail setup of engineering genius
Hard-tail setup of engineering genius
-
blurred
- On the street
- Posts: 35
- Joined: Sat Feb 28, 2015 1:47 pm
- Country: USA
- Suzuki 2-Strokes: YZF600
Re: '74 GT550 rebuild - Project Gaki
So, I have moved forward... kinda.
I call this my stage 3 weight reduction. Bike should be super fast now!!

Here's some of the inside of the engine:
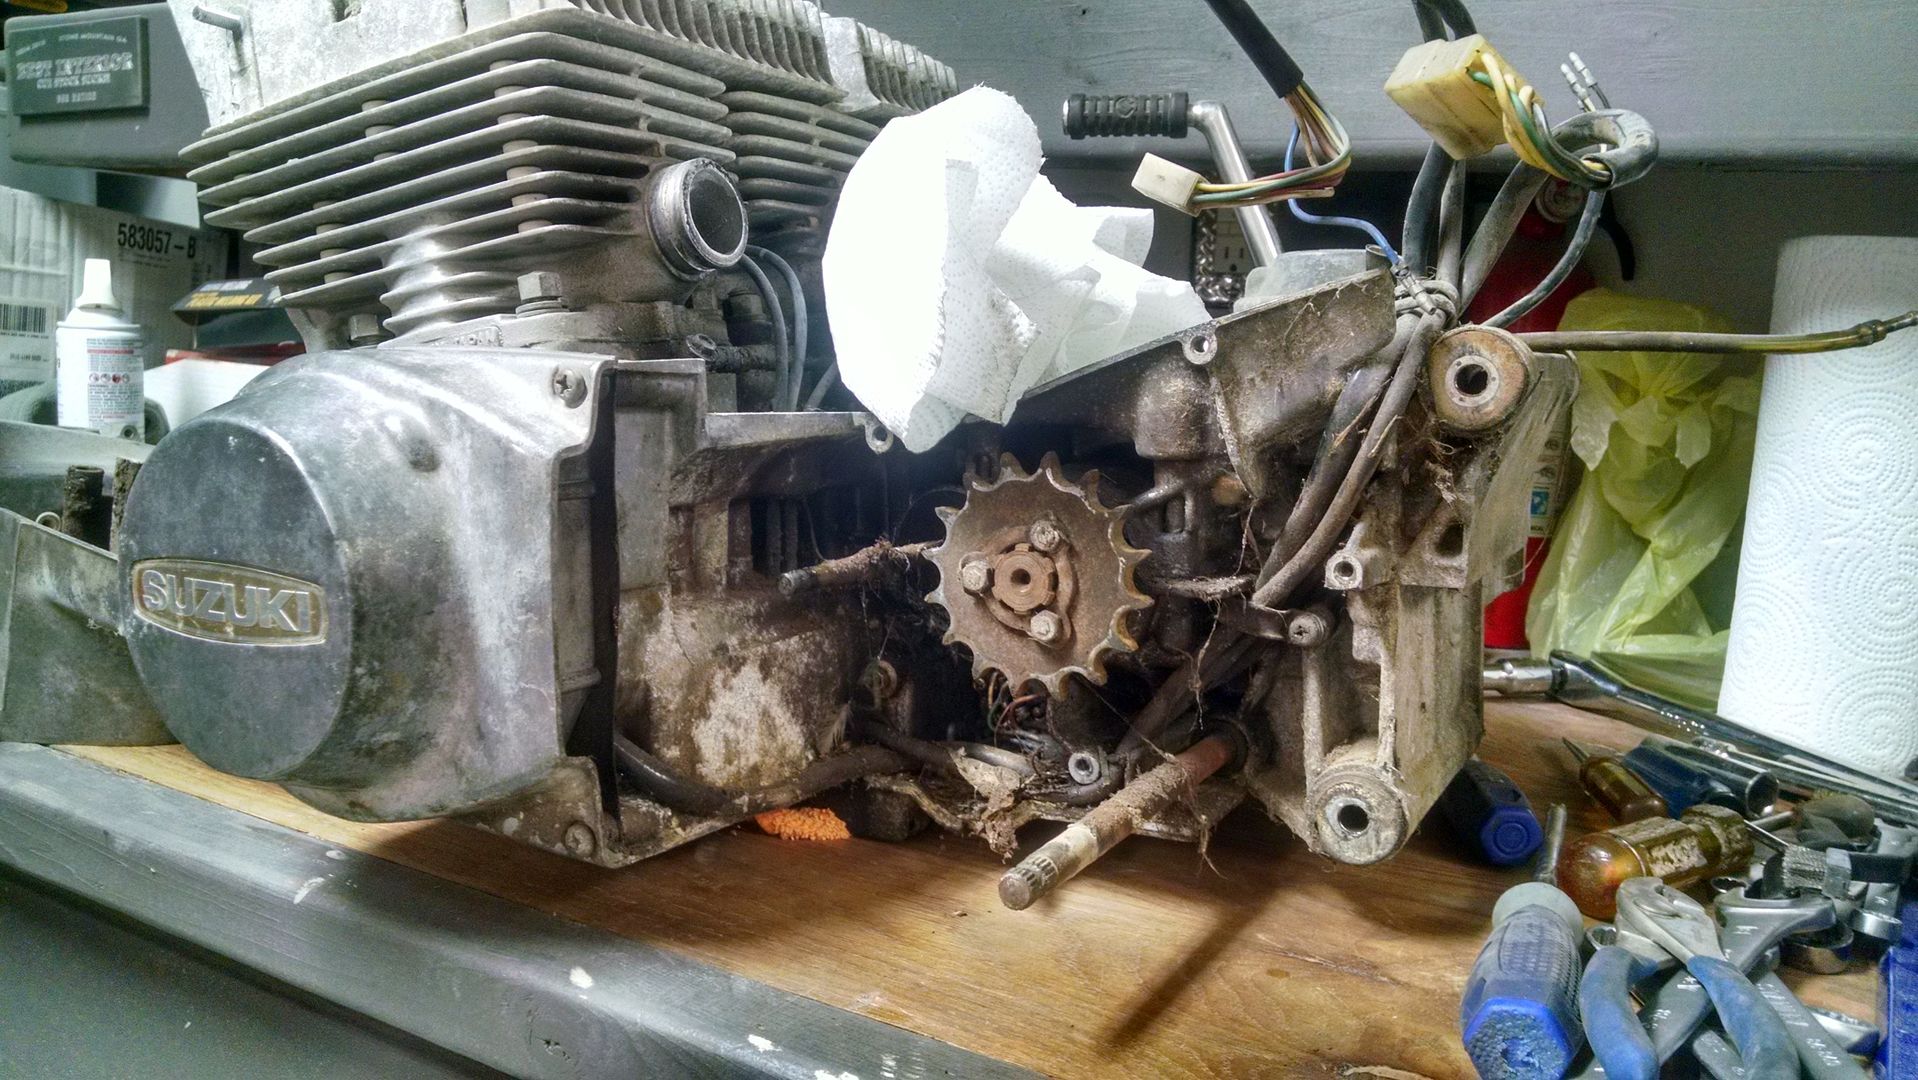
So far, everything I have seen from taking off the covers moves and spins freely...
It's just dirty. I found a walnut in the housing for the chain. Also, a ton of spiders. Was wondering where those boogers came from since I had never had an issue with them in the garage until recently. Now I know why.
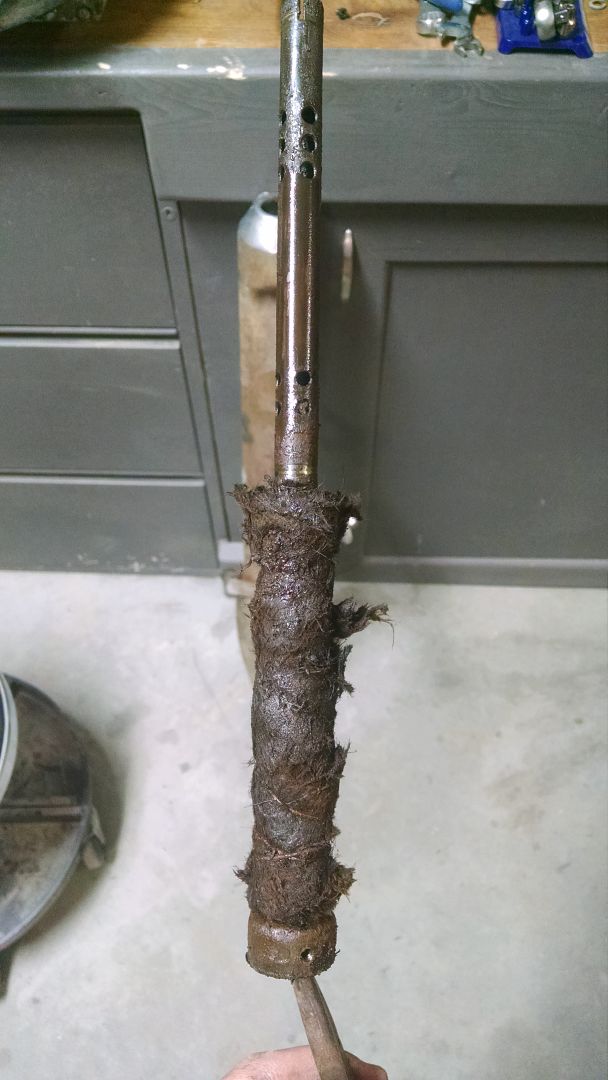
Pulled the baffle out of one of the mufflers... pretty sure this needs replaced.
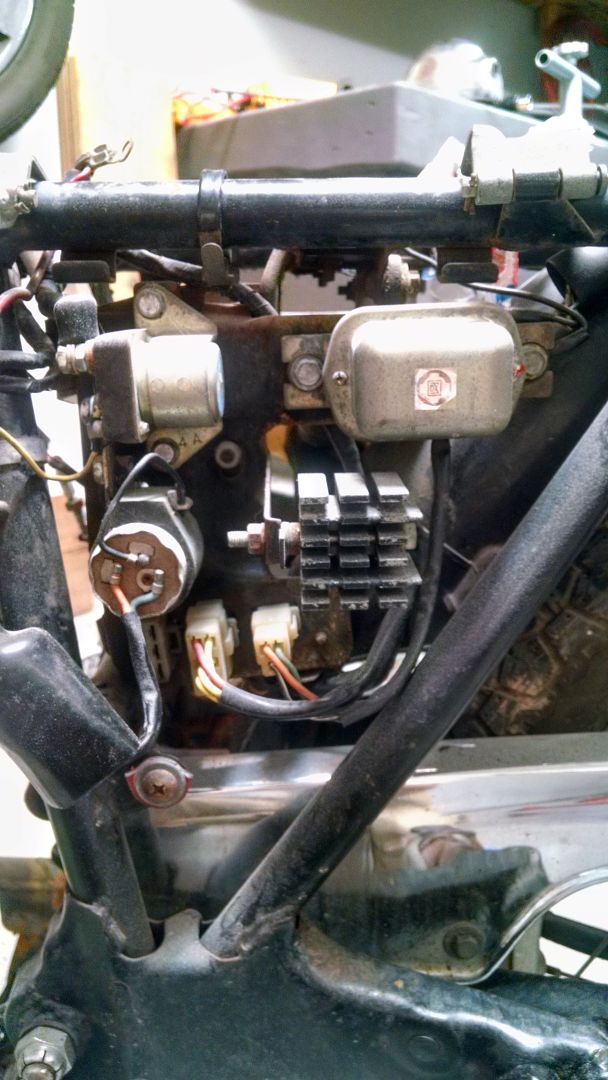
Lastly, would anyone be so kind to identify what each of these components are/do? I've searched for a diagram listing them, but haven't found anything.
So, I have the engine out and will be opening it up soon. I have all the gaskets here along with a new set of plugs. The proper main jets are on the way along with a new petcock and adapter plate.
Once the main jets get in, going to place the old 5DH21 needles back into the slides and remove the Y49(I believe that is the number from the kit) and then do all the settings for those.
I call this my stage 3 weight reduction. Bike should be super fast now!!
Here's some of the inside of the engine:
So far, everything I have seen from taking off the covers moves and spins freely...
It's just dirty. I found a walnut in the housing for the chain. Also, a ton of spiders. Was wondering where those boogers came from since I had never had an issue with them in the garage until recently. Now I know why.
Pulled the baffle out of one of the mufflers... pretty sure this needs replaced.
Lastly, would anyone be so kind to identify what each of these components are/do? I've searched for a diagram listing them, but haven't found anything.
So, I have the engine out and will be opening it up soon. I have all the gaskets here along with a new set of plugs. The proper main jets are on the way along with a new petcock and adapter plate.
Once the main jets get in, going to place the old 5DH21 needles back into the slides and remove the Y49(I believe that is the number from the kit) and then do all the settings for those.
1974 Suzuki GT550 project
Hard-tail setup of engineering genius
Hard-tail setup of engineering genius
-
pearljam724
- AMA Superbike
- Posts: 1681
- Joined: Tue Jul 24, 2012 11:45 pm
- Country: U.S.
- Suzuki 2-Strokes: 75- GT 550 / 76- GT 750
- Location: SW PA
Re: '74 GT550 rebuild - Project Gaki
The baffle pictured, is actually in great condition. The electrical parts you asked about in your picture. Upper left hand corner= starter solenoid. Transfers electric to start motor once start button is pushed. Upper right = Regulator. Works in conjunction with the rectifier to maintain a full battery charge. Lower left = signal flasher relay. Transfers electric to signal bulbs when turn signals are tuned on via the switch. Lower right = rectifier. Pull all connectors apart, push pins down to unlock terminals inside the sockets. After you push down locking tabs. Remove and clean terminals with something abrasive and spray clean. Avoids, wire over heating due to dirt, oxidation, etc. These bikes are dependent of clean electrical connections. Remember to raise locking tabs on terminals, before you replace them into sockets. Otherwise, they won't lock into place losing electrical contact. It's wise to also use generous amount of die electrical grease on all pins after cleaning.


-
blurred
- On the street
- Posts: 35
- Joined: Sat Feb 28, 2015 1:47 pm
- Country: USA
- Suzuki 2-Strokes: YZF600
Re: '74 GT550 rebuild - Project Gaki
Sweet, thanks for the info!
1974 Suzuki GT550 project
Hard-tail setup of engineering genius
Hard-tail setup of engineering genius
-
blurred
- On the street
- Posts: 35
- Joined: Sat Feb 28, 2015 1:47 pm
- Country: USA
- Suzuki 2-Strokes: YZF600
Re: '74 GT550 rebuild - Project Gaki
Alright, so a bit of an update.
I have the carbs rebuilt, again. Thinking I am probably going to have to replace the floats due to one bowl on two of the floats caving in a little at some point. Noticed that while I was correcting the needle jets and the jet needles. There's something I need to pick up.
Also, wanted to post and ask, when measuring the float height, do I measure from the lip or the part that the gasket sits on to the top of the float. Based on the manual I have, the photo looked like the lip, measuring 25.75mm to the top of the float but just wanted to make sure. I know about the angle and removing the gasket, just wanted to know where I needed to measure from.
Found that one of the rubber "tubes" that connect the carbs to the engine needs to be replaced. So now I have to purchase that as well.
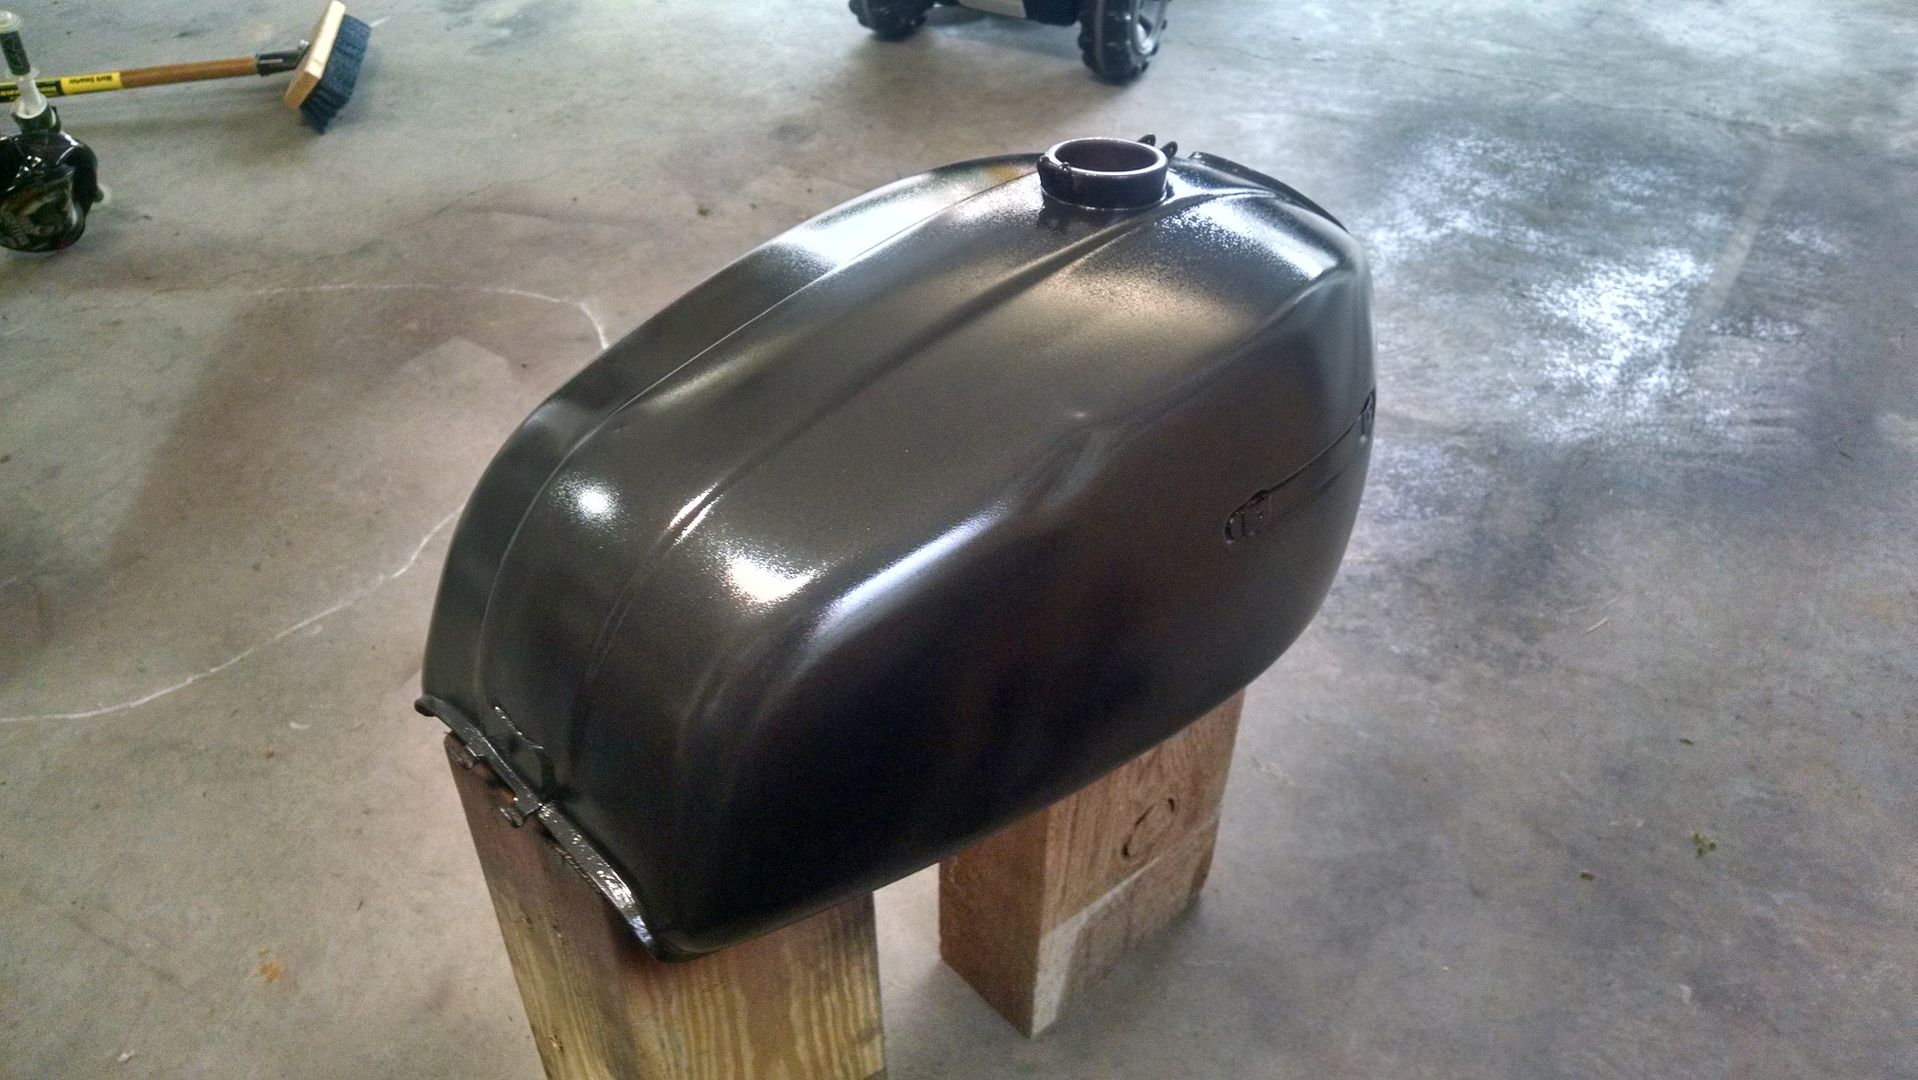
Since I am not spending any money at this particular moment on the bike, I have to just do with what I have at the moment and get it closer to starting/running. So, I messed with the tank, filed out the fuel cock hole and installed the new fuel cock that I picked up along with the adapter kit.
And, I painted the tank just to get the steel covered.
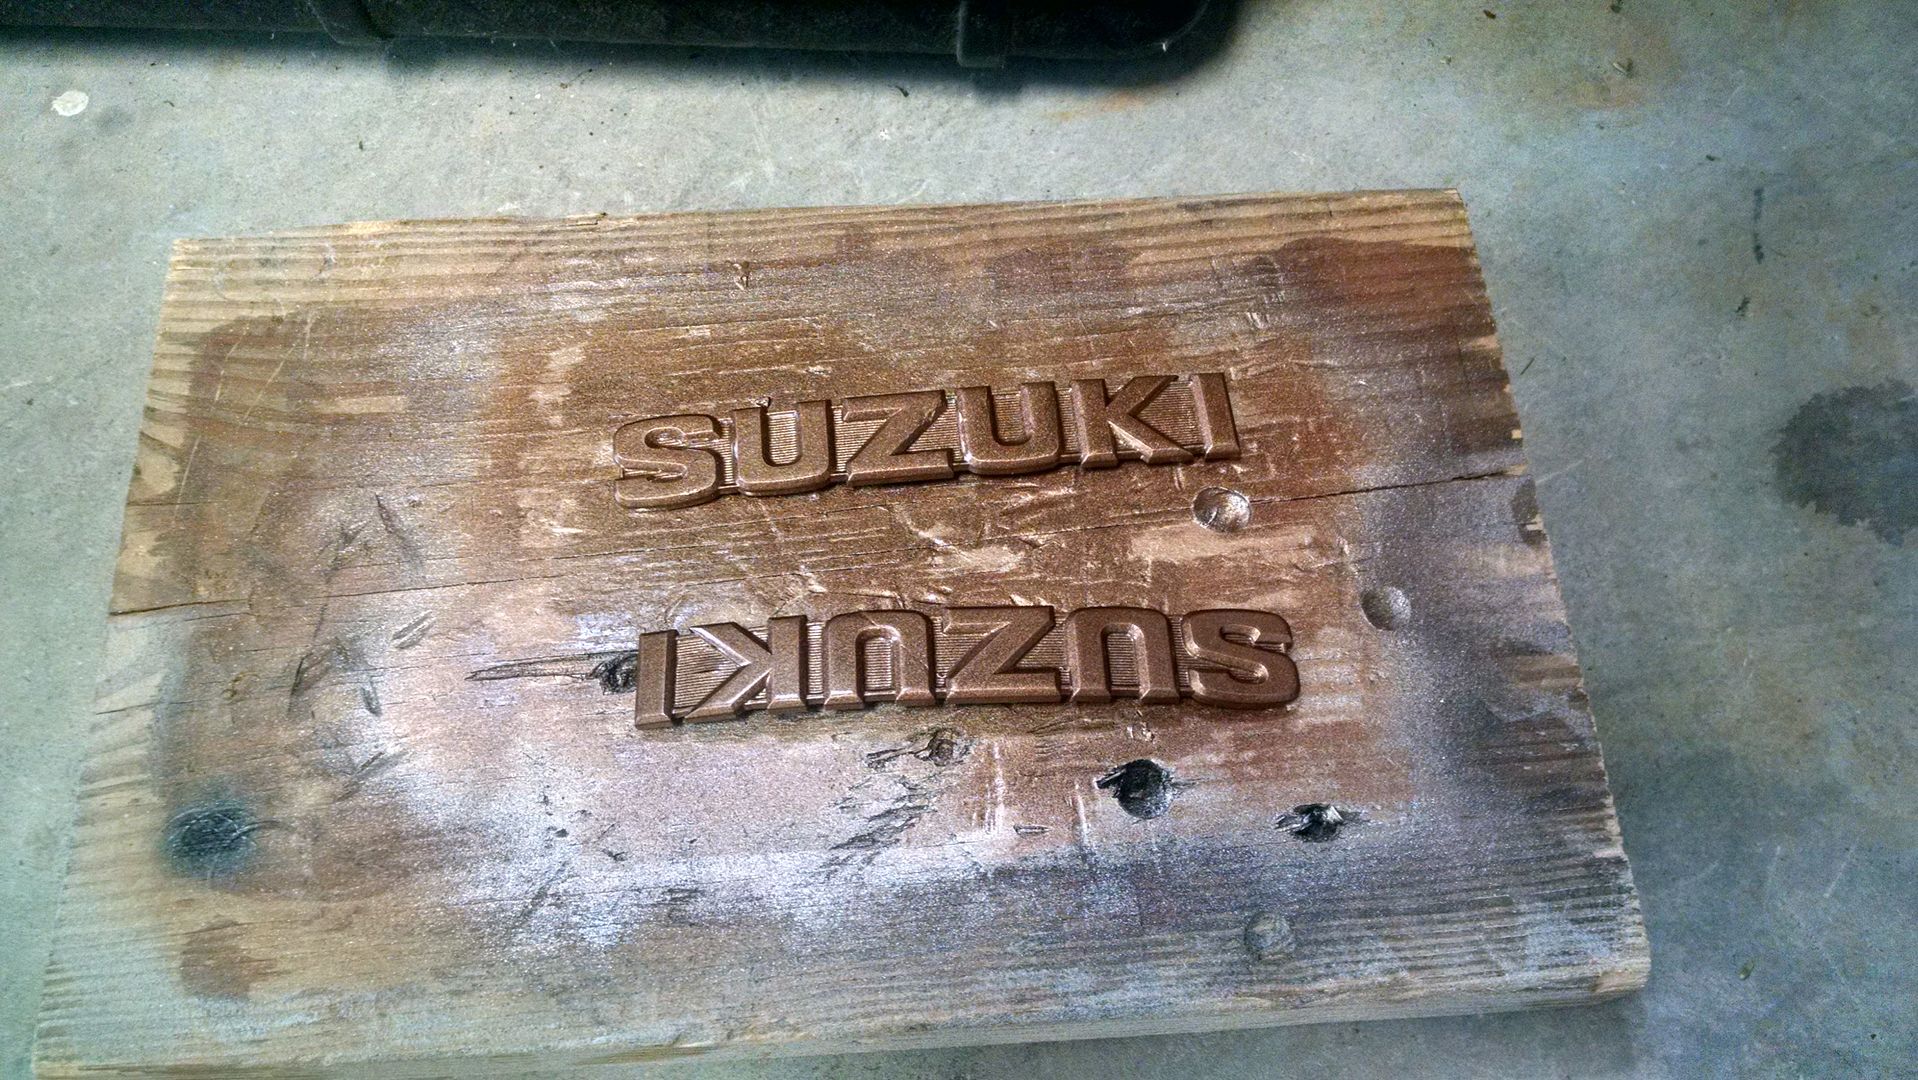
Painted the side logos
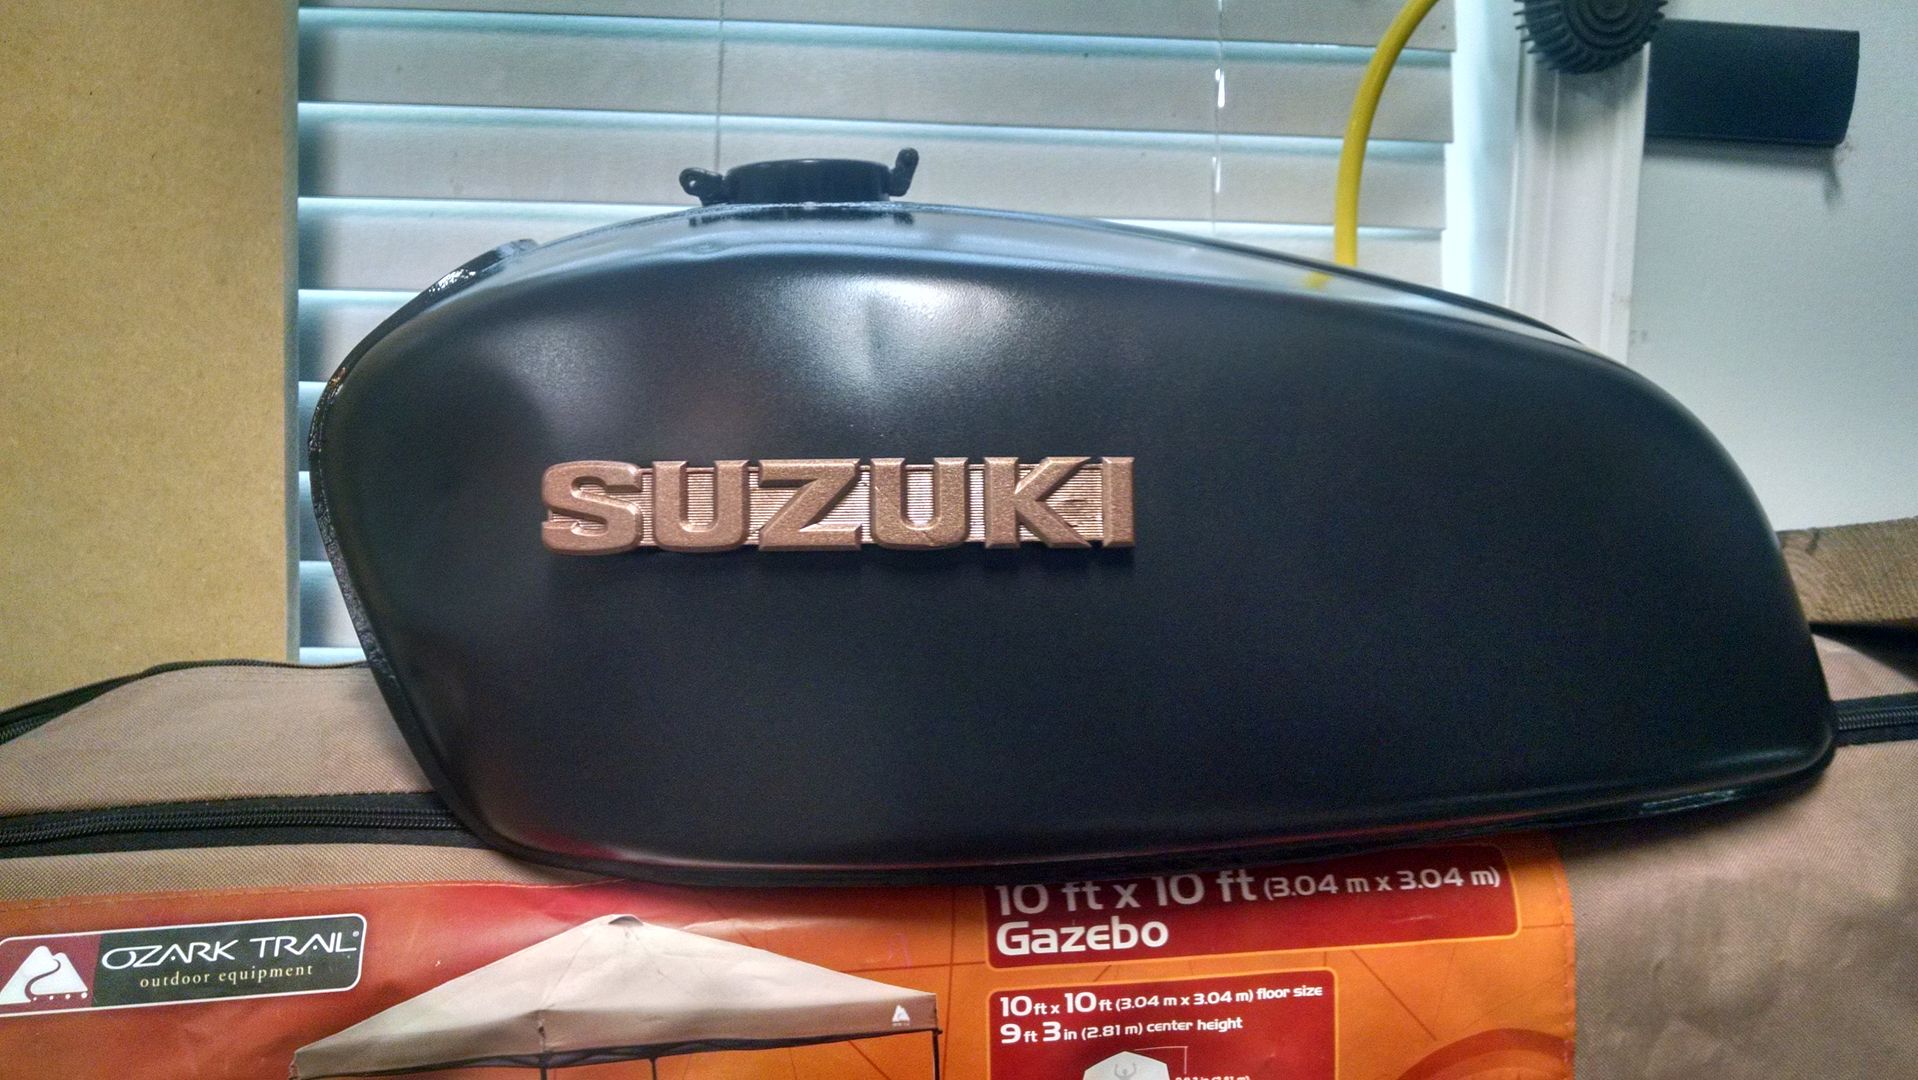
Mounted to see how I liked the combo
Then I pulled the logo off, and started doing some sanding after looking at the tank and thinking... "what if"
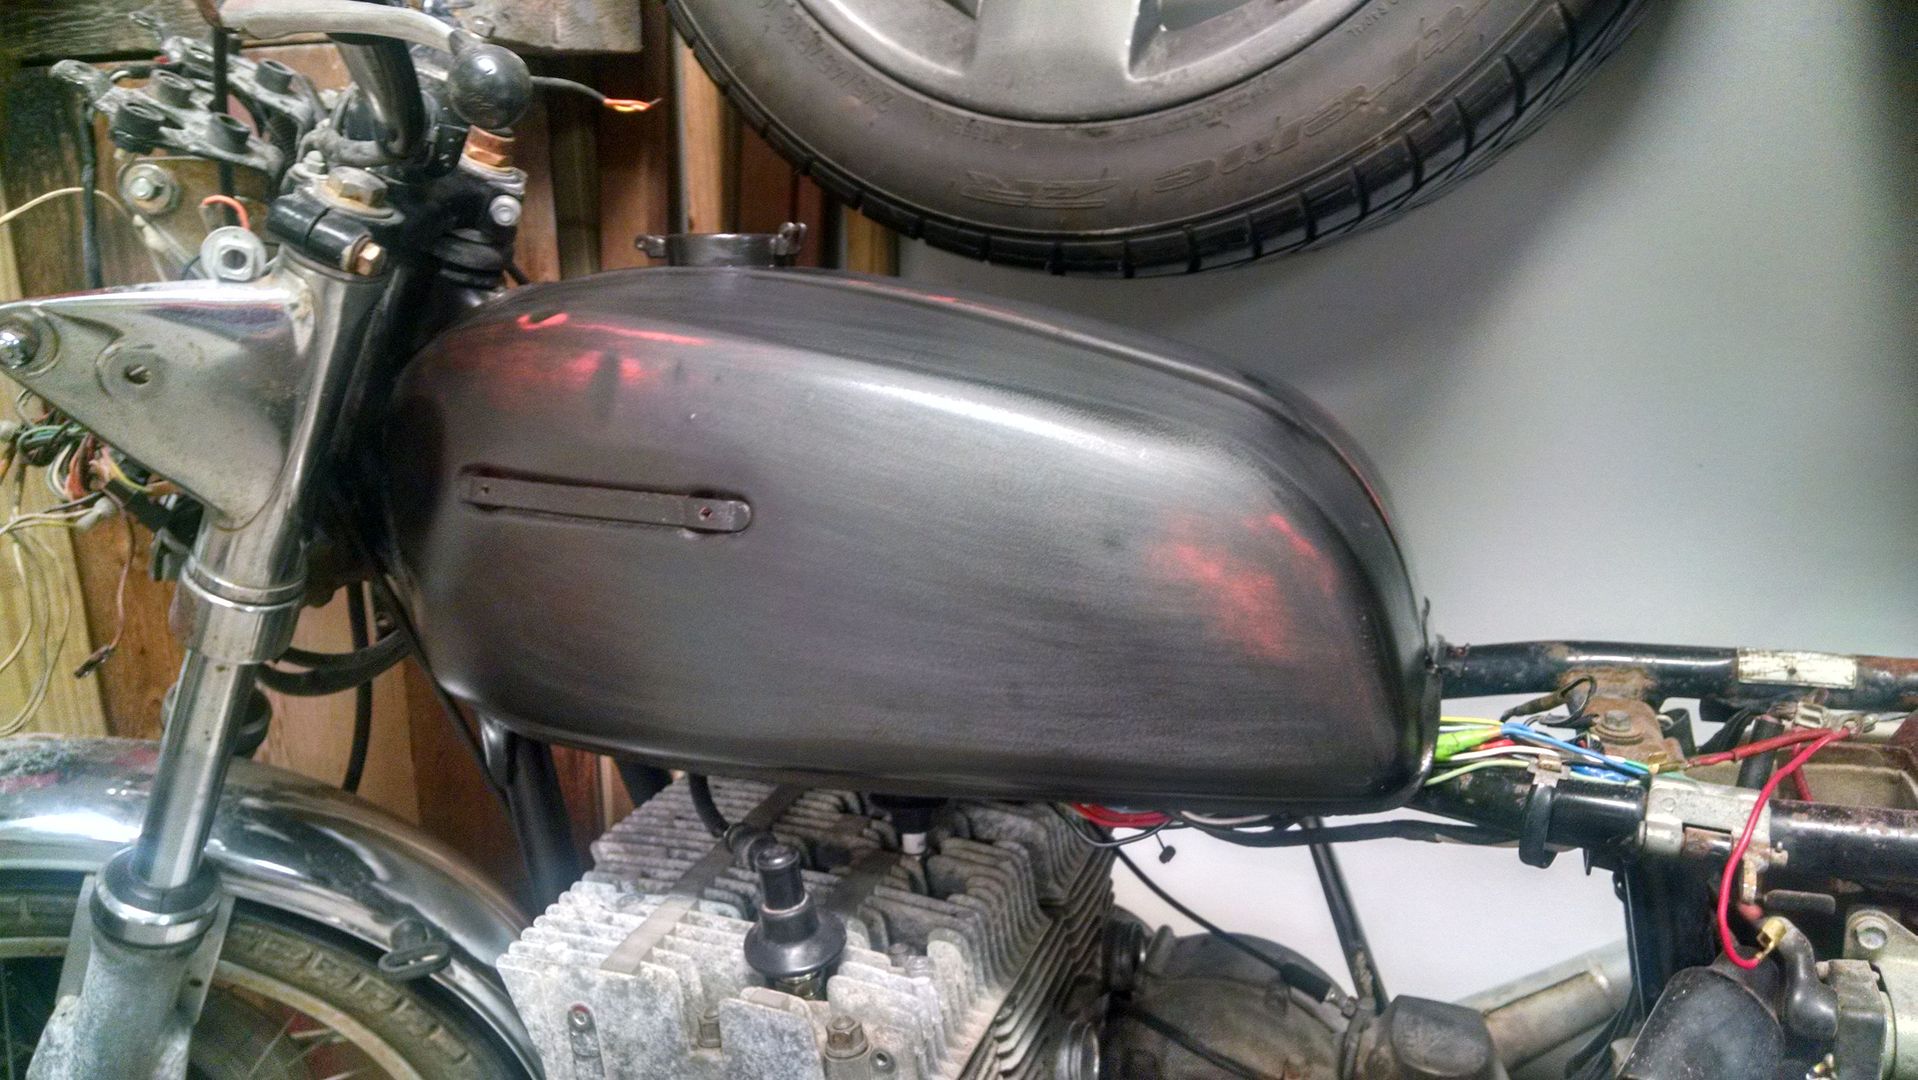
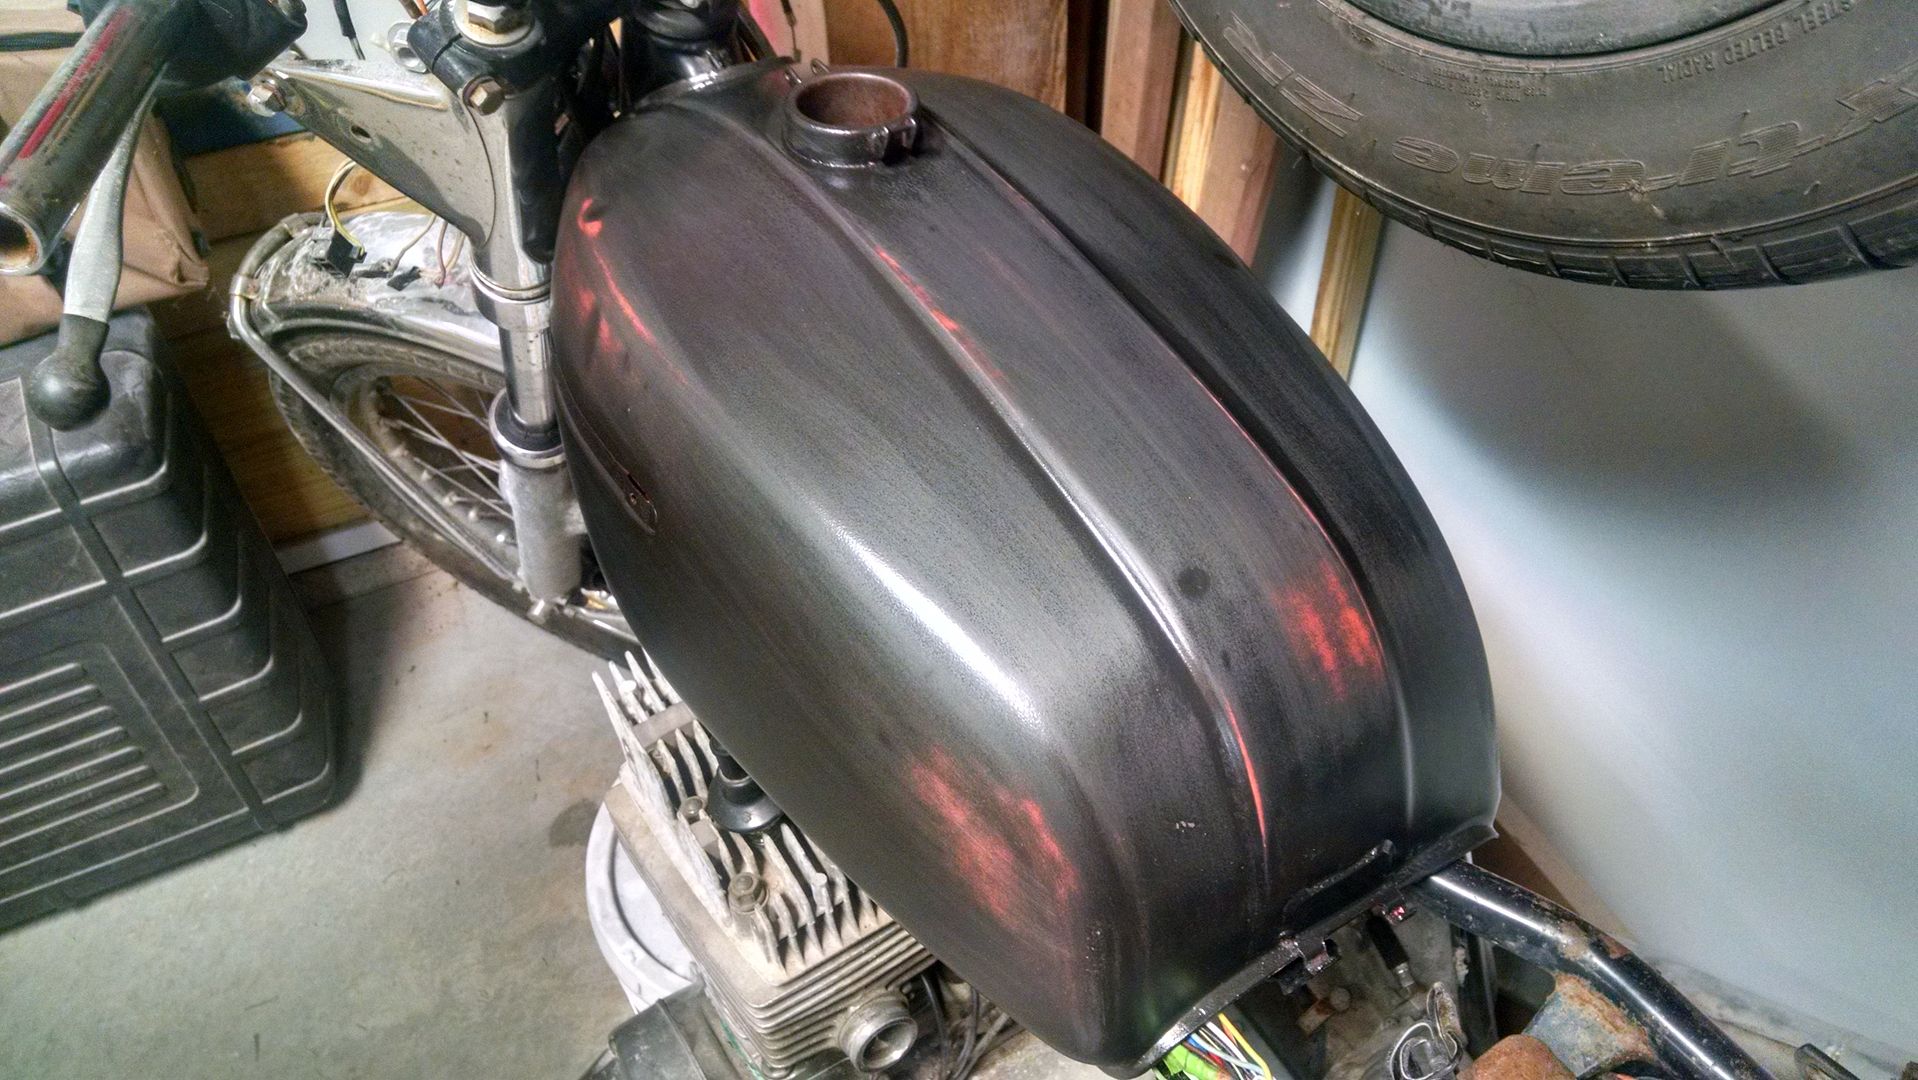
Very pleased with how it turned out. Since the tank has dents and dings on it, a solid, clean paint didn't seem like it belonged to me. This worked well, especially with the colors I had just sitting in my cabinet of random paints.
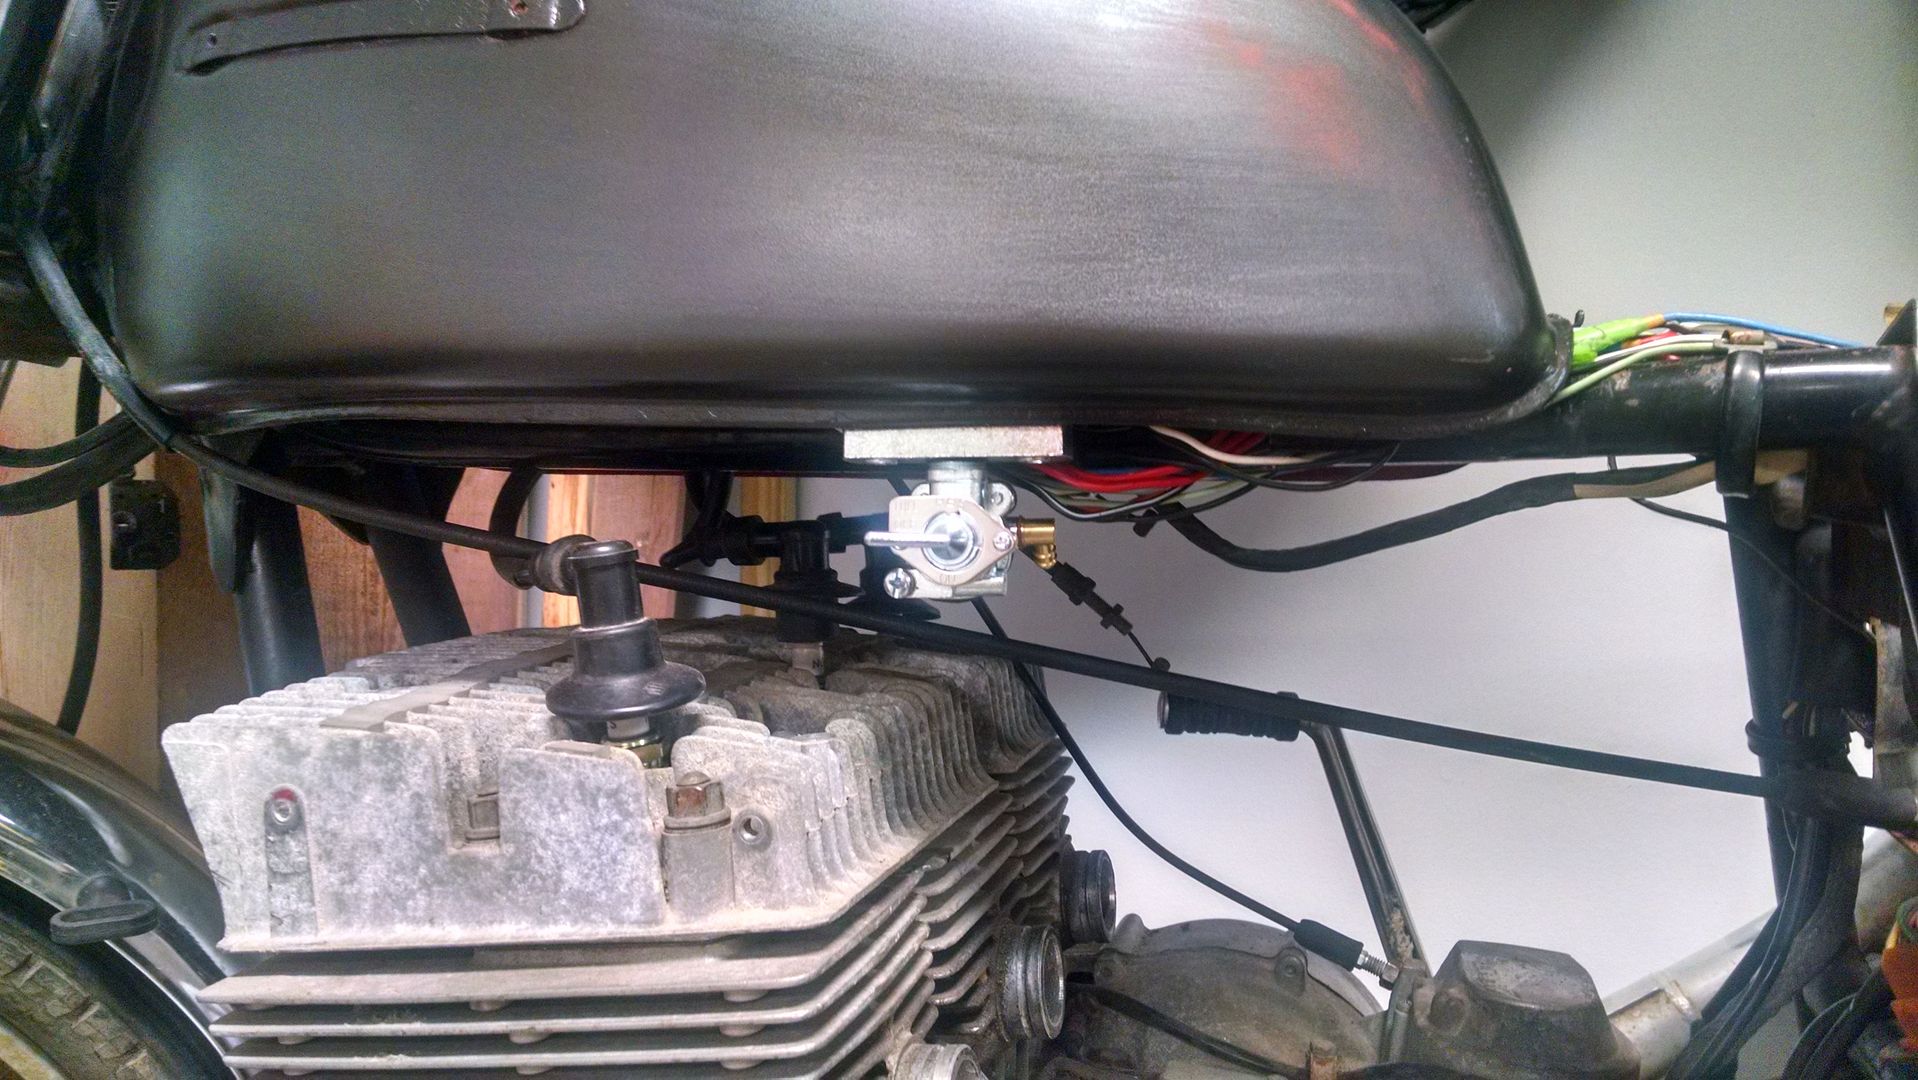
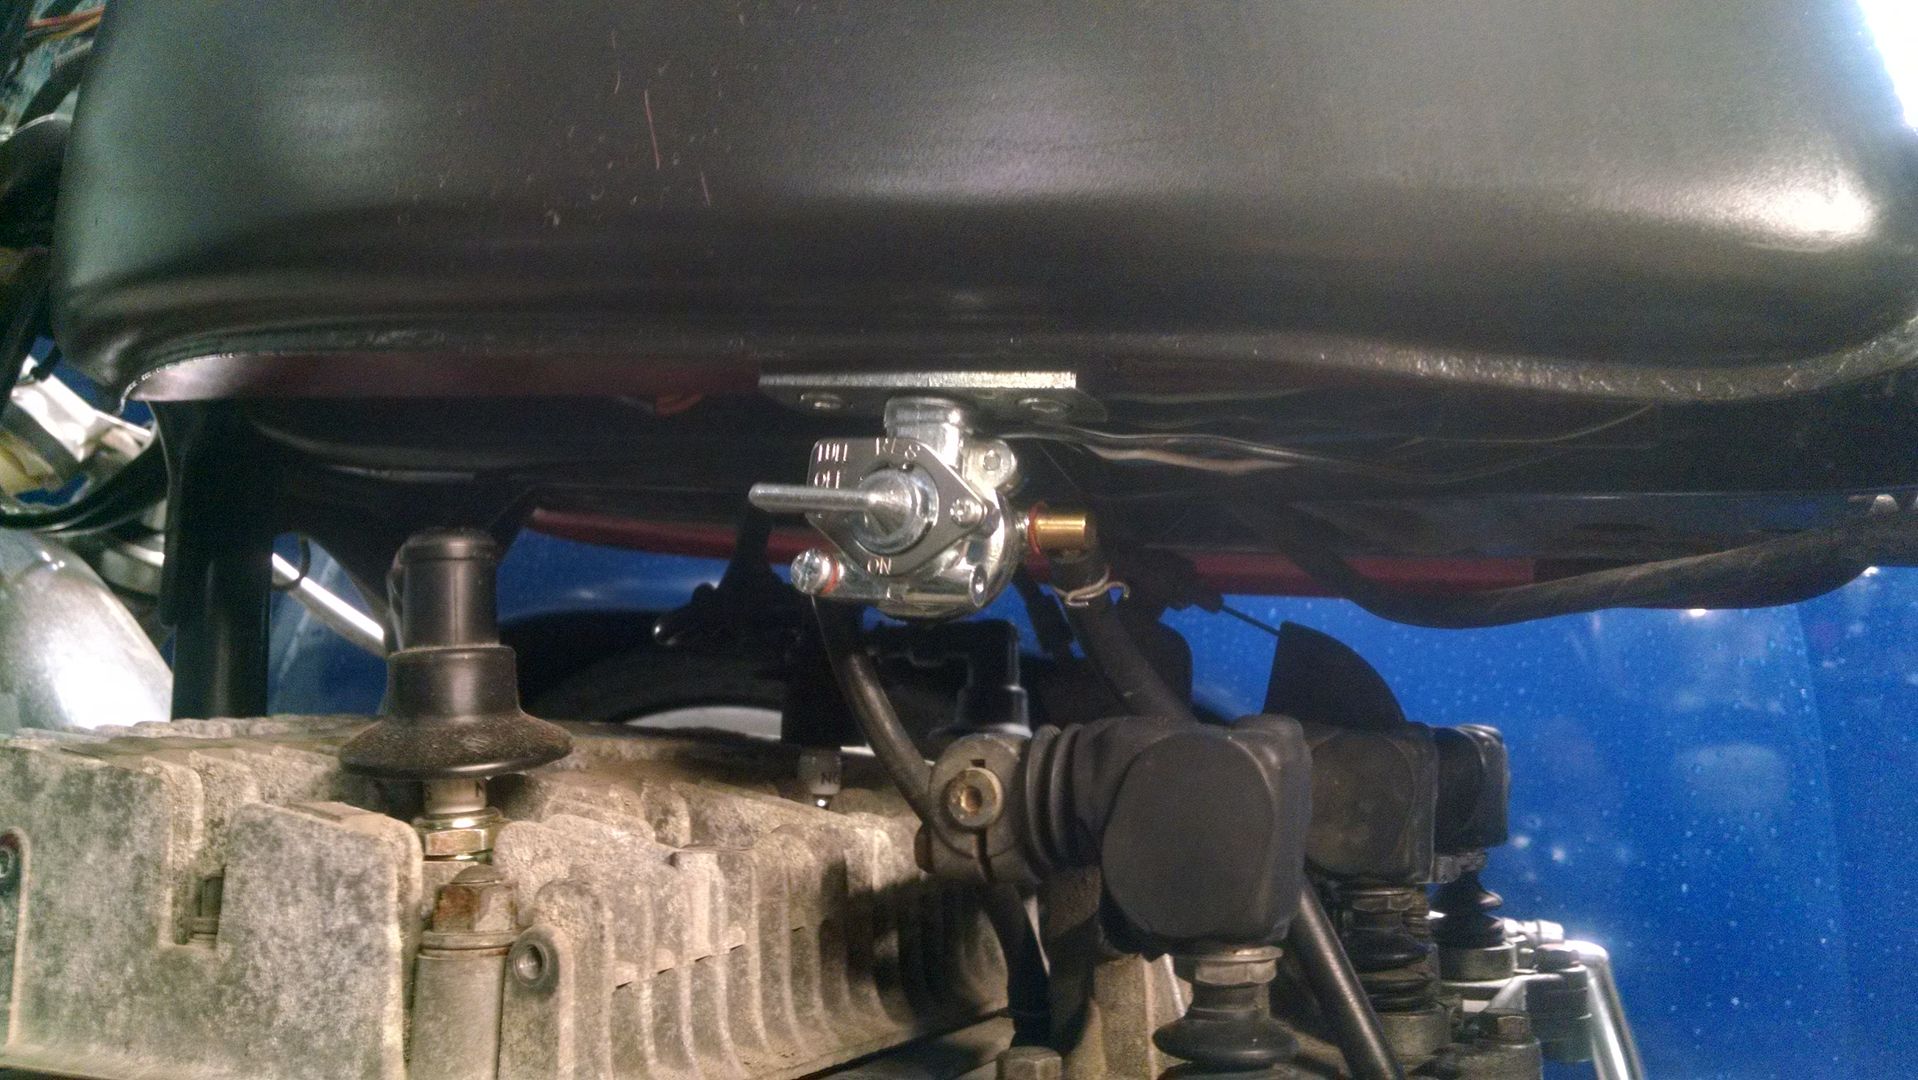
Oh and here's the fuel cock installed, partially. Still have to tighten things up. However, that will happen once I get the engine running and clean out the fuel tank.
I have the carbs rebuilt, again. Thinking I am probably going to have to replace the floats due to one bowl on two of the floats caving in a little at some point. Noticed that while I was correcting the needle jets and the jet needles. There's something I need to pick up.
Also, wanted to post and ask, when measuring the float height, do I measure from the lip or the part that the gasket sits on to the top of the float. Based on the manual I have, the photo looked like the lip, measuring 25.75mm to the top of the float but just wanted to make sure. I know about the angle and removing the gasket, just wanted to know where I needed to measure from.
Found that one of the rubber "tubes" that connect the carbs to the engine needs to be replaced. So now I have to purchase that as well.
Since I am not spending any money at this particular moment on the bike, I have to just do with what I have at the moment and get it closer to starting/running. So, I messed with the tank, filed out the fuel cock hole and installed the new fuel cock that I picked up along with the adapter kit.
And, I painted the tank just to get the steel covered.
Painted the side logos
Mounted to see how I liked the combo
Then I pulled the logo off, and started doing some sanding after looking at the tank and thinking... "what if"
Very pleased with how it turned out. Since the tank has dents and dings on it, a solid, clean paint didn't seem like it belonged to me. This worked well, especially with the colors I had just sitting in my cabinet of random paints.
Oh and here's the fuel cock installed, partially. Still have to tighten things up. However, that will happen once I get the engine running and clean out the fuel tank.
1974 Suzuki GT550 project
Hard-tail setup of engineering genius
Hard-tail setup of engineering genius
-
GT750Battleship
- Road race school
- Posts: 841
- Joined: Tue Feb 19, 2013 2:45 am
- Country: Australia
- Suzuki 2-Strokes: Suzuki GT750A 1976
- Location: Sydney New South Wales
Re: '74 GT550 rebuild - Project Gaki
Hi,with the baffles..strip them of the wadding,this stuff creates more problems with the way the bike breathes,not to mention traps moisture & promotes rust ! as the baffles are very thin in places..make sure they are not about to break when twisted & turned on their way in & out of the pipes,hell  of a job to get out if they break inside the pipe
Cheers,
Roger
Cheers,
Roger
GT750Battleship.
-
tz375
- Moto GP
- Posts: 6204
- Joined: Mon Nov 03, 2008 10:47 am
- Location: Illinois
Re: '74 GT550 rebuild - Project Gaki
BTW, when the carbs were apart, did you clean out the tiny ( 0.60mm) starter jet in the float bowl? Better to get to it now and not have to do it when the bike is assembled. And bench synch the carbs so that all 3 throttle valves start to open at exactly the same time.
There is a picture of the starter jet in that Carb manual that Suzukidave posted a link to earlier.
There is a picture of the starter jet in that Carb manual that Suzukidave posted a link to earlier.
-
pearljam724
- AMA Superbike
- Posts: 1681
- Joined: Tue Jul 24, 2012 11:45 pm
- Country: U.S.
- Suzuki 2-Strokes: 75- GT 550 / 76- GT 750
- Location: SW PA
Re: '74 GT550 rebuild - Project Gaki
You mentioned your floats being caved in a little. That's not a problem. What is, brass floats developed microscopic cracks as they age. Those cracks allow gas to enter. Allowing a float or two to be unbalanced. The floats need replaced or solder repaired if the cracks are minimal. To test for microscopic cracks or pin holes. Warm a pot of water. Hold floats under warm water with pliers. If you see a lobe bubbles. It's got cracks. This test allows you to visually see where exactly those cracks are. They are hard to see sometimes, otherwise.
-
blurred
- On the street
- Posts: 35
- Joined: Sat Feb 28, 2015 1:47 pm
- Country: USA
- Suzuki 2-Strokes: YZF600
Re: '74 GT550 rebuild - Project Gaki
appreciate all the tips guys. Hopefully, by using those, everything will work out for the better.
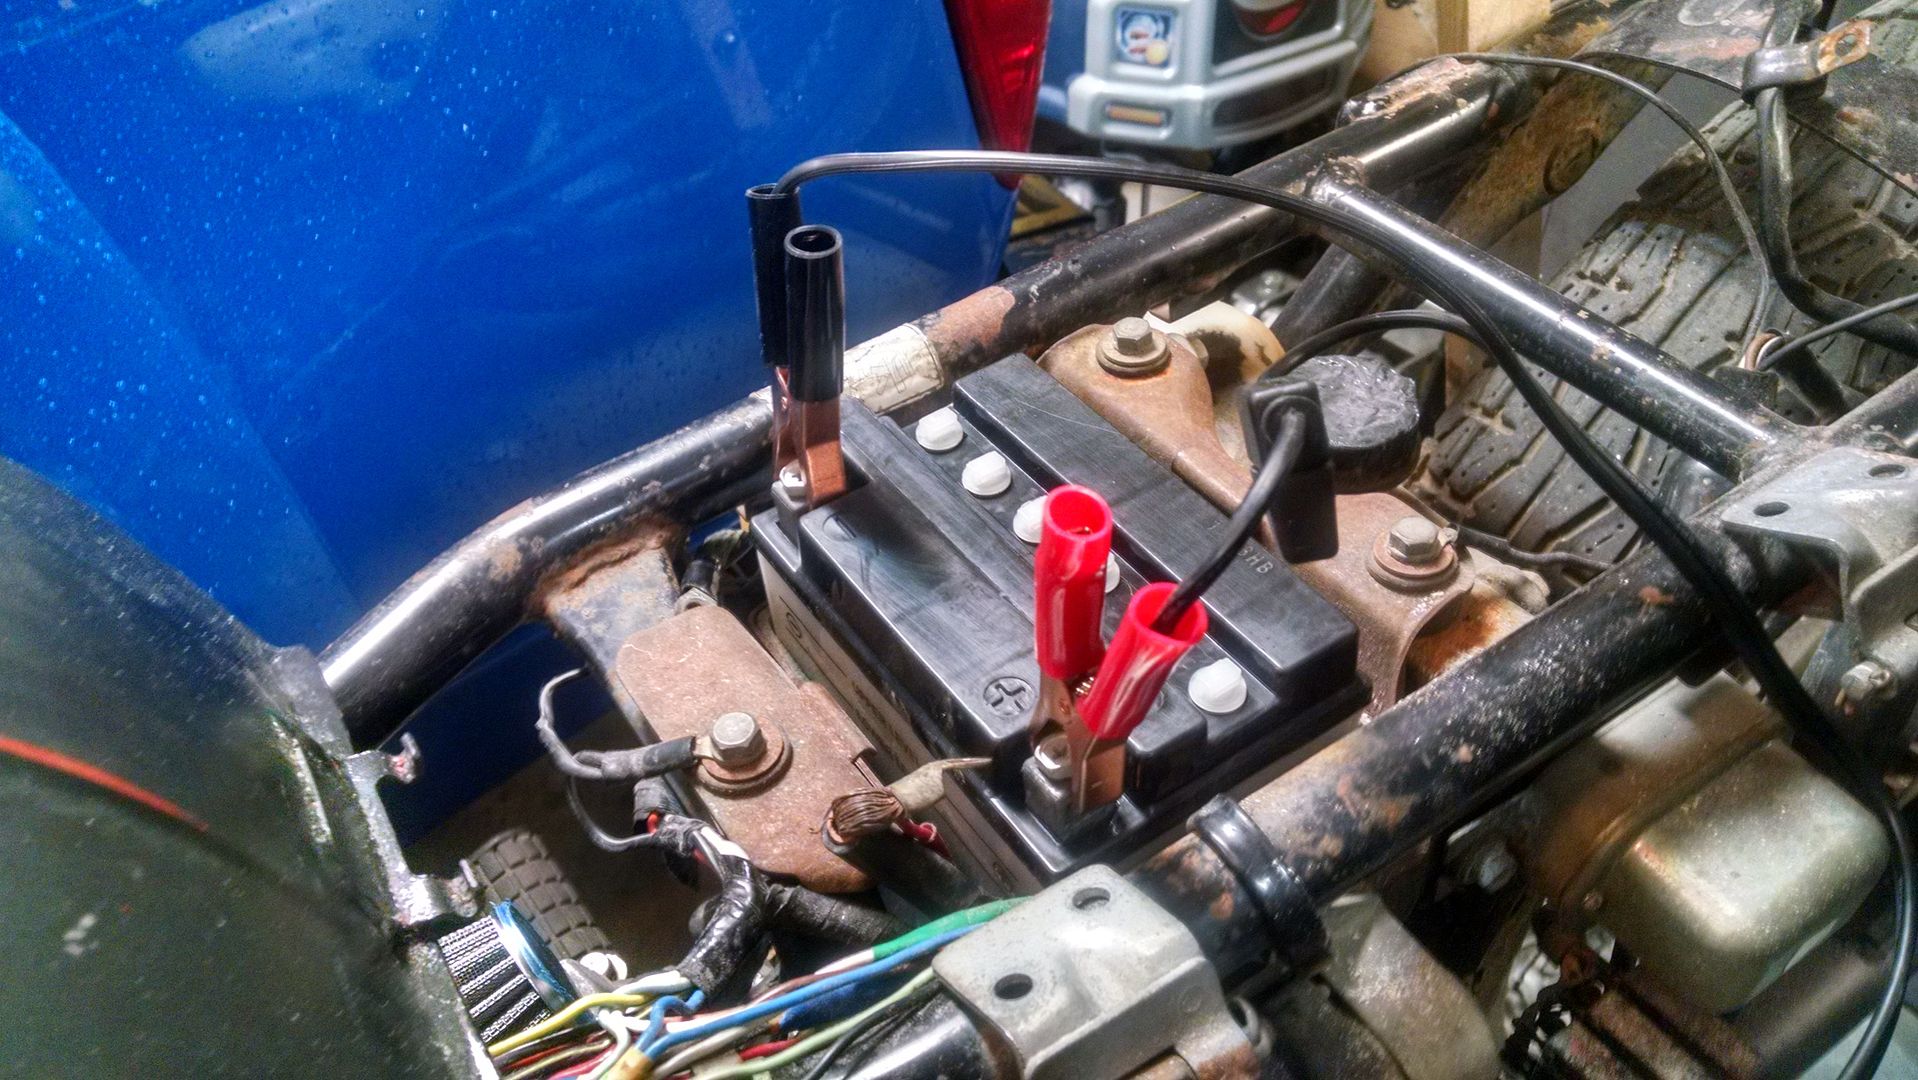
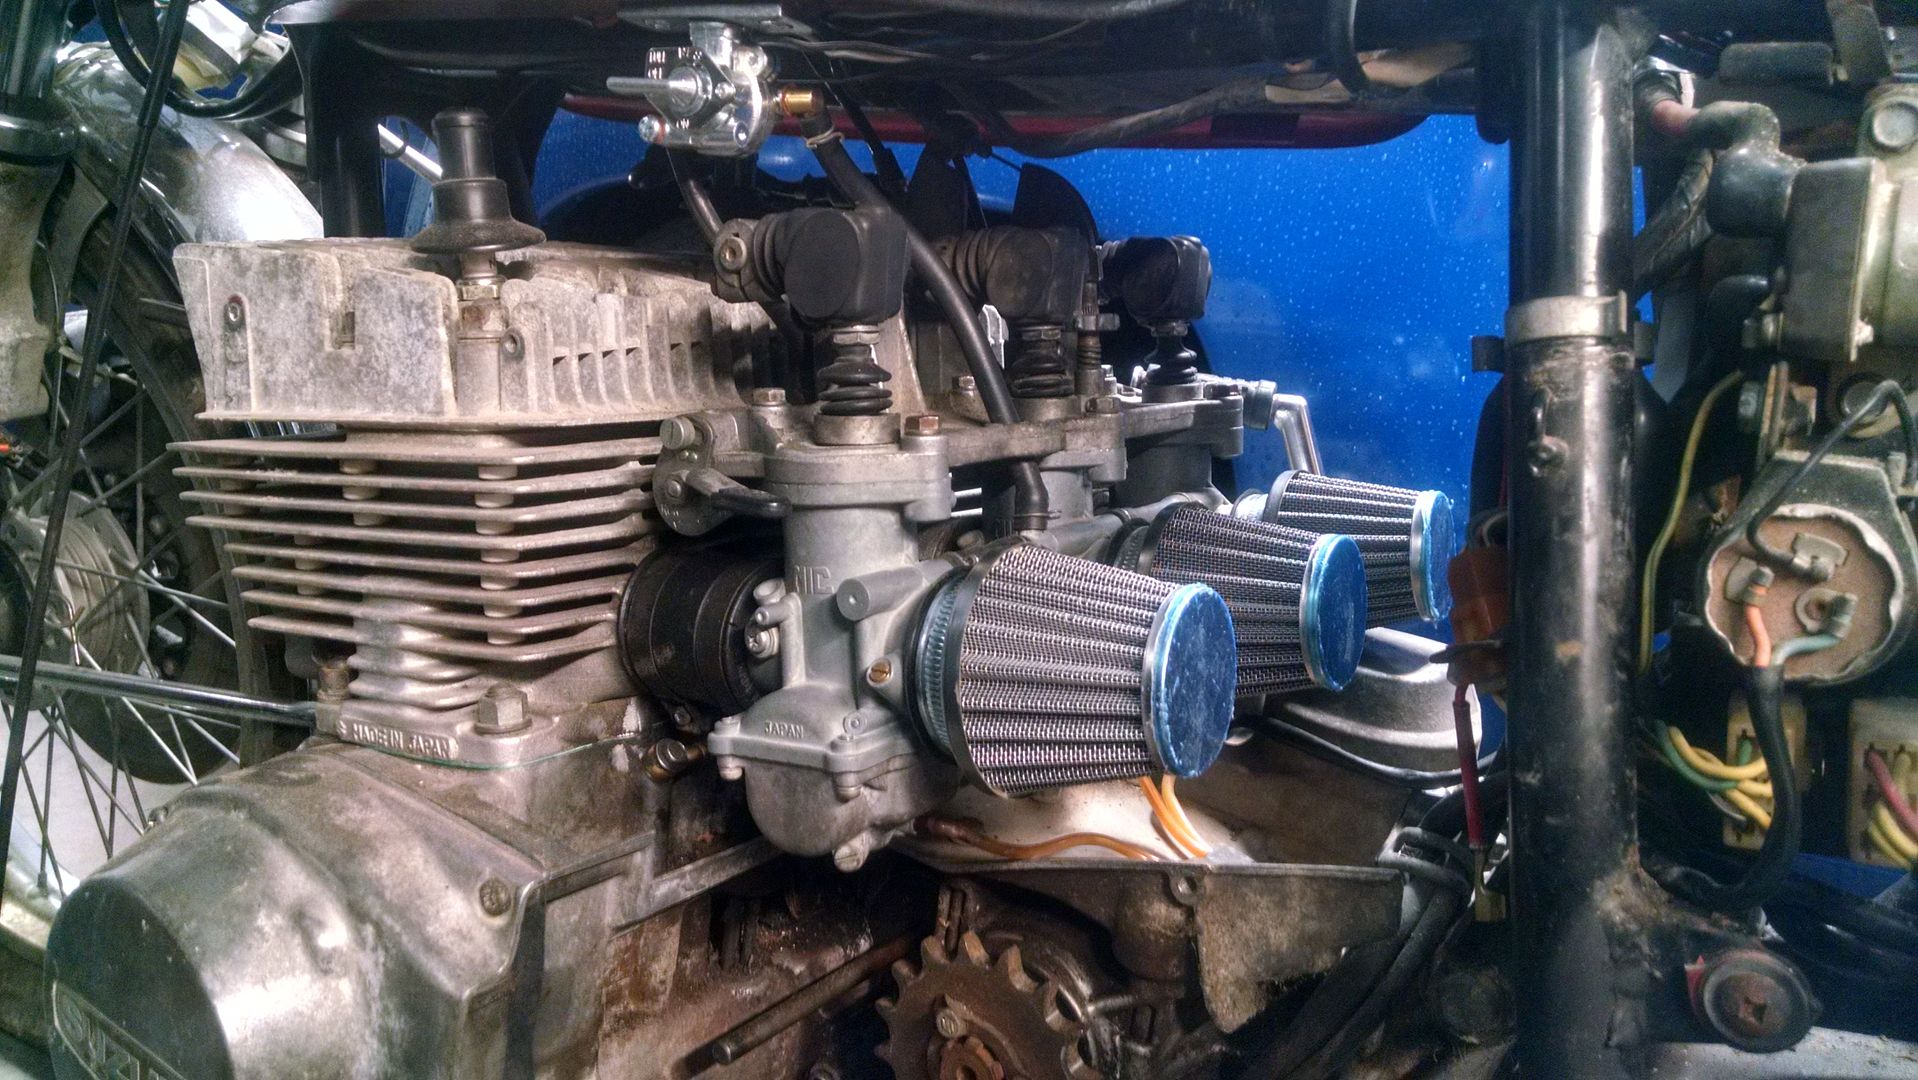
Right now, I have the battery charging, I have the carbs on with the filters attached. The gas tank was cleaned out and it has a gallon or two of gas in it.
Going to pick up some of the oils for the tank and the engine tomorrow when, hopefully, the battery will be charged and I can attempt to get this thing started.
Right now, I wanted to check to make sure I have this petcock hooked up correctly... The line from the carbs that is located furthest to the back of the bike should be hooked up to it while the front line needs to be sealed, correct?
1974 Suzuki GT550 project
Hard-tail setup of engineering genius
Hard-tail setup of engineering genius
-
blurred
- On the street
- Posts: 35
- Joined: Sat Feb 28, 2015 1:47 pm
- Country: USA
- Suzuki 2-Strokes: YZF600
Re: '74 GT550 rebuild - Project Gaki
Alright, figured out the fuel cock... ended up being gunked up on the inside and not feeding any fuel. Also, capped off the vacuum tube since this fuel cock didn't need it.
I am able to get this thing to turn over now. You can hear it on the third attempt on the video. Every couple times I could get it to do it for a short couple seconds, though it wouldn't run.
*click it and you get the video.

Now, I have no idea what to check next on this. Would it be the points? I a getting fuel, the oil pump works, I am getting spark I assume since it's firing. I haven't really done anything with the points on this so I assume that should be the next thing.
Also, I have stared at the wiring diagram until my eyes felt like they would fall off. Right now, the guy who had this thing before me did some altering on it and I am trying to figure out what goes where. Honestly, I want to bypass the starter if I can. I can use the kick start on this rather than the electric start. Able to do this?
If there is someone close to Clarksville, TN that knows these things and would like some free beer and to check one out, I'd love some help with this. Really trying to NOT pull all the wiring off this bike to completely redo it. Hell, might just have to pull it off just to lay it out and lable it.
I am able to get this thing to turn over now. You can hear it on the third attempt on the video. Every couple times I could get it to do it for a short couple seconds, though it wouldn't run.
*click it and you get the video.
Now, I have no idea what to check next on this. Would it be the points? I a getting fuel, the oil pump works, I am getting spark I assume since it's firing. I haven't really done anything with the points on this so I assume that should be the next thing.
Also, I have stared at the wiring diagram until my eyes felt like they would fall off. Right now, the guy who had this thing before me did some altering on it and I am trying to figure out what goes where. Honestly, I want to bypass the starter if I can. I can use the kick start on this rather than the electric start. Able to do this?
If there is someone close to Clarksville, TN that knows these things and would like some free beer and to check one out, I'd love some help with this. Really trying to NOT pull all the wiring off this bike to completely redo it. Hell, might just have to pull it off just to lay it out and lable it.
1974 Suzuki GT550 project
Hard-tail setup of engineering genius
Hard-tail setup of engineering genius
-
blurred
- On the street
- Posts: 35
- Joined: Sat Feb 28, 2015 1:47 pm
- Country: USA
- Suzuki 2-Strokes: YZF600
Re: '74 GT550 rebuild - Project Gaki
Thinking about it, I am going to see if I have spark on all three. Get some visual proof.
1974 Suzuki GT550 project
Hard-tail setup of engineering genius
Hard-tail setup of engineering genius
