GT550 Cafe project

General discussion about Street two-stroke Suzuki motorcycles.

Moderators: oldjapanesebikes, H2RICK, diamondj, Suzsmokeyallan

Post Reply
imquattro
To the on ramp
Posts: 239
Joined: Tue Jul 19, 2011 9:26 pm
Country: USA
Suzuki 2-Strokes: 72/74 GT550
Location: Muncy PA

GT550 Cafe project

Post by imquattro »

Hello all, I've been a lurker here a while. I teach automotive technology at a local high school but have developed an itch for 2 stokes.
A couple months back I picked up a rough one owner '72 GT550 that had been parked in a shed since '83. It was a non-runner and was missing #1 carb (or leftmost one under pet cock?) but it had a legit title.
About a 2 months later I picked up another GT550 (1974), this one in running condition but w/ no title.
Plans are to use the '74's engine in the '72's frame and do a cafe racer style resto-mod bike. My students are excited and have been helping whenever they get a chance.
So, after verifying the 74 was a runner, I started tearing the '72 apart. I have it 99% down to the bare frame.
Mice had invaded the clutch cover, air box, and #3 carb.
The engine DID kick over easily when I picked it up a couple months ago, and it's been stored inside since '83 but in just the last 3 days, cylinder # 3 has frozen.
We are pulling the engine apart for the students sake (learning/teaching moments abound!).
Cylinder #3 is soaking in PBlaster tonight.
More to come.
Image
Image
Image
Image

Mousification:
Image
Image
Image
Image
Image


Image
Image
Image

The '74 donor bike:
Image
Image

Stuck cylinder:
Image
Image

Piston #1 (not to shabby)
Image

Cylinder head w/ markings?? Any thoughts on these #s?
Image

Goop (hard but like hard rubber) on underside of head's ram-air shroud:
Image
Close up:
Image

Frame:
Image
Image

Parts organization (not bad for high school students!)
Image

Inspiration:
Image

More to come.
User avatar
oldjapanesebikes
Moto GP
Posts: 3229
Joined: Sat Feb 07, 2009 12:43 am
Country: Canada
Suzuki 2-Strokes: GT750(Jx3,L,M,A,B),T500
Location: Ontario
Contact:

Re: GT550 Cafe project

Post by oldjapanesebikes »

So you are using this as a class project ? If so then excellent ! :up: :up:
Ian

If at first you don't succeed, just get a bigger hammer !
User avatar
jabcb
Moto GP
Posts: 4241
Joined: Mon Dec 13, 2010 4:32 pm
Country: USA
Suzuki 2-Strokes: 69 T350 thru 75 GT750
Location: southwestern Pennsylvania

Re: GT550 Cafe project

Post by jabcb »

Great! Good to see somebody teaching future mechanics about working on vintage bikes. :up:
BAS (Bike Acquisition Syndrome) - too many bikes but have room for more

Suzuki:
GT750 2x75
GT550 72 & 75
GT380 72
T500 69 project & 73 project
T350 69 & 71
Honda 85 CB650SC & 86 CB700SC
09 Triumph Bonneville SE
User avatar
Joiseygirl
Yeah Man, the Interstate
Posts: 593
Joined: Mon Mar 22, 2010 4:33 pm
Location: Florida
Contact:

Re: GT550 Cafe project

Post by Joiseygirl »

What a unique way to teach your students, I'm sure your making a lasting impression on them, they will never forget you. Good for you!!! :clap: :clap: :clap:
imquattro
To the on ramp
Posts: 239
Joined: Tue Jul 19, 2011 9:26 pm
Country: USA
Suzuki 2-Strokes: 72/74 GT550
Location: Muncy PA

Re: GT550 Cafe project

Post by imquattro »

Yes, my students do enjoy a break from the traditional approach. I find many, including myself, learn, comprehend, & retain more from projects like this.
We managed to pound free the stuck piston with the help of Pblaster, heat, a nylon headed dead blow hammer, and the strength of my students.
I didn't get a picture yet.
Looked like the mice used it as a latrine because the piston's skirts were corroded to the cylinder walls. After removing the jug, we also found the rod bearing on the crank quiet stiff -possibly due to all the banging on the piston trying to free it.
There are no signs of water intrusion or uncovered outdoor storage.
diamondj
Road race school
Posts: 785
Joined: Tue Oct 14, 2008 11:00 pm
Location: Wharton, NJ USA

Re: GT550 Cafe project

Post by diamondj »

Very neat! Plus how many of these kids would see a street ridden two stroke from back in the day otherwise. This sounds similar to what the "Nisky Garage" teachers did with their shop students a few years back building CB350s:

http://niskygarage.logical.net/CB350/index.html

Jim
imquattro
To the on ramp
Posts: 239
Joined: Tue Jul 19, 2011 9:26 pm
Country: USA
Suzuki 2-Strokes: 72/74 GT550
Location: Muncy PA

Re: GT550 Cafe project

Post by imquattro »

Ok, just updating the status of how things are progressing. With teaching full time and w/ the emphasis on Automotive Technology, most work on the bike is done after hours and/or on my own time now.

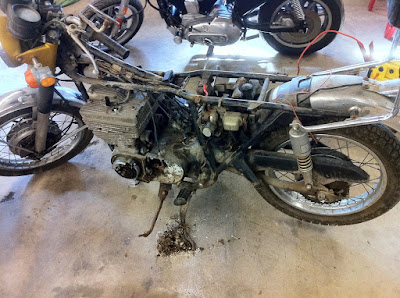
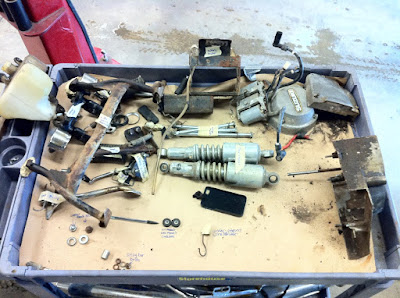
So, we got the engine apart on the '72, not looking good.
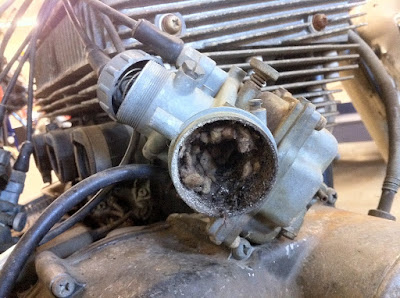
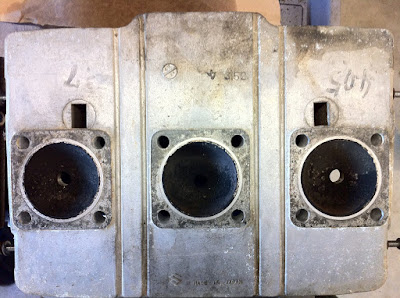
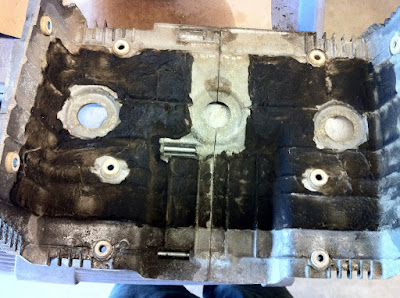
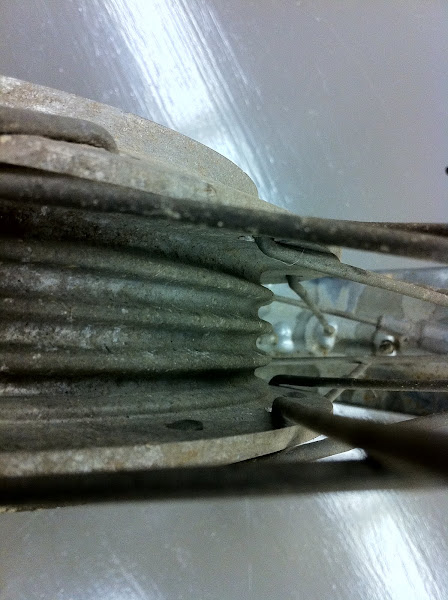
Piston #3 (the rightmost when sitting on it) was stuck and it's rod stiff on the crank.
Image
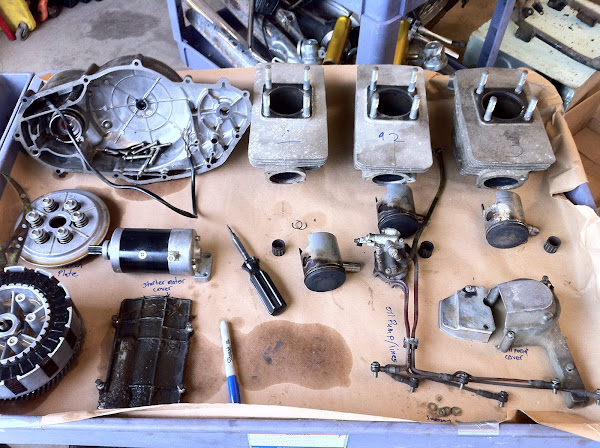
We got it freed up and found some corrosion/build up on the skirt of the piston (you can see that in the picture). We were able to free up the rod w/ some penetrating oil on the crank.
Image
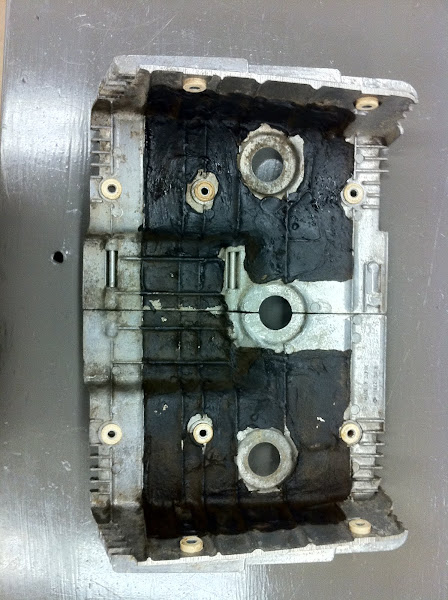
You can also see the dryness of it's counterweights and case.
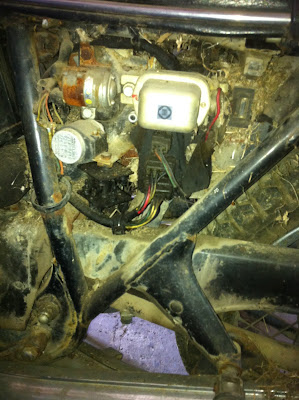
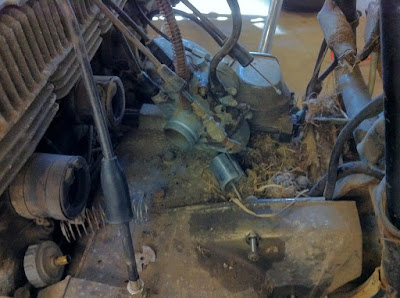
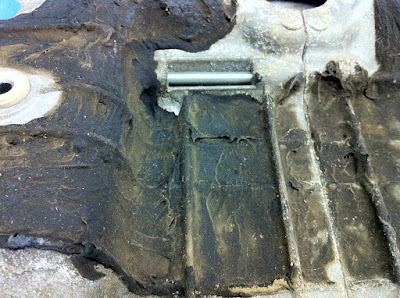
We took the case apart and found the lower SRIS port on the plagued cylinder plugged with schmut.
The crankshaft seal between 3 & 2 had it's garter spring flopping around on the crankshaft, alone with a remnant of the seal. (sorry, I'll have to get pictures of that, thought I had some but evidently don't -yet).
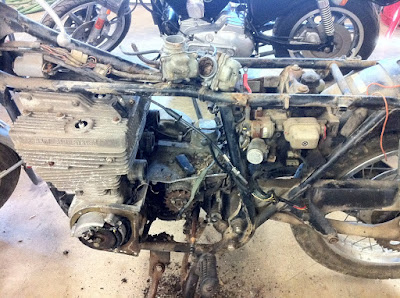
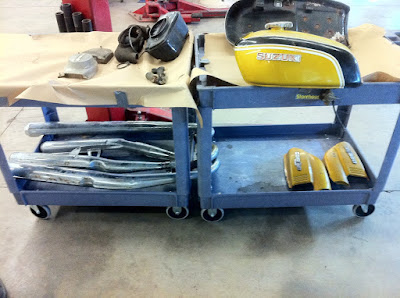
My students cleaned the cases, and they came out nicely.
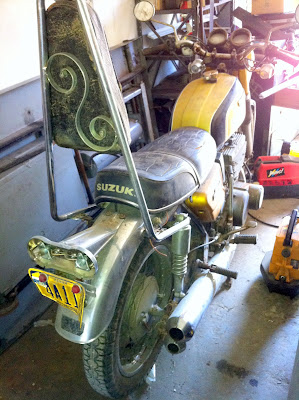
The '72 engine isn't going to be used in the project but it's purpose is mainly a practice run to refurb the '74s engine.
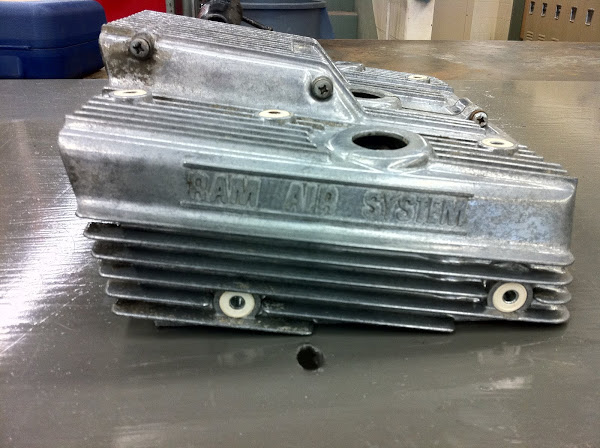
The shiny bits of the motor are covered with a clear coat that has LONG yellowed and cracked. This allows corrosion to go unchecked under the surface and greys the metal.
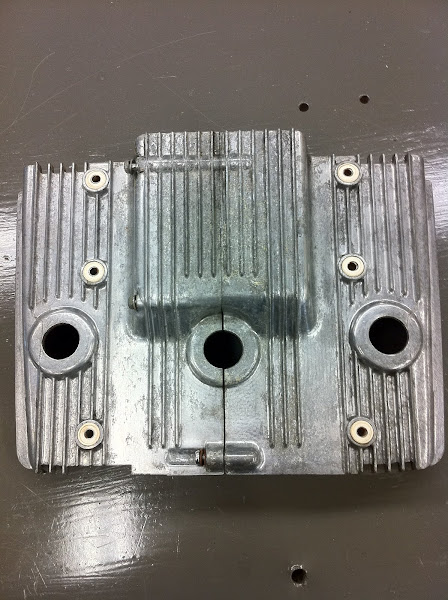
Here's a shot of the RAM AIR shroud before stripping:
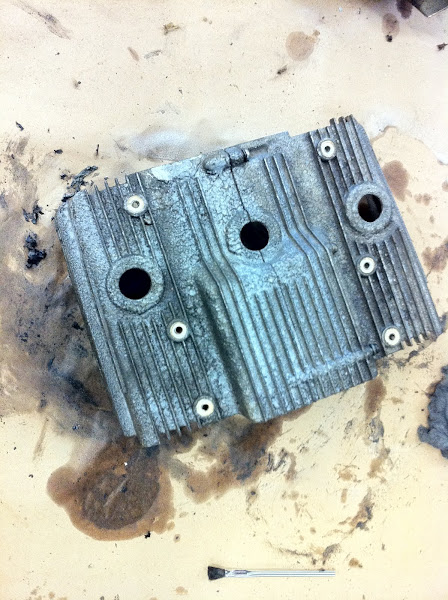
Image
Here's after:
Image
Image
Image
Image
Image

So after seeing the results of a little time with stripper (Tail Stripper II (aircraft stripper) from NAPA), I went after the rear wheel.
I removed the wheel from the frame, removed the drum brake and sprocket hub.
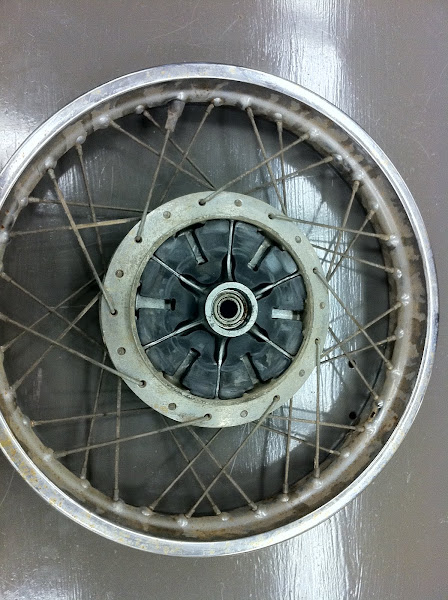
Image
Real crusty:
Image
Image
Image
I removed the spokes (replacements soon to be ordered).
Image
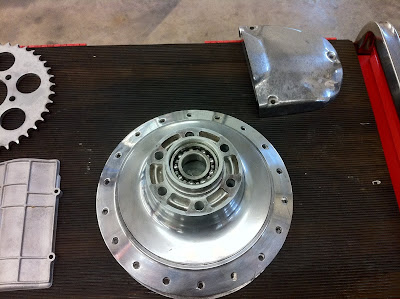
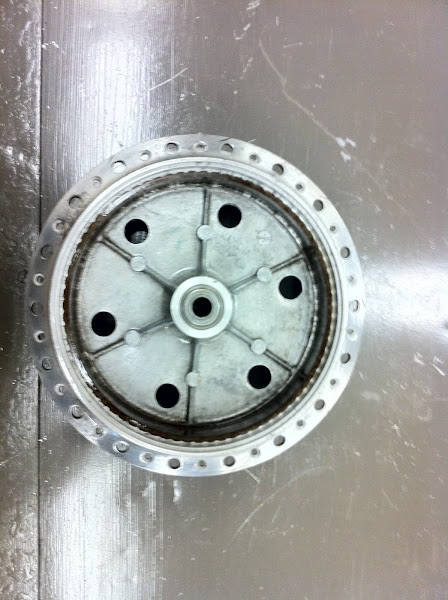
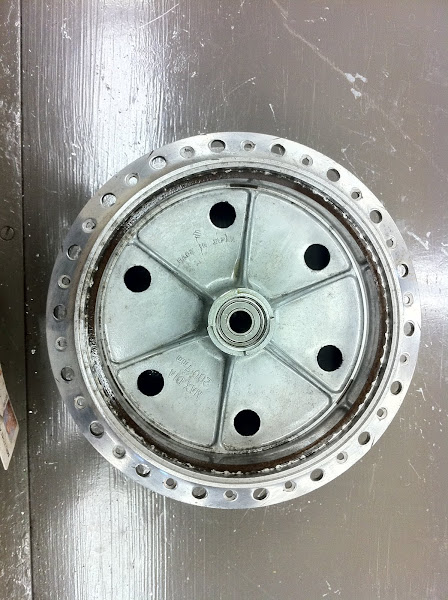
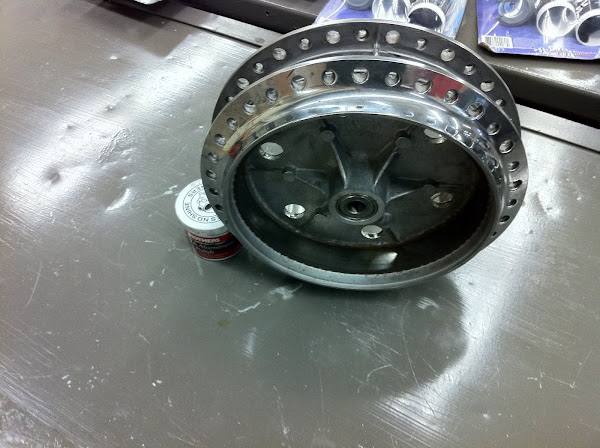
Here's the rear hub prior to anything:
Image
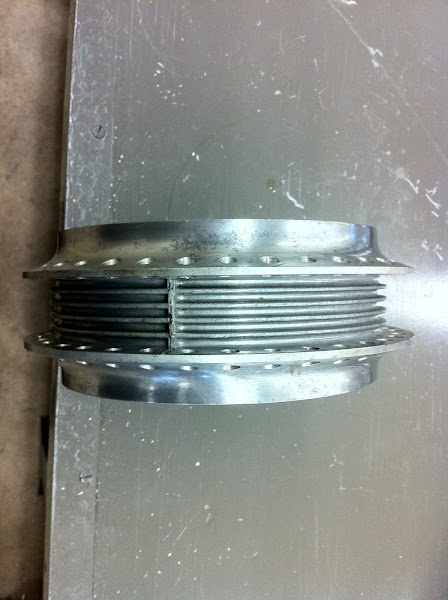
Here it is just after the being stripped:
Image
Image
Image
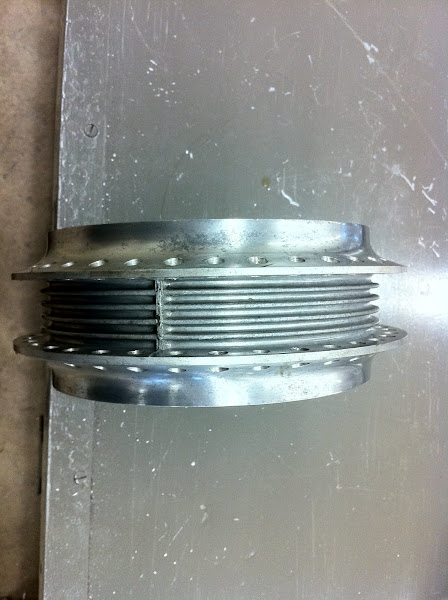
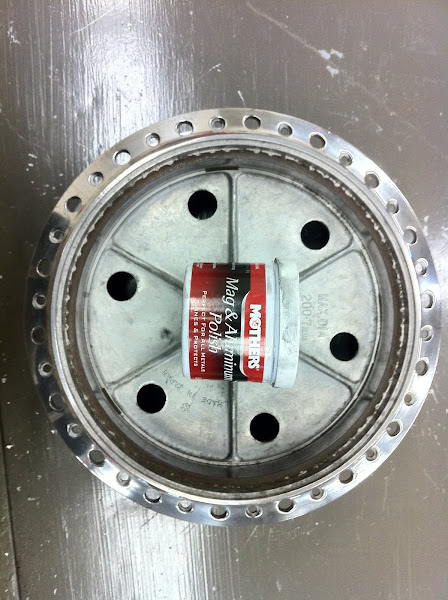
After being stripped, I took to polishing it. Some of the corrosion has left permanent staining and most
likely will take wet sanding to remove (not interested...).
Image
I also stripped and polished the sprocket hub.
Image
And the rear drum over (only 1/2 done in this picture).
Image

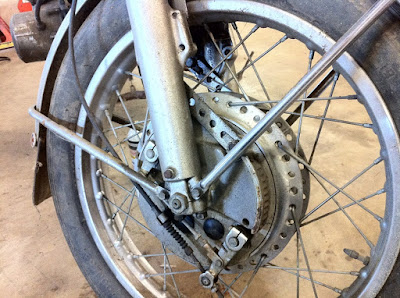
I liked how they came out and went after the front assembly then too:
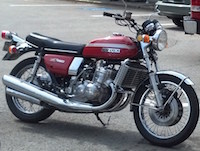
Here's how it's looked for the past umpteen years:
Image
Image
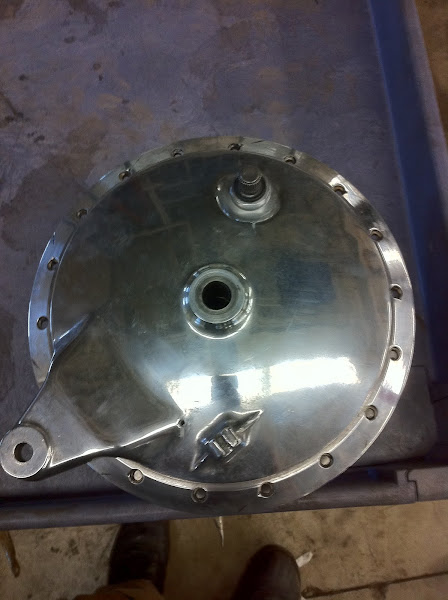
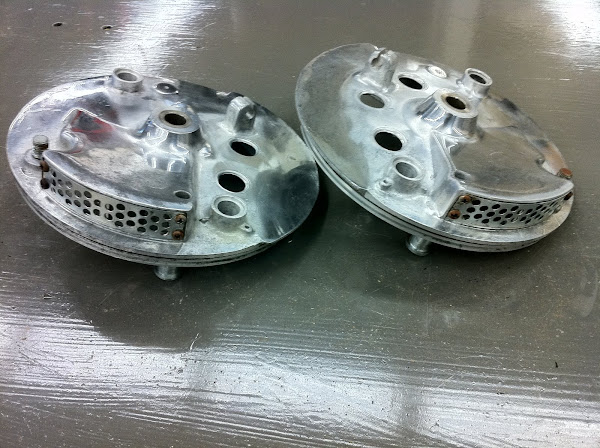
I wiped off the front drum assemblies and applied stripper:
Image
Image
After stripper. Still need polished.
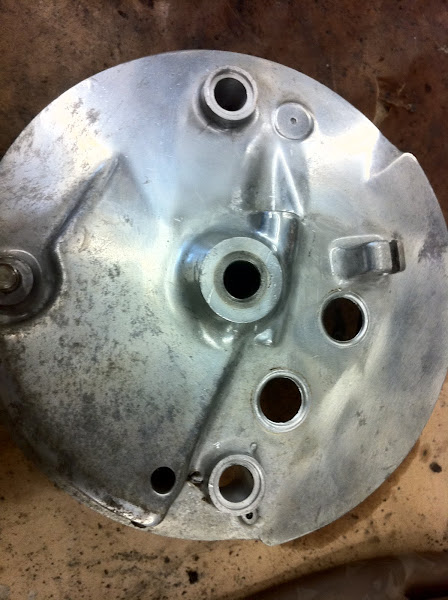
Image
Shoe side:
Image
The came with sealed duct covers, what purpose they served being sealed is beyond me. Ok, so they may keep water out, but shame on you for riding in the rain! So, I removed them and found under them these holed covers. So I left them on. I'll replace the screws w/ shiny new ones. (BTW, there are NOS "vents" on ebay for $139!!!@?! (http://cgi.ebay.com/ebaymotors/72-Suzuk ... 500wt_1184) They aren't even vented! ) Dumb. Ok, heres the picture:
Image

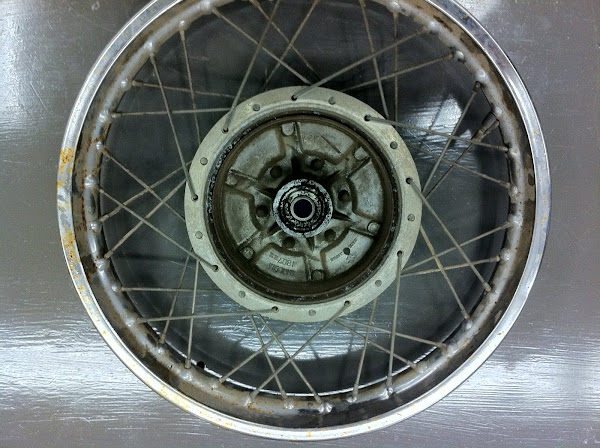
I then went after the front wheel. Here's a shot before disassembly:
Image
The rim is in decent shape, probably due to all the fork oil dripping on it over the years.
Image
Image
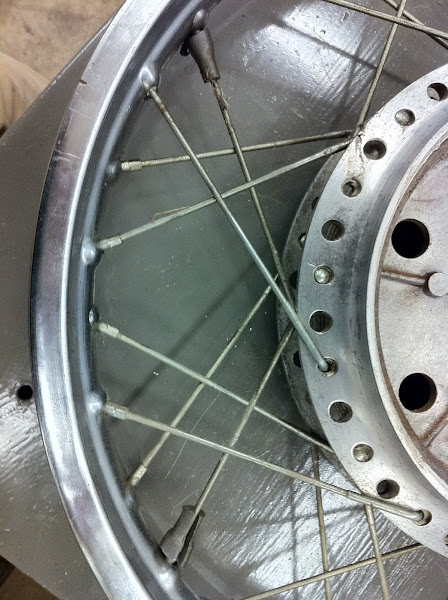
Another, just the way it's sat for the last 20+ years.
Image
Image
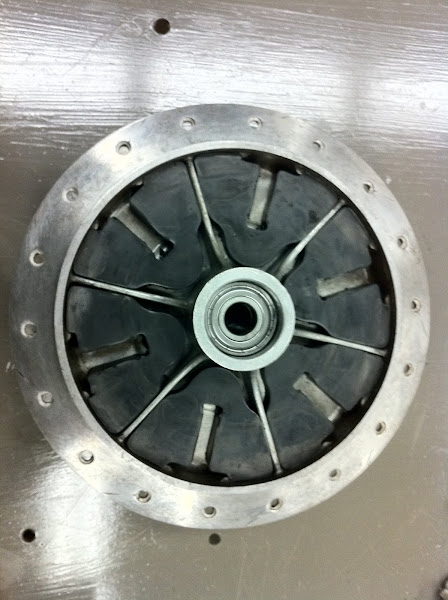
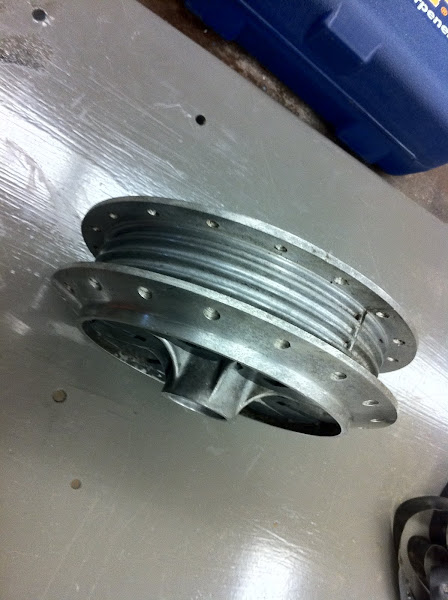
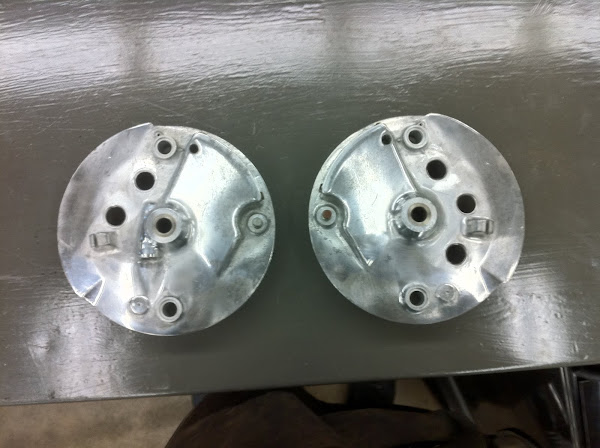
Spokes removed, post-stripper, hub only:
Image
Other side:
Image
Image

Image
After some polishing.
Image
Image
Image

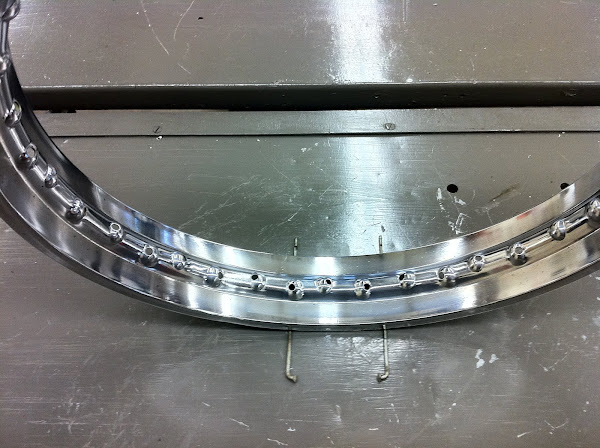
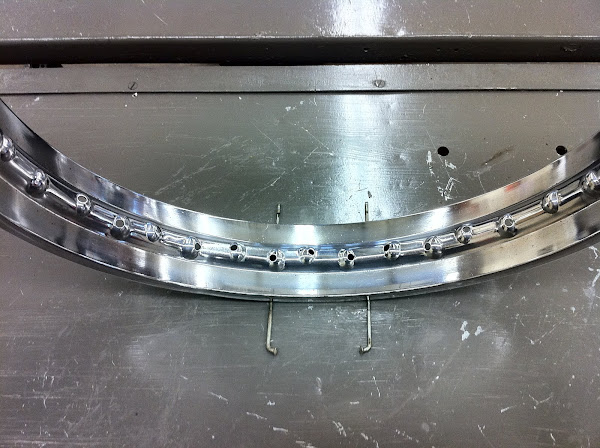
So, I have the raw rims now.
Shot a blurry shot up over my head to try to capture a side-by-side comparison of the front & rear.
Image

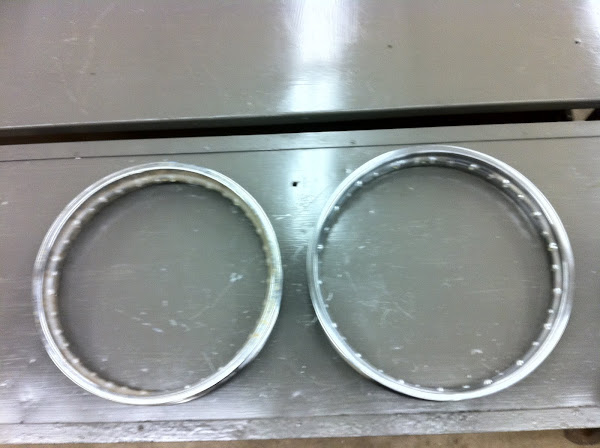
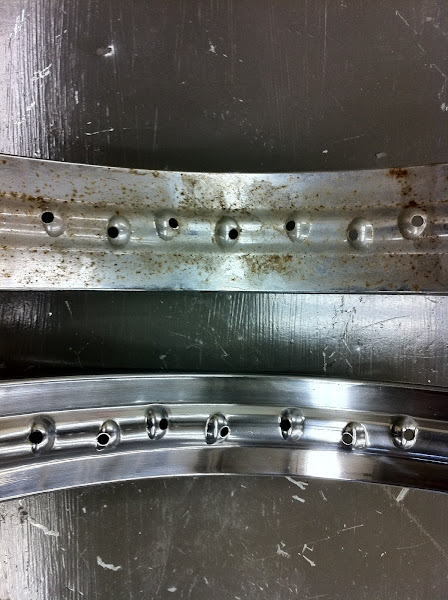
After some pblaster, elbow grease, & 0000 steel wool I got this:
(rear on top (before), front on bottom (after))
Image
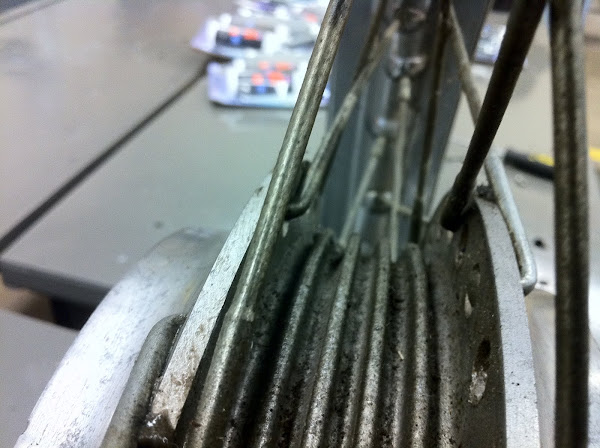
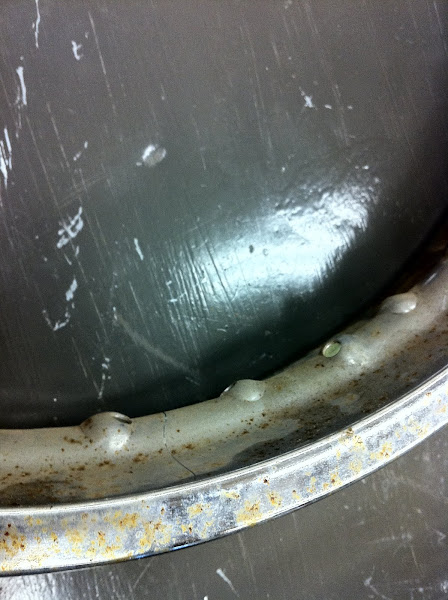
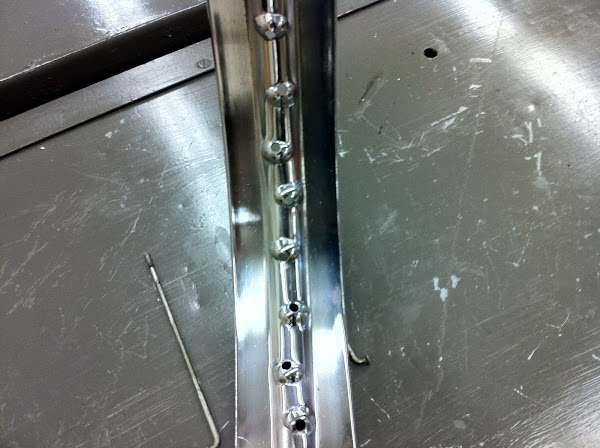
Close up of the rear prior to any attempt to clean it up. I wasn't too hopeful as it was pretty rusted.
Image
Image
Well, pretty pleased with the results:
Image
Image
Image

I'm on a negative budget. In other words, I'm trying not to spend ANY thing, unless completely necessary (ie. crank seals & case seal/gasket kit; carb rebuild kits; headlight assembly; spokes & nipples; clip-on bars; & turn signals not included)
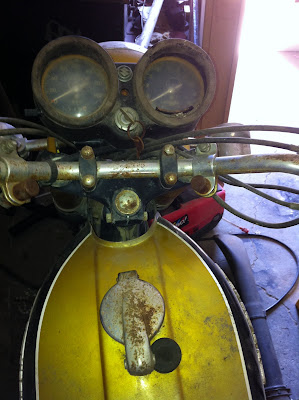
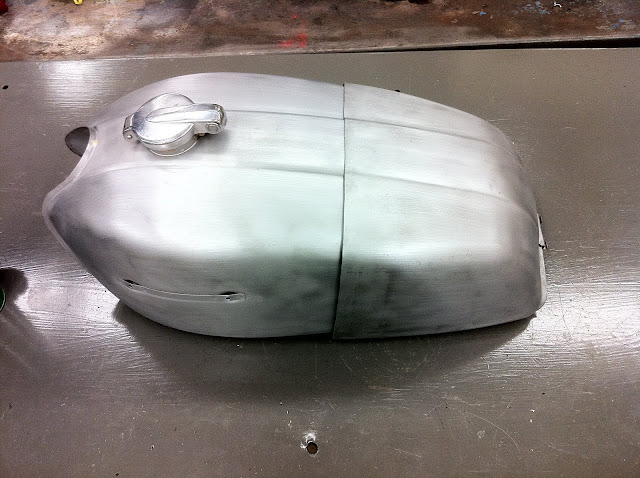
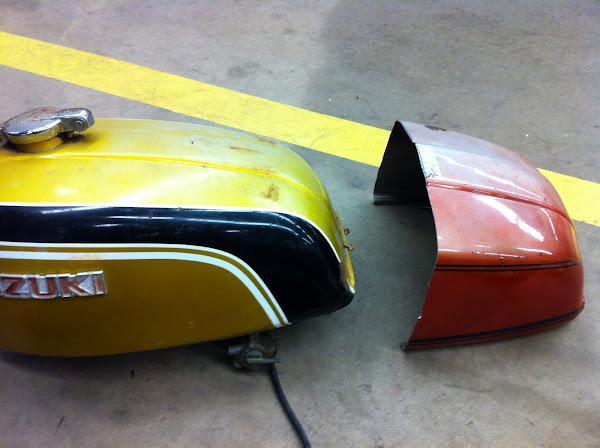
So, I'm loving the larger tanks found on most cafe racer bike, problem is, I'm not paying what they cost! So in that mindset, I've got to work w/ what I've got.
Here's what I have:
Image
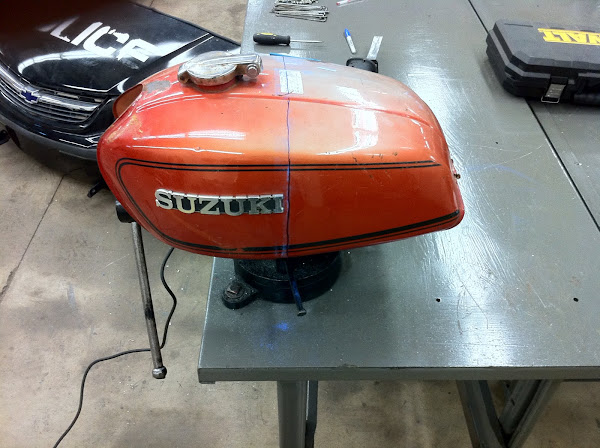
A spare tank w/ lots of rust on the outside.
Image
The line? Well....
Image
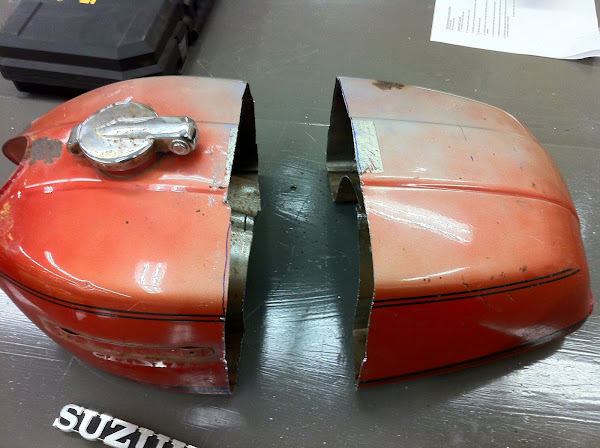
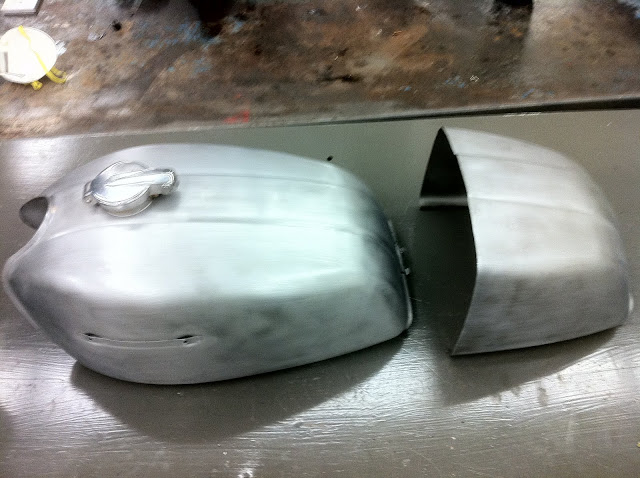
Here's where the stock tank ends and where a mock (real stretch of that concept) seat will take form.
Image
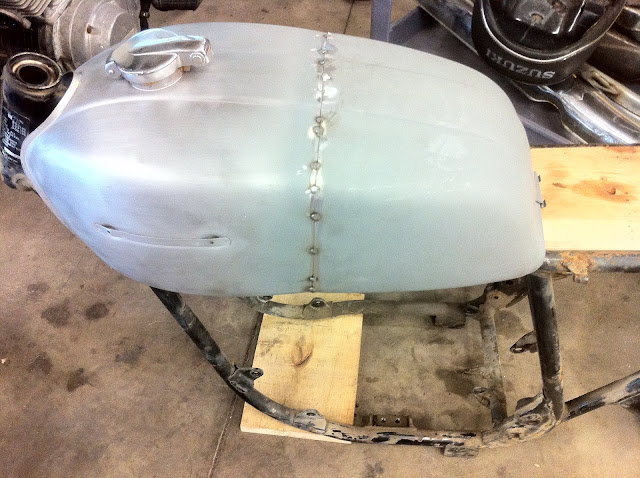
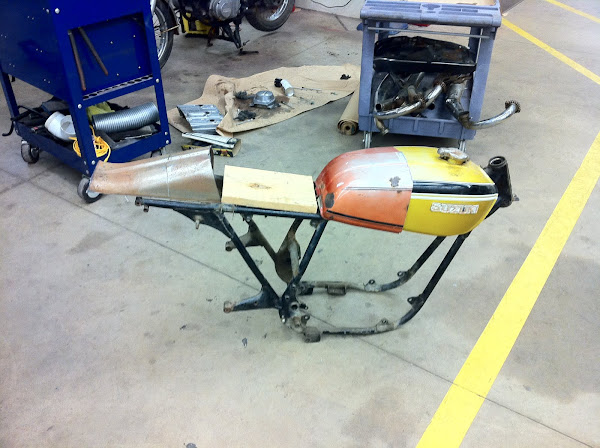
So, I trimmed out the underside of the doner tank and slipped it over the other tank:
Image
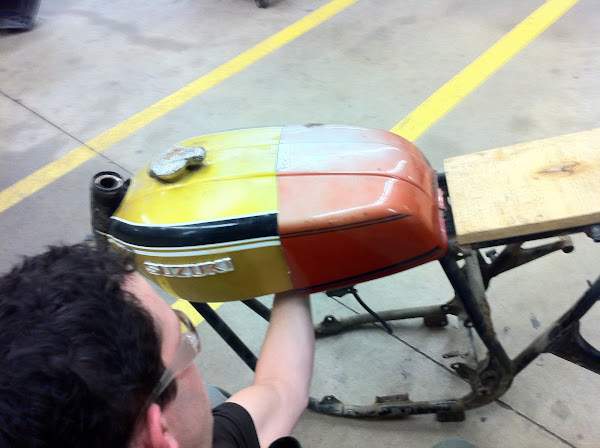
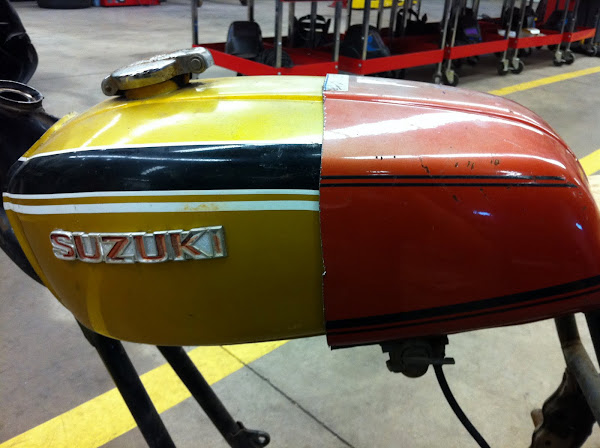
Stretching the tank, keeping the rib on the top too:
Image
Image
Image
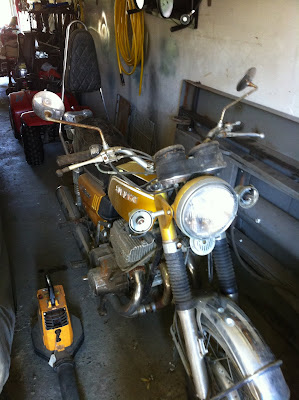
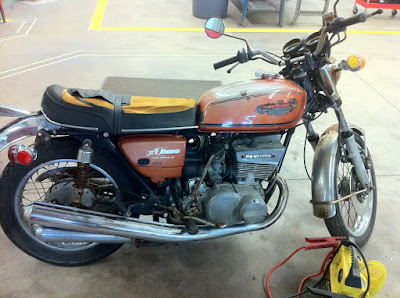
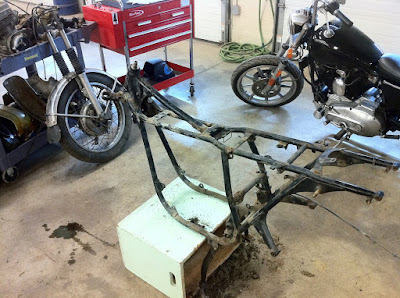
(poor '74, being cannibalized sits quietly in the background. I fire it up every Friday just to give me some ambition to spur me on)
Image

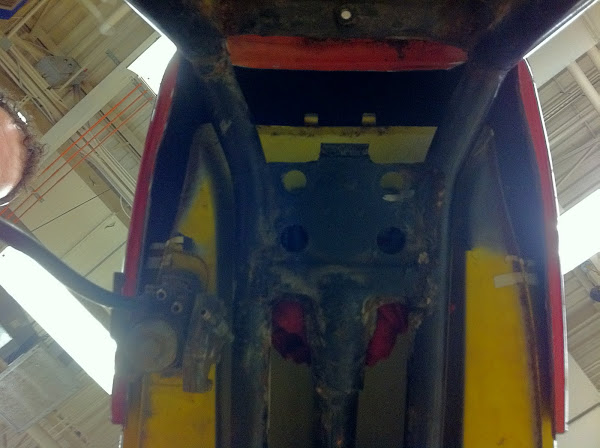
A shot from underneath shows the gap from the old tank to the extension. May get larger and be used to house some wiring:
Image

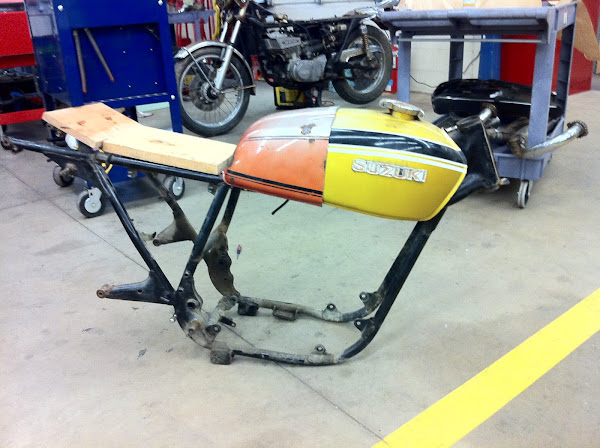
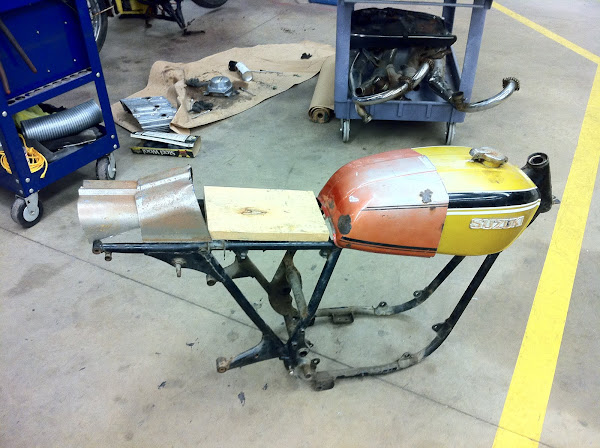
So I'm looking at the left over of the font & rear of the old cut tank and I see a form that may be used as my tail.
While it's only pictured sitting directly on the frame, I would add 1-3" of sheet metal extending below it's outer edges and thus raising the form up to house a battery & oil tank.
Image
Or maybe this:
Image

That's all for now....
User avatar
Joiseygirl
Yeah Man, the Interstate
Posts: 593
Joined: Mon Mar 22, 2010 4:33 pm
Location: Florida
Contact:

Re: GT550 Cafe project

Post by Joiseygirl »

:clap: :clap: :clap: Wish I were in HS taking your class.

Thanks for documenting and posting!
two-stroke-brit
Novice racer
Posts: 947
Joined: Sun Aug 23, 2009 7:59 pm
Country: USA
Suzuki 2-Strokes: gt750
Location: HOUSTON USA

Re: GT550 Cafe project

Post by two-stroke-brit »

Thats a very cool project you have going there.
keep posting
mark
She will never be pretty but hoping she will be a fun ride.

1973 SUZUKI GT750K.=SOLD
yamaha speedtwinn 100 barn find =SOLD
1x 1973 kawasaki H1 (restored)
1x 1973 kawasaki H1 (basket case) =SOLD
1982 HONDA CB900F =SOLD
1982 YAMAHA RD350LC.
1985 RZ350N
User avatar
tz375
Moto GP
Posts: 6204
Joined: Mon Nov 03, 2008 10:47 am
Location: Illinois

Re: GT550 Cafe project

Post by tz375 »

It's your bike and your vision, but I would keep the heavy battery and oil tank etc as close to the center as possible. Moving weight higher and rearwards makes handling worse and it's not state of the art to start with.
imquattro
To the on ramp
Posts: 239
Joined: Tue Jul 19, 2011 9:26 pm
Country: USA
Suzuki 2-Strokes: 72/74 GT550
Location: Muncy PA

Re: GT550 Cafe project

Post by imquattro »

tz375 wrote:It's your bike and your vision, but I would keep the heavy battery and oil tank etc as close to the center as possible. Moving weight higher and rearwards makes handling worse and it's not state of the art to start with.
:up: Good point & tip. My only intention was to make it clean & as few wires as visibly possible.
I'll keep your suggestion in mind.
cruisingram
Around the block
Posts: 60
Joined: Fri Feb 06, 2009 12:20 am
Location: Kea'au, Hawaii

Re: GT550 Cafe project

Post by cruisingram »

Love the two smoke Cafe' projects! Keep it up~ have a GT 750 myself, considering cafe as well.
imquattro
To the on ramp
Posts: 239
Joined: Tue Jul 19, 2011 9:26 pm
Country: USA
Suzuki 2-Strokes: 72/74 GT550
Location: Muncy PA

Re: GT550 Cafe project

Post by imquattro »

Not much happening lately...
Still waiting for someone to sell/will me a set of expansion pipes...
But on the other front, the tank work has begun to take shape:

Blasted and scuffed. Wish I could leave them this way... love the raw look.
Image

Image

Stretching the tank about 4" (Externally, and only for visual aesthetics, so, not for you true "cafe racer" bleeding edge speed/power/weight guys...)
Image

New motto:
Image

I primed the tail of the tank and the extension because once they're together, there's no way to protect from rust underneath.
I then tacked them together.
Image

I also tacked back together the section I cut out from under the old "doner" tank. I'm still tossing around using for a the tail section. It's lower edges will be extended, raising it up enough for some of the repositioned electronics & maybe the oil tank (maybe...).
Image
Thats all for now.
User avatar
tz375
Moto GP
Posts: 6204
Joined: Mon Nov 03, 2008 10:47 am
Location: Illinois

Re: GT550 Cafe project

Post by tz375 »

Just a few passing thoughts.

We all have a different vision of our dream bike and how it should look and I was wondering what your inspiration/vision is for this one?
There are not many GT550 cafe racers and I suspect it's because their lines don't flow ad it's hard to make them look balanced. The nicest custom GT550 I have seen is Coyote's. It works and the individual parts all work together.

Just as an example let's look at that black sample and pick out some style issues: It's not bad, but the various parts don't work well together. The tank has side flutes and that results in the S.u.z.u.k.i. badge being too low. Tank and seat and headlamp work in a classic table top look, but then there's a big empty space that looks all wrong. It makes the motor look too small and too low and lacks an integrated theme. In fact the frame with all that space above and behind the motor make it look like the frame is too large or the motor is too heavy or something. Side covers and airbox would have integrated the motor with the top half of the frame and bodywork. Do you see what I'm getting at?

On a classic cafe racer, typically there was an oil tank in the middle which avoided that ugly gap. If you check out a Manx Norton or Triton for styling clues.

Or in a more modern race bike like say a seventies TZ race bike. That was naked in the middle but it had a tank sump plus fairing mounts and rear fender and the frame is smaller and the motor sits higher, so again it's more integrated.

On your bikes, that 72 front end is a good looker but they are not very good brakes on a relatively heavy bike. A much better front end is the one on that 74. If the crank was rusty on the 72, I'd put that whole motor aside as a learning experience and use the 74 motor.

Tank I would have left stock because it is so hard to get an add on to flow with the rest of the original tank without bumps and steps in the curves. In fact there are very few tanks that can successfully be stretched even it the stock tank is still hiding inside.

For the seat, if you want to make it rather than buying one, I'd recommend using the foam block plug method. It allows you to get to the shape you want quite cheaply and relatively easily.

As I said, just a few thoughts/observations.
imquattro
To the on ramp
Posts: 239
Joined: Tue Jul 19, 2011 9:26 pm
Country: USA
Suzuki 2-Strokes: 72/74 GT550
Location: Muncy PA

Re: GT550 Cafe project

Post by imquattro »

Thanks for your thoughts and suggestions.
I'm not who's been given the gift a seeing something in my mind before if comes into being. I've often been quite jealous of those with that ability. So to compensate, or it's just how I work, I need to see an example(s) of a finished product to work towards, and modifications come during the process.
The black one shown in the original set of photos as my "Inspiration" is not, in my opinion, the quintesential cafe racer conversion of a GT550, but merely a cue gathering photo for me to work from.
Personally, I like the naked, minimalist look. That, to me, captures the essence of "cafe" style.
Minimal on creature comforts, less weighty, low slung, best use of power to weight ratio...
But, like you've mentioned, the GT550 isn't an ideal bike to start with due to it's inhibiting construction, styling, & weight/power ratio. That being said, it's what I've got, and in pairs.
The 72's engine will need some rebuilding to make it a runner -not interested in pursuing that.
'74's engine runs -but there's no title for that bike -and impossible now in PA to get one w/o the original owner submitting for one (also no longer available).
I have a clear title for the '72 though.
So it'll be the '72's frame w/ the '74's motor in it.
Regarding the drum front brakes: I've read mixed reviews as to their performance -moreso leaning towards their competence w/ the right set of shoes. These early GT550's were raced successfully w/ front drum brakes w/o too many complaints regarding their braking performance. I'm not racing this bike, but merely making it a casual rider.
On the other hand, the single & dual front disc setups have been proven to be prone to water fade along w/o marginal performance on dry days. Plus, on a personal note, I really like the polished look of the front drums. If I could pull a front wheel/triple tree/fork setup from a Buel Firebolt (or similar) I would, as I love the wheel mounted disk brake setup's they've been running.
Regarding the tank stretch, I don't see why you feel the lines are going to be messed up on what I've done, in fact, the whole reason I've gone about it the way I have is to KEEP the lines consistent -regarding the tank. still working on the tail, as what I've pictured mentally doesn't match what I'm seeing.
I'll look into what can be done to keep the motor from looking like a hang gliding toad ...
My 2c....
Post Reply